Guide:Mechdusa strategies
| Type | |
|---|---|
| Environment | |
| Max Life | 256,800327,420436,560 (total) |
- Item (Quantity)Rate
 Waffle's Iron(Desktop, Console and Mobile versions)100%
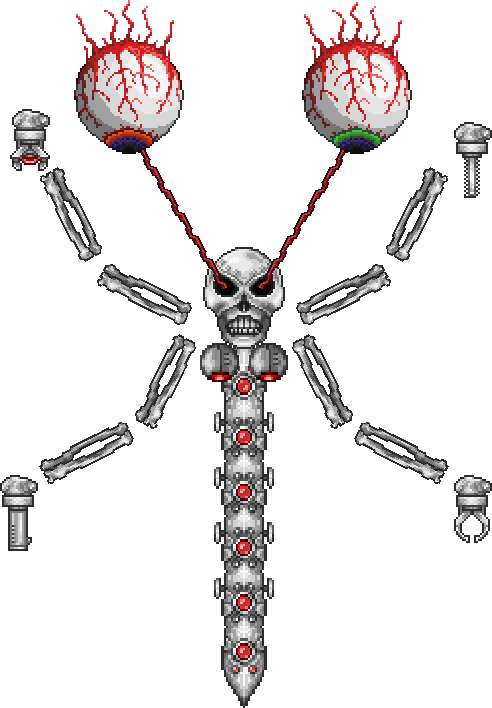
Mechdusa is an early Hardmode boss exclusive to Get fixed boi worlds which is composed of all three mechanical bosses. It is essentially a forced triple boss fight.
Spawn Conditions
Mechdusa can only be spawned in a world with the secret seed Getfixedboi, and when one or more of the following conditions are met:
- At least 1
 Demon/
 Crimson Altar has been smashed, and none of its constituent bosses have been defeated
 - Using an
 Ocram's Razor
The Fight
The Mechdusa is three separate bosses merged into one, all of which must be defeated. They have a combined health of 256,800 / 327,420 / 436,560, shared between them. Those bosses are Skeletron Prime, The Destroyer, and The Twins.
When the Mechdusa spawns, the bosses are all connected together. Skeletron Prime is the one holding them together; while it is alive, the other parts will move together with it rather than following their usual behavior.
While the Twins are attached to Skeletron Prime, Retinazer will generally stay to the left while Spazmatism will generally stay to the right. This can be useful when trying to avoid their attacks; for instance, phase two Spazmatism is less likely to hit players who stay on the left.
General Strategies
This content is transcluded from Guide:Practical tips § Combat.
- For nocturnal bosses, starting the battle just after the sun sets (7:30 PM) will provide the maximum amount of time to defeat the boss. In Hardmode, the
 Moon Charm and/or
  Moon Stone and their upgrades are also useful at night.
 - Boss battles can be won or lost before the battle ever starts. Choose your equipment and have it ready; find and/or make potions and placed buffs; use the highest-tier food you have available; set up an arena appropriate to the boss; learn the strategies for the boss you're facing.
- Prepare your Boss-fighting arena with adequate lighting,
 Campfires and
  Heart Lanterns for health regeneration, and
  Stars in Bottles for mana regeneration if you use magic.
  Bast Statues(Desktop, Console and Mobile versions) will provide a significant defensive boost.
  Garden Gnomes(Desktop, Console and Mobile versions) and (Desktop, Console and Mobile versions) (if underground) proper torch placement will reduce damage taken and increase damage dealt due to the luck. The Torch God's Favor(Desktop, Console and Mobile versions) helps with this.
  Honey pools can also be used for extra health regeneration.
 - (Desktop, Console and Mobile versions)
 Sunflowers provide the
  Happy!(Desktop, Console and Mobile versions) buff to nearby players, which grants a +10% movement speed bonus and 17% reduction in enemy spawn rate.
 - Always carry around a stack of the highest-tier healing potion available, as relying only on natural Health Regeneration is not a good idea. Depending on the game stage, this can include items such as
 Lesser Healing Potions or
  Honeyfins. On the
  Desktop,
  Console, and
  Mobile versions,
  Restoration Potions are healing potions with a shorter cooldown.
- Likewise carry mana potions, if you use Magic.
- The
 Strange Brew(Desktop, Console and Mobile versions) is also an option, which yields very similar healing abilities to Healing Potion with added chances to trigger periods of invulnerability upon consumption.
 - On the
 Old-gen console version and Nintendo
  version, Restoration Potions can save a slot, but will likewise trigger both cooldowns.
- It is suggested to build houses for the
 Dryad and the
  Nurse NPCs in your arena. The former casts the
  Dryad's Blessing(Desktop, Console and Mobile versions) buff, which increases your defense and provides you with a thorns-like effect, while the latter can heal and remove debuffs instantly, at the cost of some
  coins.
 - Bosses are displayed on the Minimap: Follow the boss's icon to track it when you're struggling to find it. You can identify the boss icons by checking their respective wiki pages.
- Once you have freed the
 Mechanic in the Dungeon, you can use
  Wire to enhance your arena with
  Traps and helpful
  Heart and
  Star Statues. The former helps to damage the enemies, though be careful to set them up correctly in order not to hurt yourself during the battle. The latter will spawn heart and star pickups, respectively. Connect these devices to
  timers to activate them infinitely.
 - In Hardmode, the
 Brand of the Inferno(Desktop, Console and Mobile versions) and
  Sergeant United Shield(Desktop, Console and Mobile versions) can be used to parry incoming contact damage.
 - It may be useful to summon and kill the Eye of Cthulhu or King Slime before summoning any harder boss in order to spawn an extra one-use pool of Hearts. Note that this will prevent any Heart Statues from spawning new Hearts.
- Remember to use the
 Sharpening Station(Desktop, Console and Mobile versions),
  Ammo Box(Desktop, Console, Old-gen console and Mobile versions),
  Crystal Ball,
  Bewitching Table(Desktop, Console and Mobile versions),
  War Table(Desktop, Console and Mobile versions), and
  Slice of Cake(Desktop, Console and Mobile versions) before you go to explore or battle bosses/invasions. These will give boosts that are useful to have, with the first five being class-specific. They give
  Sharpened(Desktop, Console and Mobile versions),
  Ammo Box(Desktop, Console, Old-gen console and Mobile versions),
  Clairvoyance,
  Bewitched(Desktop, Console and Mobile versions),
  Strategist(Desktop, Console and Mobile versions), and
  Sugar Rush(Desktop, Console and Mobile versions), respectively.
Terrain Preparation
It's important to have plenty of room for this fight. Fighting aboveground gives more room, but on the Getfixedboi seed this has the disadvantage of increased enemy spawns, while the lower gravity can be helpful or harmful depending on how high you are and your movement strategy. Alternatives include blowing up a large underground arena using Dynamite, or creating a very long minecart track.
If players cannot deal with the low gravity, the next largest open space is the region between the Underworld spawn island and the ruined houses. This can be done on either side, whichever one is more convenient. Players will need a lot of dynamite (get 300 for starters).

1: Dynamite the blocks in the lava. This causes the lava to sink, giving players more vertical space. If the player wants to sink the lava even more, dynamite the bottom of the spawn island.
2: Place rows of a lava-resistant platform, (Underworld enemies drop lava when killed in this seed) as it suits the player.
3: Players can use a Lava Walking item (Water Walking Potion, Lava Waders, etc.), or build a row of blocks or platforms above the lava. If the player chooses blocks, players can dig a hole every few blocks to allow the lava to pass through. Players can fill the holes with platforms to make sure Guide Voodoo Dolls do not fall into lava.
4: If players place Campfires and such, campfires burn when lava touches them. Players can use Bubble Blocks to partially mitigate this.
5: If the player still desires more vertical space, the top of the Underworld can be easily destroyed using Sticky Dynamite.
6: Remember to keep a lava immunity item during the fight, as players might touch the lava of an enemy that died. An Obsidian Skin Potion is recommended as it doesn't require an accessory slot.
The space isn’t as large as the surface, but players won’t accidentally die from going off the top of the map.
Asphalt Blocks are available from the beginning of the game since the Steampunker spawns early as feature of the Getfixedboi seed, although she dies after the first day and does not respawn again until at least one part of Mechdusa is defeated. Two rows of blocks widely spaced apart can serve as an arena, using Gravitation Potion to switch between them.
Gearing Up
Armor


 Adamantite armor provides the overall greatest increase to all stats, though it lacks a unique set bonus.
 Frost Breastplate can be substituted onto melee and ranged variants of Adamantite armor for better offensive and defensive stats, as the set bonuses are less important.
  Mythril Greaves/
 Spider Greaves can also be substituted in for even more offensive stats.


 Titanium armor is a great choice due to its high stats and the
  Titanium Barrier buff.
 Crystal Assassin armor provides respectable defense, stat boosts and a nice dash that can free an accessory slot usually used for the
  Shield of Cthulhu, making it a viable alternative to Adamantite armor or Titanium armor.

 Orichalcum armor is especially powerful as its set bonus can hit many parts of Mechdusa.

 Palladium armor provides lower stat bonuses, but the
  Rapid Healing greatly increases natural regeneration, which can help with this long fight.
 Spider armor is the best choice for summoners. However, if one desires extra range for whips like
  Firecracker or the
  Cool Whip,
  Obsidian armor may be useful.
 Forbidden armor provides weak stat bonuses, but comes equipped with a set bonus that can be used against the Destroyer portion of Mechdusa to great effect.
 Frost armor can apply Frostbite against all portions except the Destroyer, and great stat increases are part of the set bonus, which makes it a good alternative to Adamantite and Titanium armors.
Weapons
Mechdusa is very large and has many different components that can be damaged, so weapons with an area or piercing effect have a strong advantage at the beginning. Due to the different nature of the bosses that make it up, you may need to switch out weapons as the fight progresses, such as switching to single-target damage once the Destroyer portion dies.
- For Melee Users
 Drippler Crippler has a piercing projectile that can do high damage while maintaining some distance from the boss.
- The
 Shadowflame Knife is a powerful choice due to its ability to bounce multiple times off of Mechdusa, hitting several parts.
 - The
 Sergeant United Shield is another strong choice due to its ability to home and hit multiple parts of Mechdusa.
- For Ranged users
- The
 Daedalus Stormbow works well against all component bosses. However, it requires some open space above the player for it to be fully effective, so it works better above-ground. The
  Adamantite Repeater or
  Titanium Repeater also works well with those arrow types.
 - The
 Dart Pistol or
  Dart Rifle with
  Cursed Darts can carpet the whole screen in flames, attacking every segment at once. The
  Crystal Darts can be effective versus Probes, and
  Ichor Darts are strong against Skeletron Prime and the Twins.
 - The
 Uzi will also work very well if obtained, and should be used with the Endless Musket Pouch (for its piercing High Velocity Bullets).
- For Magic users
- The
 Orange Zapinator has a special property that randomly multiplies damage when it pierces enemies. Since the Mechdusa has many parts, individual lasers from the Zapinator can have damage multiplied ten times or more. Once there are only a few parts of Mechdusa left, though, it would make sense to switch to another option.
 - The
 Nimbus Rod and
  Clinger Staff have powerful piercing properties that can do heavy damage to the Destroyer portion of Mechdusa.
 - The
 Golden Shower does excellent piercing damage and inflicts the
  Ichor debuff on several parts of Mechdusa, allowing your other weapons to deal even more damage.
 - The
 Cursed Flames does high damage and inflicts the
  Cursed Inferno debuff.
- For Summoner users
- The
 Firecracker and
  Cool Whip are the best whips for this fight, with the former multiplying enemy damage and the latter having a snowflake projectile that pierces multiple segments and hits probes.
 - The
 Sanguine Staff has consistent attacks and deals well with Probes. It is one of the strongest summons available for this fight.
 - The
 Blade Staff is another viable option, but is much stronger when used with a whip that has Summon Tag damage, such as the Cool Whip.
Accessories
- Accessories that increase your mobility such as the
 Lightning Boots or wings are a must if not using a mount.
 - An Emblem for your class will increase your damage output significantly.
- The
 Frog Leg (and its upgrades) makes all wings significantly faster, which helps when dodging its attacks.
 - The
 Charm of Myths increases your base health regeneration and reduces the cooldown on potions, making it a good choice if you have trouble dodging its attacks.
 - The
 Cobalt Shield or its upgrades make you immune to knockback which is useful if you find yourself getting knocked around during the fight.
 - The
 Shield of Cthulhu can greatly increase your mobility as well as provide some extra defense.
 - The
 Worm Scarf and
  Brain of Confusion will reduce damage taken, making them powerful choices. In addition, the Brain of Confusion can grant some additional damage.
 - The
 Star Veil can add additional immunity time from hits and can also deal extra damage.
Potions
 Greater Healing Potions are recommended.
- For buff potions,
 Ironskin Potion and
  Endurance Potion will help with damage taken, and
  Regeneration Potion will help with recovery.
 - Rangers with Bows should bring along an
 Archery Potion or two.
 - Mages greatly benefit from
 Mana Regeneration Potions and
  Magic Power Potions.
 - Damage increasing potions like the
 Rage Potion and
  Wrath Potion are good for everyone, and both are easily available on the getfixedboi seed.
 - The
 Lifeforce Potion will increases your max health and allows you to take more hits.
 - The
 Heartreach Potion can help with grabbing hearts dropped by Probes.
 - A
 Summoning Potion will help with extra damage, even non-summoners can benefit from having a summon from something like the
  Sanguine Staff.
Specific Strategies
Despawning
The despawn ranges for the parts of Mechdusa are not equal. By moving far enough away from the main body, it is possible to despawn everything except the Destroyer. By killing just this part, the player can access some post-mech gear such as Hallowed Armor or Old One's Army weapons.
Minecart
A long minecart track can be an efficient way to fight this boss, as many attacks will miss if the player is going fast enough. In the Get fixed boi seed, a minecart in hell is especially useful as Retinazer and Skeletron Prime's Laser arm can get stuck in the ceiling, being unable to fire for part of the fight.
As mentioned above, parts of Mechdusa will despawn if the player moves too far away, so go faster to despawn parts or slower to keep them together. Turning around can be accomplished with pressure plate tracks, teleporters (space a screen or two apart so as not to run into the body of Mechdusa), and hammered minecart tracks to reverse direction.