Game controls
The default game controls are listed below. These can be changed from the Controls menu in settings on the title screen. While in-game, they can be accessed by opening the inventory, selecting "Settings", and navigating to "Controls".
Desktop / Console Versions
Gameplay Controls
| Action | Wiki Icon | Desktop (mouse & keyboard) | Desktop (controller) | Playstation | Xbox | Wii U | Nintendo Switch | Notes |
|---|---|---|---|---|---|---|---|---|
| Use item | ⚒ Use / Attack | ZR/R/Touch screen (gamepad) | Attack using held weapon, consume held potion, summon using held mount/minion summon item, etc. | |||||
| Interact | ⚷ Open / Activate | Open a door or chest, activate switch, talk to NPC, edit a sign/tombstone, etc. To right click on macOS without a right click button, put two fingers on the trackpad (for laptop users) before clicking to make the same effect as a right click. | ||||||
| Aim | Right analog stick | Right analog stick | Right analog stick for smooth movement; |
Move the cursor or direct attacks. | ||||
| Up | ▲ Up | W | Left analog stick | Left analog stick |
| |||
| Down | ▼ Down | S |
| |||||
| Left | ◀ Left | A, left arrow key | Moves character to the left. Hold the key down for continuous movement. | |||||
| Right | ▶ Right | D, right arrow key | Moves character to the right. Hold the key down for continuous movement. | |||||
| Jump | ↷ Jump | Space, up arrow key |
| |||||
| Grapple | Grapple | E | ZL/L/L3 | Activates/launches the grappling hook equipped in the grappling hook slot. | ||||
| Auto Select | Auto Select | Left Shift | Hold L3 | Hold |
Hold |
Hold |
When held, it will try to select the appropriate tool to interact with the object under the cursor. A light source will be selected if nothing else applies. | |
| Smart Cursor | Smart Cursor | Left Ctrl | Press R3 | Press |
Press |
Press |
Press/Hold |
Toggles the Smart Cursor. When on, it will automatically target tiles depending on the tool selected, to semi-automate tasks such as tunneling and building. |
| Quick Mount | Quick Mount | R | Mount or dismount the mount located in the equipment slot. | |||||
| Quick Heal | Quick Heal | H | Unbound | Consumes the best healing item from inventory. (If all the healing items could not restore health to maximum health, the item with the largest amount of health restoration will be the best. If there are one or more items that can restore health to maximum health, the item with the least amount of spill health restoration will be the best. If Restoration Potion exists and the number of health lost is greater than 90 and less than 120, the spill health restoration of Restoration Potion is considered 0.[1]) | ||||
| Quick Mana | Quick Mana | J | Unbound | Consumes the first mana restoration item in inventory (starting from the top-left). | ||||
| Quick Buff | Quick Buff | B | Unbound | • Consumes one of each type of Buff Potion in inventory.
| ||||
| |
Lock on an enemy to auto-aim all attacks. Press once to lock and again to release the lock. | |||||||
| |
Throw | T | Unbound | Discards the currently selected item onto the ground as a dropped item, which can then be collected by any player. Does not inflict throwing damage. Items can also be thrown by opening the inventory, picking the item to be thrown away and right-clicking outside the inventory. Note that throwing throws the whole stack of items, except for torches, where only one torch will be thrown. | ||||
| Inventory | Inventory | Esc | Opens the expanded head-up display, including inventory, crafting interface, Save and Quit (singleplayer) or Disconnect (multiplayer) controls. If autopause is enabled, the game will pause (not currently available on console). Press Start on Xbox or PS3 to pause the game (this will not open the inventory). | |||||
| |
↵ Enter | Enter | Opens the chat box. | |||||
| Pause | Inventory | Esc | Pauses the game in singleplayer. The game will only pause if Autopause is turned on. Note that on PC, independently from the Autopause setting, it is in singleplayer also possible to pause the game by any method which switches out of the Terraria program, such as the Alt-Tab hotkey or the Windows key function. | |||||
| Zoom In | + | N/A | ZR (while paused) | Zoom in on the character, making it possible to see less on the screen. | ||||
| Zoom Out | - | N/A | ZL (while paused) | Zoom out, making the character appear smaller, but allowing more to be seen. |
Map Controls
| Action | Wiki Icon | Desktop (mouse & keyboard) | Desktop (controller) | Playstation | Xbox | Wii U | Nintendo Switch | Notes |
|---|---|---|---|---|---|---|---|---|
| Zoom In | + | Unbound | ZR | Zooms the minimap in. | ||||
| Zoom Out | - | Unbound | ZL | Zooms the minimap out. | ||||
| |
PageUp | Unbound | Decreases transparency of the minimap. | |||||
| |
PageDown | Unbound | Increases transparency of the minimap. | |||||
| Toggle Full Map | Toggle Full Map | M | Opens a full-screen map. This can be zoomed in and out with the keyboard just as the minimap can, or with the mouse wheel. It can be scrolled using the directional keys or by dragging it with the mouse. The full-screen map can be dismissed by clicking the icon at the bottom left corner, or by pressing the inventory key, or the Map key again. In multiplayer, it will also show all players. On the console versions, the player can select their team from this screen. | |||||
| |
Toggle Map Style | Tab | Cycles the minimap between the three modes: portrait, overlay, and hidden. See Minimap for more details. |
Hotbar Controls
| Action | Wiki Icon | Desktop (mouse & keyboard) | Desktop (controller) | Playstation | Xbox | Wii U | Nintendo Switch | Notes |
|---|---|---|---|---|---|---|---|---|
| Cycle Left / Right | Cycles the selected item in the hotbar left or right. | |||||||
| |
0–9 | 0-9 | Unbound | Tap hotbar item | Selects an item from the hotbar (1 being the leftmost, and 0 being the rightmost). The hotbar is the uppermost row of the inventory, i.e. the top 10 slots. The item is merely selected; to actually use it click the left mouse button after making a selection. | |||
| Dynamic Hotbar | D-Pad | Unbound | Unbound | D-Pad | Unbound | Items can be bound to different buttons by opening the inventory, selecting an item and pressing a button. That item can then be equipped in the hotbar immediately by pressing that button during gameplay. |
Others
| Action | Wiki Icon | Desktop (mouse & keyboard) | Desktop (controller) | Playstation | Xbox | Wii U | Nintendo Switch | Notes |
|---|---|---|---|---|---|---|---|---|
| Loadout 1 | F1 | F1 | Switches to Loadout 1. | |||||
| Loadout 2 | F2 | F2 | Switches to Loadout 2. | |||||
| Loadout 3 | F3 | F3 | Switches to Loadout 3. | |||||
| Toggle Camera mode | F4 | F4 | Toggles Camera mode. | |||||
| Toggle Debug | F7 | F7 | Toggles rendering debug information. | |||||
| Toggle Tx/Rx | F8 | F8 | Toggles multiplayer connectivity debug info. In singleplayer, all values are 0 and do not change. | |||||
| Lighting Setting | ⇧ Shift + F9 | Shift + F9 | Cycles through the 4 lighting settings: Color, White, Retro and Trippy, in that order. | |||||
| Toggle FPS | F10 | F10 | Toggles FPS (frames per second) display. | |||||
| Toggle HUD | F11 | F11 | Toggles visibility of the HUD (heads-up display). |
Inventory
- To remove one item from a stack, right click on it. Hold down the right mouse button to increase the number of items to be removed from the stack.
- To place objects directly from the inventory, left click to select the item, then left click to place it or right click to throw it.
- To place objects directly from the inventory into the Trash Can, hold Ctrl down while clicking the item. This can be used to quickly free up space in the inventory.
- This setting can be changed on the main menu under Settings > Controls > Left Shift Quick Trash. Enabling the option will have quick trash use Shift instead.
- To quickly move objects from the inventory into an open container, or vice versa, hold Shift down while clicking the item.
- To place objects directly from an open container into the Trash Can, hold Ctrl down while clicking an item.
- If Left Shift Quick Trash is enabled, this feature will not work.
- To favorite an item (making it unable to be quick stacked, quick trashed, thrown, or deposited), hold Alt down clicking the item. A border should appear letting the player know that the item is favorited. Do note that placing favorited equipment onto the equipment slots and placing them back in the inventory will remove the favorite status on the equipment, in which case the player will to need to used Alt + Left Click again.
NPC
- To interact with an NPC, move close enough that a speech bubble appears when the player moves the mouse cursor over it (or, on
 Mobile, when a speech bubble simply appears). Then, use the ⚷ Open / Activate control.
 - When buying items from an NPC, hold down the right mouse button/Right Trigger/Buy Button to increase the number of items purchased.
Equipment
- Right-clicking on a piece of equipment, including one located in a Social slot, will swap it with its corresponding Armor or Accessory slot.
Miscellaneous
- To read a sign, tombstone, or the name of a chest, hover the cursor over it.
- When crafting, hold down the right mouse button to rapidly craft a number of items (the speed increases as long as the player holds down the button).
Nintendo Switch Version
Touch controls
The Nintendo Switch version of the game utilizes the touch screen in handheld mode to make playing easier. Most of the controls are very similar to controls from the
![]() Mobile version of the game, but some are entirely new. Some of these controls include:
Mobile version of the game, but some are entirely new. Some of these controls include:
- The ability to double tap the hotbar to open the inventory.
- The ability to double tap accessories in the inventory to toggle accessory visibility.
- Tapping the minimap to access the full size map.
Unlike the mobile version, however, pinching the screen to zoom in and out uses the selected item.
Mobile Version
| Action | Touch | Notes | |
|---|---|---|---|
| Use item | Tap and hold (swing/fire weapons) / Single tap (consume potion, summon mount/minion summon item, etc.) | R2 | Attack using held weapon, consume held potion, summon using held mount/minion summon item, etc. |
| Interact | Single tap | Open a door or chest, activate switch, talk to NPC, edit a sign/tombstone, etc. | |
| Jump | Left analog stick
/ |
| |
| Up | Left thumbpad |
| |
| Down |
| ||
| Left | Moves your character to the left. Hold the key down for continuous movement. | ||
| Right | Moves your character to the right. Hold the key down for continuous movement. | ||
| Grapple | Grapple thumbpad (top-left of the right thumbpad) | L2 | Sends the grappling hook in the direction the thumbpad is held. |
| Quick-Use item | Move right thumbpad | Right analog stick | Attacks, breaks, or places tiles in the direction the analog stick is held. If a consumable item is selected, it will be consumed. |
| Auto-Attack Verify | - | R3 | Attacks in the direction of the targeted enemy. By default, the nearest enemy is automatically targeted, this can be changed by tapping on another enemy. |
| Throw (discard) | Drag item from hotbar/inventory | Tosses the currently selected item a few squares in the direction the item is dragged. Note that throwing throws the whole stack of items. | |
| Inventory | Opens the player's inventory, and by extension, their crafting and gear menus. The game will automatically pause, unless you are on a multiplayer server. | ||
| Pause | Opens settings, such as saving and quitting, or changing teams. The game will automatically pause, unless you are on a multiplayer server. | ||
| Zoom in | Pinch-out | D-Pad | Pinch-out to get closer to the character (see less on screen). |
| Zoom out | Pinch-in | Pinch-in to get further away from the character (see more on screen). | |
| Toggle Full Map | Zoom out far enough or |
Zoom out far enough | Opens the map. Zooming in on the map will return to normal gameplay. |
| Cycle Hotbar
Left / Right |
- | L1 / R1 | Cycles the selected item in the hotbar left or right. |
| Hotbar direct selection | Tap hotbar | Selects the item tapped on the hotbar. The hotbar is the uppermost row of the inventory, i.e. the top 5-10 slots. If it is a consumable, it will automatically be used right away. | |
| Lock target | Targets an enemy with a yellow arrow over them. See Lock On for more information. | ||
| Manually move Cursor | Right thumbpad | Used mainly in Building Mode to determine where blocks and walls will be placed. However, attacks will also be directed towards this position unless the Circle Pad is used to direct attacks. The Manual Cursor shown as a white crosshair somewhere near the player. | |
| Toggle Smart Cursor | Makes block placement easier. See Smart Cursor for more information. |
- ↑ Information taken from the
 Desktop 1.4.4.9 source code, method
 QuickHeal_GetItemToUse()inTerraria.Player.cs. - ↑ MFi stands for "Made For iPhone". Buying an MFi controller will guarantee it working properly on iOS. Extensive list of MFi controllers
iOS, Android, and Amazon versions
As of Mobile 1.3, the user interface has been updated to more closely reflect that of the desktop version. However, as mobile users typically will be dealing with touch controls and/or smaller screens, there are a few small differences between the two to make gameplay flow smoothly.
The inventory is primarily split up into 5 sections: The Inventory and Housing Menu on the left, and Chat, Equipment Menu, and Crafting on the right. Like many other UI elements, they can be moved around and altered in the settings.
A starter inventory.
The housing menu. Note the extra placeholder slots.
The Chat UI.
Inventory
Akin to the desktop version, The inventory consists of 50 slots. The player can set whether the 10 left most slots or the top row serves as the hotbar.
Some inventory functions have been moved to below the inventory for easy access. These include the tools, research, and a split function. The tools button opens a small window consisting of the various toggles, such as those given by the Paint Sprayer and the Torch God's Favor. Researching is also accessible here, separately from the Journey Mode tools accessible in the pause menu. The split button opens a small slider which splits a stack in two based on its position.
Housing Menu
It is identical to the housing menu on desktop, save for an aesthetic change where each NPC fills in a placeholder slot as they move in.
Chat
The player can type messages and view status messages in the Chat menu. This window also has a button which allows access to Emotes. It functions identically to the chat on the ![]() Desktop version.
Desktop version.
Equipment
Consists of all the equipment the player has equipped. Visibility can be toggled by tapping the show/hide button, but not by double tapping the accessory as seen in the Nintendo Switch version.
Crafting
Consists of a list of craftable items with a Craft button below. The materials needed will be listed next to the button. The player can access all duplicated items here by pressing the duplication button in Journey mode. There are filters for Weapons, Blocks, Accessories, Materials, All (which disables the active filter), Armor, Misc, and Consumables, accessible even outside of Journey mode.
Windows Phone version
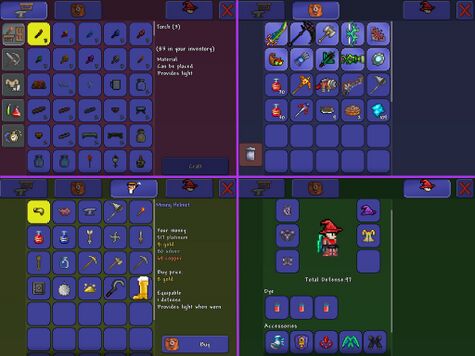
Inventory / Storage Tab
- Tap and drag an item to move it, or switch its position with another.
- Drag the inventory screen up or down to see more of the inventory.
- Selecting an item and tapping the "Split Stack" button (the button with stacked coins) will take one item and place it in a new stack. If a new stack has been recently created, the item will be added to that one instead.
- Selecting armor or an accessory and tapping the Equip button (labeled with a helmet and a player's head) will automatically equip it in an armor or accessory slot. If the respective armor slot is full, it will be equipped in the vanity slot. Dragging an item to the Equipment tab and releasing will equip it in the same manner.
- Selecting an item the Storage tab Tapping the Take button will add it to your inventory. Dragging an item to the Inventory tab and releasing will take it in the same manner.
- Holding an item over a tab for a while will switch to that tab.
- Additionally, if you're on the main screen and want to throw an item, you can do so by selecting it in your hotbar and then holding it. You can then drag to throw. It can be useful if you want to throw a Guide Voodoo Doll and summon the WoF.
Equipment Tab
- Any equipable item will automatically be equipped when crafted, bought, picked up, or when the Take button is pressed in the Storage tab.
- Selecting an item and tapping the Unequip button (labeled with a helmet and a player's head) will unequip it and place it in the Inventory.
Crafting Tab
- Tap a recipe and tap Craft to craft one of the item.
- Tap and hold Craft to craft multiple items (the speed increases as the player holds the button).
NPC Shop Tab
- Selecting an item and tapping Buy will buy the item if the player has enough money.
- Hitting Sell in the Inventory tab, or simply dragging an item to the Shop tab will sell it.
- The Goblin Tinkerer has an additional region above the shop where items can be reforged. Dragging an item here and selecting Reforge will reforge it.
3DS Version
| Action | Notes | |
|---|---|---|
| Use item | Attack using held weapon, consume held potion, summon using held mount/minion summon item, etc. | |
| Interact | Open a door or chest, activate switch, talk to NPC, edit a sign/tombstone, etc. | |
| Jump |
| |
| Up | Circle Pad |
|
| Down |
| |
| Left | Moves your character to the left. Hold the key down for continuous movement. | |
| Right | Moves your character to the right. Hold the key down for continuous movement. | |
| Grapple | Sends the grappling hook in the direction swiped, or on the Nintendo | |
| Quick-Use item | Attacks, breaks, or places tiles in the direction the analog stick is held. If a consumable item is selected, it will be consumed. | |
| Auto-Attack | Attacks in the direction of the targeted enemy. On the | |
| Throw (discard) | Drag item from the Quick Inventory onto the drop icon | Tosses the currently selected item a few squares in the direction the item is dragged. Note that throwing throws the whole stack of items. |
| Inventory | Tap the inventory icon on the touch screen or ZR on the New Nintendo 3DS | Opens the player's inventory, and by extension, their crafting and gear menus. The game will automatically pause, unless you are on a multiplayer server. |
| Pause | Start / Select | Opens settings, such as saving and quitting, or changing teams. The game will automatically pause, unless you are on a multiplayer server. |
| Zoom in | Magnifying Glass on the World Map | Pinch-out to get closer to the character (see less on screen). |
| Zoom out | Pinch-in to get further away from the character (see more on screen). | |
| Toggle Full Map | Tap the compass icon on the Touch Screen | |
| Cycle Hotbar
Left / Right |
L / R | Cycles the selected item in the hotbar left or right. |
| Hotbar direct selection | Tap item on the Quick Inventory | Selects the item tapped on the hotbar. The hotbar is the uppermost row of the inventory, i.e. the top 5-10 slots. If it is a consumable, it will automatically be used right away. |
| Lock target | Targets an enemy with a yellow arrow over them. See Lock On for more information. | |
| Toggle Manual Cursor Mode | D-Pad / Touch Screen in Building Mode | Used mainly in Building Mode to determine where blocks and walls will be placed. However, attacks will also be directed towards this position unless the Circle Pad is used to direct attacks. The Manual Cursor shown as a white crosshair somewhere near the player. |
| Move Camera | C-Stick (New Nintendo 3DS only) | Moves the camera. |
3DS Inventory
Quick Inventory
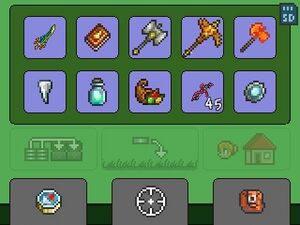
The touch screen features the players hotbar, housing menu, map, and other utilities. This is referred to by the game as the "Quick Inventory". The quick inventory shows the first ten slots in the players inventory, similarly to the mobile version of the game. The top left button under the hotbar allows the player to Quick Stack to Nearby Chests, which will be greyed out if the player is not near any chest. The middle button allows the player to drop an item they've tapped and held onto, greyed out if there is no item to drop. The top right button is the housing menu, which will be greyed out unless the player is in a house.
The bottom three buttons are the World Map, Building/Precision Mode, and the player's Inventory from left to right.
- The World Map appears on the touch screen so the player can view the map as they move, and also has a magnifying glass in the corner which toggles a zoomed-in and out view.
- Building Mode provides a zoomed in view of the player's screen and sorts tools on the left, and building materials on the right.
- Building materials are sorted in the order they appear in the players inventory, but tools are sorted in accordance with the order Weapon → Pickaxe → Axe → Hammer → Wrenches/Wire Cutters → Fishing Tools, top to bottom.
- Items on the left can be swapped by holding L for tools and R for building materials and a direction. Up / Down on the D-Pad or Circle Pad will change the item selected. Left and Right only work on the left row, when there are variants of a tool, such as a Terra Blade being able to switch to a Paladin's Hammer, as they are both categorized as weapons.
- On the New Nintendo 3DS, Building Mode can also be toggled with ZL.
- The D-Pad can be used along with Building Mode for increased precision when placing blocks.
Inventory
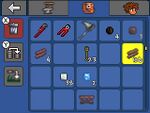
The Inventory on the 3DS version is very similar to the inventory on the ![]() Mobile version. Items appear on the bottom screen, while an item's statistics will appear on the top. The top ten slots of the inventory will be brightened, indicating items in these slots will appear in the Quick Inventory. Items can be thrown away with
Mobile version. Items appear on the bottom screen, while an item's statistics will appear on the top. The top ten slots of the inventory will be brightened, indicating items in these slots will appear in the Quick Inventory. Items can be thrown away with ![]() , and stacks of items can be split with
, and stacks of items can be split with ![]() . Below both the trash and split icon is a drop icon. Armor can be equipped with
. Below both the trash and split icon is a drop icon. Armor can be equipped with ![]() when selected, but even if that armor is a vanity item, it will be equipped in the armor slots and be swapped with any item currently filling the slot.
Also similar to the
when selected, but even if that armor is a vanity item, it will be equipped in the armor slots and be swapped with any item currently filling the slot.
Also similar to the ![]() Mobile version, items can be dragged between slots opposed to just using button inputs. However, button inputs are still required when equipping or depositing items, as there is no way to drag items between tabs.
On the top of the inventory screen are four/five buttons. The first, being a back arrow, causes the player to exit the inventory. The rest toggle the crafting menu, the inventory, the chest's inventory (if applicable), and the player's armor/accessory screen.
Mobile version, items can be dragged between slots opposed to just using button inputs. However, button inputs are still required when equipping or depositing items, as there is no way to drag items between tabs.
On the top of the inventory screen are four/five buttons. The first, being a back arrow, causes the player to exit the inventory. The rest toggle the crafting menu, the inventory, the chest's inventory (if applicable), and the player's armor/accessory screen.
Chest Inventory
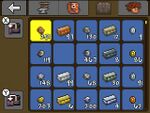
When a chest is opened, controls differ greatly from the regular inventory. To take an item out of a chest, ![]() is used, and
is used, and ![]() will loot all of the items from the chest. Items cannot be split or trashed from the chest directly. When the player's inventory is accessed when a chest is available, a quick stack button appears at the bottom left corner of the screen. A deposit button will also appear if an item is selected, but does not share the button shortcut of X with the take button. Thus, the player should be careful to not trash an item they wish to put back into a chest.
will loot all of the items from the chest. Items cannot be split or trashed from the chest directly. When the player's inventory is accessed when a chest is available, a quick stack button appears at the bottom left corner of the screen. A deposit button will also appear if an item is selected, but does not share the button shortcut of X with the take button. Thus, the player should be careful to not trash an item they wish to put back into a chest.
Crafting Menu
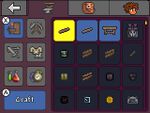
The crafting menu splits up crafting recipes into multiple sections. These sections are:
- Furniture, Blocks, and Walls
- Tools
- Weapons
- Armor and Vanity (along with certain accessories)
- Buff Potions
- Miscellaneous items that do not fit in with the other categories, e.g. Boss Summons, some Accessories, Biome Keys
![]() can be used to switch between categories, and
can be used to switch between categories, and ![]() or the button on the touch screen can be used to craft the selected item. Items can be selected with the D-Pad, Circle Pad, or touch screen. Items that can be crafted will be listed before items that cannot, and will have a blue background. Attempting to craft an uncraftable item show the reason it is uncraftable next to the craft button. Similar to items with long tooltips, an item with a long name as an ingredient will have it's name scroll back and forth.
or the button on the touch screen can be used to craft the selected item. Items can be selected with the D-Pad, Circle Pad, or touch screen. Items that can be crafted will be listed before items that cannot, and will have a blue background. Attempting to craft an uncraftable item show the reason it is uncraftable next to the craft button. Similar to items with long tooltips, an item with a long name as an ingredient will have it's name scroll back and forth.
Player Inventory
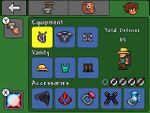
The player's armor and accessories are on the last tab of the inventory. Pressing ![]() will remove that armor or accessory and place it in the player's inventory. The five eyes below the player image show and hide the player's accessories, so long as they aren't wings.
will remove that armor or accessory and place it in the player's inventory. The five eyes below the player image show and hide the player's accessories, so long as they aren't wings. ![]() can be pressed to view the player's current buffs and debuffs as well as their durations. Buffs can be canceled with
can be pressed to view the player's current buffs and debuffs as well as their durations. Buffs can be canceled with ![]() when on the screen.
when on the screen.
Shop Inventory
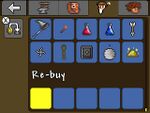
When interacting with a NPC that sells items, the NPC will appear in place of where a chest would appear. Items can be bought from an NPC with ![]() , so long as the player has sufficient funds. Items can also be from the player's inventory with
, so long as the player has sufficient funds. Items can also be from the player's inventory with ![]() . When an item is sold to an NPC, that item goes to the Re-Buy slots, a section of 5 slots where items sold recently can be rebought. Unlike shops in the
. When an item is sold to an NPC, that item goes to the Re-Buy slots, a section of 5 slots where items sold recently can be rebought. Unlike shops in the ![]() Desktop version, exiting the NPC's shop inventory will not erase items in the Re-Buy slots, instead, items in said slots will only be erased if the player saves and exits the game.
Desktop version, exiting the NPC's shop inventory will not erase items in the Re-Buy slots, instead, items in said slots will only be erased if the player saves and exits the game.
History
- Desktop 1.4.4: F4 changed to be they keybind for Camera mode.
- Desktop 1.4.1.1:
- Fixed an issue preventing Master mode players from accessing all accessory slots with Gamepad.
- Fixed a crash related to housing menu interaction with Gamepad.
- Fixed an issue causing a kanji key to automatically replace some keybindings.
- Desktop 1.3.1: Controller support for PC, easier binding.
- Desktop 1.3.0.1: Added favorite option for items in the inventory and the mount hotkey.
- Desktop 1.2.4.1: Fixed bug where resetting controls to default would reset quick mana to M rather than J.
- Desktop 1.2.3: Added support for Ctrl+Z, X, C, and V (clear line, cut line, copy line, and paste into line respectively). Added support for Shift+Insert, Shift+Delete, Ctrl+Insert (paste, cut, and copy respectively).
- Desktop 1.2.0.1: Added map control.
- Desktop 1.2:
- M is now used for the new minimap feature.
- J is now used for quick mana.
- Desktop 1.1.1: Keybindings will no longer sometimes be set to "None" automatically.
- Desktop 1.1:
- Items Pulsate when hold on the mouse cursor so they stand out against other items on the UI.
- Items move freely and rotate when falling after being dropped or thrown.
- F7 shows game debug information.
- F8 shows connectivity debug information.
- F9 changes lighting setting.
- Added 'Auto Select' hotkey.
- Added ability to place items directly from open inventory.
- Desktop 1.0.6:
- Hotkeys can now be used to change selected item when the inventory is open.
- Hotkeys to use the Hooks (default is E) added.
- Hotkeys for Mana and Healing Potions now work correctly with Restoration Potions.
- Desktop 1.0.5: Added hotkeys for quickly drinking healing, mana, and buff potions. The healing/mana potion the player uses is based on the same principle arrows are. Topleft most item first. The buff potions are all used at once.
- Desktop 1.0.2: Right clicking and holding down on a crafting recipe will now craft multiple of the same item to a max of the stack and/or until running out of materials.
- Desktop 1.0.1: The Inventory button is now re-mappable.
- Desktop-Release: Introduced with basic controls.


