Guide:Getting started

Welcome to Terraria!
This guide will help you get started on your journey through your world. It will cover gameplay basics like character creation, combat, and early-game tips, and direct you to other guides for further advice. Keep reading for a step-by-step tutorial on how to begin Terraria!
Gamemode
On Terraria's title screen, you can pick the game mode you would like to play. For this guide, it is recommended to select "Single Player," and the information presented on this page will assume this is what has been selected. In the case one wants to play with friends, however, select the "Multiplayer" option to connect to other players. On the ![]() Old-gen console and
Old-gen console and ![]() versions, select Play Game to get started. Note that there is currently no official way to crossplay between any versions.
versions, select Play Game to get started. Note that there is currently no official way to crossplay between any versions.
The ![]() Console,
Console, ![]() Mobile,
Mobile, ![]() Old-gen console and
Old-gen console and ![]() versions have a built-in Tutorial that we recommend completing first.
versions have a built-in Tutorial that we recommend completing first.
This guide will assume you have chosen Single Player; as it is easier to learn to play the game.
So let's learn how to be a master at the early game!
Character Creation

.jpg)
After selecting the game mode, you'll have to create and select your own character. Click the New button on the bottom right to open the character creation screen. Here, you can change a number of your character's properties, such as: gender, hair, hair color, clothing style along with its colors, skin color, and eye color!
Name and Difficulty
Your character's name will display when logging into a world, sending messages in chat, and whenever you die. It does not have to be the same as your Steam or console username. On the ![]() Desktop version,
Desktop version, ![]() Console version, and
Console version, and ![]() Mobile version, you are able to change the name of your character at any time you wish. On
Mobile version, you are able to change the name of your character at any time you wish. On ![]() Old-gen console and
Old-gen console and ![]() , your character's name cannot be changed later on.
, your character's name cannot be changed later on.
You can choose different character difficulty options: Journey(Desktop, Console and Mobile versions), Classic (also known as Softcore), Mediumcore, and Hardcore. Note: On ![]() , all players are in Classic mode; there is no difficulty setting.
, all players are in Classic mode; there is no difficulty setting.
The character difficulty setting determines what happens when the character dies -- it does not affect any other aspects of gameplay, including how hard the enemies will be.
- (Desktop, Console and Mobile versions) Journey Mode gives the player the ability to "research" items and access to various cheat options, like a limited Creative mode. Journey characters can access the cheat menu by pressing C, allowing them to enable Godmode, duplicate items, set the time and weather, Increase or Decrease enemy spawning or Stop Enemy Spawning entirely, etc. Journey characters can also change the difficulty of their world on the fly if they find the current difficulty too hard or easy, and start with an improved set of starter tools and items. However, Journey characters can only enter Journey Mode worlds, including playing in multiplayer.
- Classic, or Softcore, means that you will drop some of your coins upon death. Depending on world difficulty, you may drop half, 3/4, or all of your coins. Lost coins can be picked up by returning to your death location, but you may have to defeat enemies to get them back.
- Mediumcore means that you will drop every item you are carrying upon death. Dropped items will be permanently lost if you leave the world before recollecting them, and some items can be destroyed by Lava.
- Hardcore means that you have only 1 life, like in Minecraft; if you die, the character file is permanently deleted. Note: Hardcore is not the same thing as Hardmode, which is a game progression term used to indicate a world is post-Wall of Flesh.
It is recommended you choose Classic/Softcore or (Desktop, Console and Mobile versions)Journey for your first playthrough, as this will give new players an easier time and a less frustrating experience. Journey Mode gives the player more options, but also showers them with more information and extra tools that can make it harder to get used to. This guide will be written as if the player has chosen Classic, though all tips apply to Journey as well.
Appearance (optional)
Characters can be visually customized by changing their gender appearance, hairstyle, eye color, skin color, and clothing. All but eye and skin colors (pre-1.4) can be changed in-game using certain items.

None of the Appearance options have any effect on gameplay aside from visuals, the player hurt sound effect, and occasional NPC quotes.


- The color selection bars use the Hue/Saturation/Value system. The top bar changes the base color; the middle changes how faded the color is; the bottom bar lightens or darkens the color from white to black. See HSV (Wikipedia) for a more technical explanation.
- Clothing will be obscured by your armor and vanity items. This can be undone by wearing the Familiar set as you progress.
- To change your clothing in-game later, use a Dresser. To change hairstyle, find the Stylist NPC. To change your gender appearance, drink a Gender Change Potion.
Once you are finished, click Create to confirm character creation with the settings chosen. Now, click Play on your character to enter the World Selection screen.
World Creation

Click the New button on the Select World screen to generate your first world. Players are not locked to a single world; however, we recommend completing the game using a single world at first to keep things simple.
Name and Seed
These two options won't have much effect if you're starting out.
- Your world's name is displayed on the Select World screen, and it will be shown to other players if you hosted a Multiplayer session. It also appears in a few death messages.
- The world seed is a randomly-generated number which represents the world that has been created. It can be copied and pasted to create an identical world. There are various seed values that can dramatically change world generation and gameplay, but it is strongly recommended that the player does not use these for a first playthrough.
World Size
There are three options:
- Small worlds are relatively compact and easy to traverse; it will take you less time to travel between biomes and descend into caves. This makes the game easier at first, since traveling is relatively risky. However, small worlds generate fewer treasure items and natural resources, so you may have a hard time later on.
- Medium worlds are 50% larger than small worlds; they take a bit longer to travel through, but have more space to generate treasure and extra biomes.
- Large worlds are twice the size of small worlds. It takes a long time to travel between biomes, but the size allows for nearly all possible terrain, treasure, and resources to be generated in large quantities, aside from a few very rare structures. These worlds are useful if you are looking to build.
While world sizes are mostly similar in gameplay, they can notably affect the length of a playthrough; which world size is best will vary from player to player and often depends on the amount of time one has on hand. Note: the bigger world option you choose, the longer the wait time will be for the world to generate.
Difficulty
- Classic (Normal) Mode worlds offer the standard Terraria experience.
- Expert Mode(Desktop, Console and Mobile versions) worlds have enhanced enemies and bosses, hazards, and valuable Expert-only treasure. The exclusive loot can help the player overcome the increased difficulty, but the world is much harder, especially lategame. This can leave newer players feeling helpless later on.
- Master Mode(Desktop, Console and Mobile versions) worlds have even more dangerous enemies and bosses, being a difficult experience even for experienced Terraria players. The player gets an extra accessory slot and a small handful of exclusive items. All Expert items appear in Master Mode as well.
- (Desktop, Console and Mobile versions)Journey Mode(Desktop, Console and Mobile versions) worlds are for Journey Mode characters only; they are the only worlds where the cheat menu can be used. A Classic/Softcore character can't even log into a Journey world. Note that Journey mode has difficulty sliders ranging from 0.5x (the easiest) to 3.0x (equivalent Master mode). Sliding to 2x will enable all Expert Mode features and 3x will enable all Master Mode features. The difficulty slider lets Journey characters experiment with each world difficulty without committing to a full playthrough of it.
We recommend that you select Classic (also known as Normal) or (Desktop, Console and Mobile versions)Journey for your first playthrough. Make sure that either both your world and character are Journey mode or neither are!
World Evil
All Terraria worlds have one of two Evil biomes, that affect your ability to receive certain loot and changes a boss that you fight. On the ![]() Desktop version,
Desktop version, ![]() Console version, and
Console version, and ![]() Mobile version, the world evil can be selected, whereas it is always random on the
Mobile version, the world evil can be selected, whereas it is always random on the ![]() Old-gen console version and Nintendo
Old-gen console version and Nintendo ![]() version. While seeds for the non-native world evil can be bought later, artificial biome creation can be difficult.
version. While seeds for the non-native world evil can be bought later, artificial biome creation can be difficult.
- The Corruption, a purple-colored biome that generally offers both lower risk and reward, making it ideal for new players.
- The Crimson, a red-colored biome with themes of flesh and gore. Overall, its items are slightly more powerful, but the enemies are more dangerous. This makes it appealing to experienced players.

Click Create or Accept to generate your world; the game will display a progress bar until it is complete. Afterwards, press Play on the created world to start your adventure!
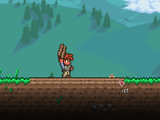
Beginning Gameplay

Upon entering a world for the first time, your character will appear at the center of the map, so you have half of the world to explore to the left, and half to the right. This location is known as the Spawn Point and will be where your character appears after you die, or whenever you enter the world. It's also marked with a Green Arrow on the Map in ![]() Desktop version,
Desktop version, ![]() Console version, and
Console version, and ![]() Mobile version. Note: Avoid building exactly on this spot, as you could potentially break blocks when spawning in.
Mobile version. Note: Avoid building exactly on this spot, as you could potentially break blocks when spawning in.
You will notice you have a set of starter tools in your inventory, including a ![]() Copper Shortsword (
Copper Shortsword (![]() Wooden Sword if playing on the Nintendo
Wooden Sword if playing on the Nintendo ![]() version),
version), ![]() Copper Pickaxe and
Copper Pickaxe and ![]() Copper Axe.
Copper Axe.
Movement and Tool Use
- On
 Desktop version, the game can be controlled using the Mouse and Keyboard. If you are using a controller, please see the console section further below.
- The cursor on the screen is moved using the mouse.
- ⚒ Use / Attack (left-click) will activate the item currently selected in the hotbar, or attached to the cursor. This usually results in attacking with a weapon, placing/breaking a block, drinking a potion, etc.
- The WASD keys move the character (note that W is not for jumping).
- ↷ Jump (spacebar) will make the character jump (or fly/swim/etc depending on your accessories).
- ⚷ Open / Activate (right-click) will interact with placed objects like Chests and Doors. It is also for talking to NPCs and splitting stacks of items.
- T will cause your character to throw the currently selected item in front of the player. It is recommended that you reassign this function to a key that you won't press on accident, due to an accidental press potentially having disastrous consequences. (Items can also be thrown by dragging them out of the inventory and right-clicking).
- On the
 Mobile version, there will be a left joystick for movement, a right joystick for using items (alternatively tap anywhere on the screen to use an item or place a block), and other buttons to do various things, such as quick heal and Mounts. There is also a lightbulb button that will show each button's function once tapped and can be toggled on and off.
  Console version use controllers / Joy-Cons
  to control the game. The Nintendo Switch version also has touch screen capability when it isn’t docked, so some gameplay elements have mobile-like controls (e.g., main menu, inventory).
Hotbar and Inventory
The Inventory
In the upper-left corner of the screen, you will see ten inventory slots labeled 1 through 10. These slots are referred to as the hotbar. They are a quick way of accessing commonly-used items. You can place any item into them from the inventory. To use the item, select the hotbar slot by pressing the associated number on the number row on the keyboard, use the scroll wheel to scroll to the right slot, or click a slot with the cursor. When you have selected a slot, you can press ⚒ Use / Attack anywhere on the screen to use the selected item.
By pressing Esc or Inventory you open up the inventory. It consists of 40 inventory slots, 10 hotbar slots, 4 slots each for coins and ammo, a trash slot, and various armor/accessory slots. It also contains the crafting menu, which is used to craft items.
All newly created characters (in Classic/Softcore mode) begin with the following items in their inventory:
 Copper Shortsword (Desktop, Console, Old-gen console and Mobile versions) or
  Wooden Sword (3DS version), used for killing enemies.
 Copper Pickaxe, used to dig blocks, as well as detaching placed items like Furniture.
 Copper Axe, used for chopping down Trees and Cactus to obtain Wood.
Note: Items may have a word as their prefix, such as "Demonic Copper Pickaxe" or "Broken Copper Shortsword". These will increase or decrease the item's base stats; see the Modifiers page for more information.
Rearranging the Inventory
Items in the inventory can be moved using the cursor. Pressing ⚒ Use / Attack on an item will remove it from its slot and attach it to your cursor. Clicking again on another slot will set the item back down, swapping it for another if the slot already contains an item. Pressing ⚷ Open / Activate on an item will either pick up a single item from a stack (if the item is a stack) or equip it to your character (if the item is equippable).
Moving a held item out of the inventory screen allows you to ⚒ Use / Attack as if it were held in the hotbar; this can be used, for example, to drink a potion. Pressing ⚷ Open / Activate will throw the item onto the ground, this can be used to pass an item to another player in Multiplayer.
Certain inventory slots act in a special way:
- The ammo slots can only contain items that are either Ammunition for Ranged weapons, Wires for Wrenches or Bait for Fishing poles. Keep in mind that the top-most Slot for ammo will be used first, followed by subsequent slots.
- The Coin slots can only hold coins, which may be dropped when you die. When you collect coins, they will be deposited into the Coin slots, automatically converting to the next highest denomination when appropriate (100 ⇒ 1, 100 ⇒ 1, 100 ⇒ 1). You can move coins to your normal inventory instead of the Coin slots (though subsequent money will still deposit to the Coin slots by default). This does not prevent Coin loss upon death.
- While you can drag items into the Trash slot (located in the lower-right section of your Inventory) to get rid of them, pressing Ctrl while clicking an item in your inventory will do so automatically. The last item placed in the Trash slot will remain until you trash another one, so be careful when quickly removing items, as you can only retrieve the last item placed there. Trashed items are also removed when logging out.
- You can favorite items by pressing Alt while clicking on the item. This prevents the player from throwing the item, quick-stacking it to a nearby chest or trashing/selling it through hotkeys, and is a useful option for ensuring that the player does not lose valuable items.
- Some NPCs allow you to buy and sell items from them. If you are currently shopping, you can drag/drop to sell items, or press Ctrl and click said item (instead of a trash icon, you'll see a coin icon, indicating a sale). If you accidentally sell an item, you can buy it back for the same price - if it is still visible in the NPC's shop, but beware: once you sell an item and leave the dialogue, your sold items will disappear.
- If the NPC's inventory is full when you sell an item, it cannot be bought back. For this reason, it may be optimal to sell your items to an NPC who offers few items for sale (e.g., not the
 Tavernkeep(Desktop, Console and Mobile versions), who may have a full inventory as-is).
- If the NPC's inventory is full when you sell an item, it cannot be bought back. For this reason, it may be optimal to sell your items to an NPC who offers few items for sale (e.g., not the
- The equipment slots on the bottom-right/equipment menu/right are for items your character wears, such as armor and accessories. The Inventory will show you your character's Armor and Equipment slots. Upon clicking the icons at the top of those slots, you can see your "alternative" Equipment, such as Mounts, Pets, Hooks, Minecarts, and Light Pets.
Other interface elements
These red hearts beside the inventory indicate the character's Health. Each red heart equals 20 health. All characters begin with 100 health. This can be raised to 400 health using ![]() Life Crystals found underground, and later 500 health with
Life Crystals found underground, and later 500 health with ![]() Life Fruits found in the Jungle during Hardmode.
Life Fruits found in the Jungle during Hardmode.
If your health reaches 0, your character will die, and will re-appear at your Spawn Point after a delay. Health regenerates naturally after a short period of not taking damage.
![]()
![]()
![]()
![]()
![]()
The blue stars on the right side of the screen indicate the character's Mana. Each blue star is 20 mana. All characters begin with 20 mana. This can be raised to 200 mana using ![]() Mana Crystals and temporarily boosted further with some accessories and armor.
Mana Crystals and temporarily boosted further with some accessories and armor.
Mana is used to power Magic weapons; it regenerates similar to health, but at a much faster rate.
The First Day
After loading the world, your character will be standing at the spawn point, with an NPC nearby, the ![]() Guide. You can talk to him by pressing ⚷ Open / Activate with your mouse over him. He has some tips for new players, (Desktop, Console, Old-gen console and Mobile versions) and choosing Craft will let you give him materials to see what Recipes can be crafted using them. This option can be used at any point in the game.
Guide. You can talk to him by pressing ⚷ Open / Activate with your mouse over him. He has some tips for new players, (Desktop, Console, Old-gen console and Mobile versions) and choosing Craft will let you give him materials to see what Recipes can be crafted using them. This option can be used at any point in the game.
Using Your Items
The player starts with Copper tools as options for damage, mining, and chopping trees. If the player swings their Copper Shortsword, they will quickly stab (Desktop, Console and Mobile versions) in the direction of your cursor/(Old-gen console and 3DS versions) directly in front of you. This weapon attacks quickly with relatively high damage, and is a good option if you can aim at an enemy. Unlike your tools, you will need to click again for each stab of the shortsword, (Desktop, Console and Mobile versions) unless the player enables Autofire in settings.
Next, select your Copper Axe in slot 3. There will likely be trees around you where you spawn in, or you can walk over to them. By holding ⚒ Use / Attack over the base of a tree, you can chop down the tree, splitting it into collectable pieces of ![]() Wood and
Wood and ![]() Acorns. These collectable item drops can be gathered into your inventory by walking near them. Make sure to target the bottom middle of the tree, to avoid leaving a stump below where you chopped.
Acorns. These collectable item drops can be gathered into your inventory by walking near them. Make sure to target the bottom middle of the tree, to avoid leaving a stump below where you chopped.
Check the Wood and Acorns you now have while having your inventory open. This lets you read information about the item for how to use it. Both Wood and Acorns will tell you that they can be placed, and that they are a Material. Materials can be used in crafting recipes to make new items, as discussed below.
To place an item that can be placed, select that item then press or hold ⚒ Use / Attack near the ground. Different items have different placement rules; wood needs to be placed against an existing block from any cardinal direction, while acorns need to be placed directly above grass. When placed, wood serves as a solid block that you can't walk through, while you can freely walk through a tree sprout from an acorn.
To remove blocks, you use your Copper Pickaxe. Select the item and move the cursor over a block near your character, then hold ⚒ Use / Attack. This will swing your pickaxe, breaking the block after a few strikes and freeing it to be picked up. Using the block allows you to place blocks, while the pickaxe allows you to remove them. This works on wood that you place and the dirt and grass below you, but you cannot mine the blocks directly beneath trees until you chop it down with your axe.
If you mine the block directly below another one, that block will float in the air. Blocks need other blocks to be placed, but not to stay airborne.
There are some exceptions, such as ![]() Sand and
Sand and ![]() Silt, which fall when there are no supporting blocks below them.
Silt, which fall when there are no supporting blocks below them.
It is likely that by this point a Slime has leapt on-screen. This is an enemy, which will damage you if it touches you, and you will damage it if you swing a weapon at it. Killing it will reward you with ![]() Gel and Coins. Gel is a crafting material, while coins are primarily used to purchase items from NPCs.
Gel and Coins. Gel is a crafting material, while coins are primarily used to purchase items from NPCs.
Crafting
Crafting is a key part of Terraria, allowing the player to access new items. On the ![]() Desktop version,
Desktop version, ![]() Console version, and
Console version, and ![]() Mobile version, the crafting menu can be seen while the inventory is open, while the
Mobile version, the crafting menu can be seen while the inventory is open, while the ![]() Old-gen console version and Nintendo
Old-gen console version and Nintendo ![]() version have separate menus for crafting.
version have separate menus for crafting. ![]() Desktop and
Desktop and ![]() Mobile can immediately start crafting from the inventory. On
Mobile can immediately start crafting from the inventory. On ![]() Console, press
Console, press ![]() (
(![]() ) /
) / ![]() (
(![]() ) /
) / ![]() (
(![]() ). From there, switch tabs on
). From there, switch tabs on ![]() Old-gen console to access the crafting interface and on
Old-gen console to access the crafting interface and on ![]() Console, switch menus (
Console, switch menus (![]() /
/ ![]() )
) ![]()
![]() . On
. On ![]() , tap the inventory icon on the touch screen, or press the ZL Button on a New 3DS. From there, tap the crafting icon, then navigate to the desired page with
, tap the inventory icon on the touch screen, or press the ZL Button on a New 3DS. From there, tap the crafting icon, then navigate to the desired page with ![]() .
.
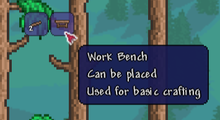
The crafting menu will show the player possible Recipes they can craft with the materials they have in their current position. With wood, you can craft a ![]() Work Bench and
Work Bench and ![]() Wood Platforms. If you killed a Slime and have Gel, you can also craft
Wood Platforms. If you killed a Slime and have Gel, you can also craft ![]() Torches. The Work Bench is used as a Crafting Station to craft more new items, Platforms are blocks you can stand on but also move through, and Torches produce light to see in dark areas. All of these items can be placed; the Work Bench must be placed on top of solid, flat ground, while Torches can be placed on top of or on the sides of blocks and trees, and Platforms can be placed on blocks, on trees, or even above grass and on top of vines and sunflowers.
Torches. The Work Bench is used as a Crafting Station to craft more new items, Platforms are blocks you can stand on but also move through, and Torches produce light to see in dark areas. All of these items can be placed; the Work Bench must be placed on top of solid, flat ground, while Torches can be placed on top of or on the sides of blocks and trees, and Platforms can be placed on blocks, on trees, or even above grass and on top of vines and sunflowers.
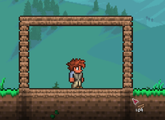
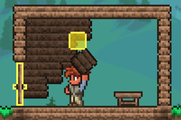
Safety and House building

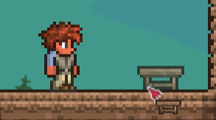
NPCs like the Guide need a house to move into, and the player can also benefit from the shelter for safety. Houses need furniture, lighting, walls, and a frame. For furniture, start by crafting a ![]() Work Bench from 10
Work Bench from 10 ![]() Wood, place it down, and stand near it.
Wood, place it down, and stand near it.
- This will allow you to craft
 Chairs and
  Tables for your NPCs to use, as well as
  Wood Walls or
  Dirt Walls for the background of the house. The Work Bench itself also functions as a smaller table.
 - Work Benches can also craft
 Wood armor and a Wooden Sword and
  Wooden Bow as better weapons. Bows need Arrows, which are crafted with Wood and
  Stone Blocks.
For the frame of the house, a simple rectangle can work, though you can also make more complicated shapes. The important things are to get used to placing blocks and to have no gaps in the frame. Platforms also work for the frame while still allowing player movement in and out of the house, or the player can craft a ![]() Door to walk through. Finally, you need a light source; Torches are the easiest option for this.
Door to walk through. Finally, you need a light source; Torches are the easiest option for this.
 Torches can be crafted with 1
  Gel dropped from
  Slimes and 1
  Wood in groups of 3, and can be used to make useful tools such as a
  Campfire (which will regenerate health) and
  Flaming Arrows.
- Despite producing light, Campfires will not count as a light source for NPC housing.
- For placing the frame of the house, you can hold down ⚒ Use / Attack to place down multiple blocks in a line. This also lets the player place blocks as soon as their cursor is in a valid position to do so.
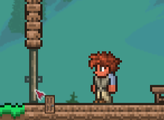
Every world spawns with you and the Guide at the spawn point. He is a valuable resource of information and help, so you want to protect him from enemies, though if he dies, a replacement will move in later during the day if you have an empty house.
Once you have collected about 200 wood, return to where you initially spawned and dig out 1 block underneath where you first appeared.
Time to get building!
- Steps of building a suitable House
1. Lay down the wood foundation
2. Make a box
3. Craft a
 Work Bench
4. Place the Work bench down
5. Craft 1
 Door and replace a side wall with it (tip: replace both walls if you want mobility)
6. Craft
 Wood Walls and cover the interior of the house with it
8. Assign an NPC to the house, in this case the
 Guide
Guide


- Tip:
 Work Benches are considered Tables for purposes of NPC Housing. You can replace Tables with them. For more info, consult Housing.
- Tip:
If you're struggling with building a house, you can use the housing menu to check what is missing from your house. One hard-to-diagnose potential problem: NPCs need a place to stand on, and it needs to be a solid block. Make sure to not make your floor entirely out of platforms.
The Guide will move into the first house you build, but building more houses will allow other useful NPCs to move in, such as the ![]() Merchant or
Merchant or ![]() Demolitionist, if you've met their criteria for joining. NPCs will also reduce enemy spawn rates in the area, making it safer for them and the player, (Desktop, Console and Mobile versions) and each NPC has their own Happiness that can reward you with discounts if they're kept happy. 3 houses in any given local area will give minimum spawn rates and the best happiness for NPCs; more houses can be built some distance away.
Demolitionist, if you've met their criteria for joining. NPCs will also reduce enemy spawn rates in the area, making it safer for them and the player, (Desktop, Console and Mobile versions) and each NPC has their own Happiness that can reward you with discounts if they're kept happy. 3 houses in any given local area will give minimum spawn rates and the best happiness for NPCs; more houses can be built some distance away.
If you can't build a house before sunset, you can dig yourself 4 blocks deep into the ground and cover yourself up with ![]() Dirt to protect yourself from enemies.
Dirt to protect yourself from enemies.
When Night falls, all NPCs will return to their designated houses and stop moving, and new NPCs will stop moving in. NPCs without a house will walk around aimlessly. You can temporarily surround them with blocks to prevent enemies from reaching them.
Continuing on
Weapons

During your adventures in Terraria you will encounter many enemies. To fight them, you use weapons. There are 5 main types of weapons:
- Melee weapons: These weapons are the most straight-forward. They are weapons that physically hit the enemy, like Swords, Boomerangs and Flails.
- Ranged weapons: These weapons use a form of ammo to fire projectiles at distant enemies, such as Bows. If the player does not have the appropriate ammo, they cannot use the weapon.
- Magic weapons: Magic weapons have various different attacks, but generally they shoot a magical projectile that costs Mana. If the player does not have mana, they cannot use the weapon. Examples include the different Staves.
- Summoning weapons: These weapons summon a minion that independently targets and attacks enemies, potentially guided by a player pressing ⚷ Open / Activate or using a (Desktop, Console and Mobile versions)Whip. The Slime Staff is an example of a summoning weapon.
- Throwing weapons: This is a minor weapon type that uses consumable items to deal damage. They deal Ranged damage. In 1.3.0.1(Desktop, Console and Mobile versions), they were made to have their own damage type, but were merged back with Ranged weapons in 1.4.0.1(Desktop, Console and Mobile versions).
Good weapons in the early-game include:
- A Wooden Sword. This weapon gives a wide overhead swing that can easily hit small flying enemies at close range. Other wood types or Cactus can provide upgrades for this sword.
- A Wooden Bow. This weapon requires Arrows to fire, but can hit enemies at range for high damage due to arrows having independent damage stats. Other wood types can be used to upgrade your bow as well.
- Its damage can be increased further with Flaming or
 Frostburn Arrows, which can be crafted with 1 Torch /
  Ice Torch and 10
  Wooden Arrows. This also allows the bow to effectively light up darkness from a safe distance, keeping the player from being surprised by a dangerous enemy.
 - 10 Wooden Arrows + 1
 Fallen Star can craft
  Jester's Arrows, very strong and bright arrows that are good against crowds. However, Fallen Stars are rare and have several other options for using them that you may prefer.
  Mana Crystals especially are an important resource for anyone looking to use magic.
- Its damage can be increased further with
 Snowballs are a cheap and surprisingly effective way to deal damage, gaining 15 Snowballs per
  Snow Block and dealing 8 damage per hit.
- Wooden weapons are cheap to craft and can have potentially positive Modifiers. It's worth it to craft a few of them and look for a good Modifier; swords generally prefer damage, while bows generally prefer speed.
As you explore, you can find weapons by looting your environment, which will offer you various other options for dealing with enemies. Try them out! The worst that happens is you don't like it and stick with your current weapon.
- There are no craftable Magic or Summoning weapons available at the start, but weapons such as the
 Wand of Sparking(Desktop, Console and Mobile versions) and
  Finch Staff(Desktop, Console and Mobile versions) can be found in Surface
  Chests hidden throughout the world.
Armor
- Wood armor is a cheap earlygame option that offers 3 Defense. You can get small improvements by crafting armor from other, rarer wood types you find elsewhere in the world, such as
 Boreal(Desktop, Console, Old-gen console and Mobile versions) or
  Cactus armor.
 - Wearing a full set of matching armor will generally provide a set bonus, which provides an extra benefit that is generally better than mixing and matching armor from different sets.
Healing
In Terraria, any damage done to you will appear above your head as a red number. Damage you deal to enemies is shown with an orange number. You will restore HP naturally over time, but this takes time you may not have in tense situations. To get a burst of HP sooner, you can use a healing item, either via Quick Heal or selecting a healing potion and pressing ⚒ Use / Attack. When you use a healing item, the amount healed will be shown as a green number.
 Mushrooms can be used to restore 15 health, but are rather ineffective and have much better uses as a material for
  Regeneration Potions or
  Lesser Healing Potions.
- Lesser Healing Potions can be obtained from Pots, Chests, crafted, or bought from the Merchant and they restore 50 health on use.
- Once you get
 Glowing Mushrooms, you can use them and Lesser Healing Potions to craft
  Healing Potions, which heal 100 health per use.
Note: Consumables like these give the ![]() Potion Sickness between uses. It prevents you from using any healing items for 30-70 seconds, so healing potions can't let you just ignore damage.
Potion Sickness between uses. It prevents you from using any healing items for 30-70 seconds, so healing potions can't let you just ignore damage.
Crafting Stations

While the Work Bench allows you to craft wooden items, ores need a ![]() Furnace to be smelted into bars and an
Furnace to be smelted into bars and an ![]() Anvil to process those bars. For the Furnace, mine at least 20 blocks of
Anvil to process those bars. For the Furnace, mine at least 20 blocks of ![]() Stone and craft these with Wood and Torches at a Work Bench to get a Furnace that you can then place down.
Stone and craft these with Wood and Torches at a Work Bench to get a Furnace that you can then place down.
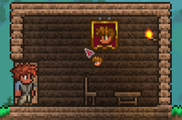
For the anvil, you need Iron or Lead Ore. Each world will only have one or the other, and they have the same uses. Search for oddly colored blocks like in the graphic to the right; these tend to be ore deposits. Once you mine 15 Iron or Lead, you can smelt them into ![]() Iron/
Iron/![]() Lead Bars at the Furnace and use these at a Work Bench to craft an Anvil, which you can then place down. This will let you craft Tools, Weapons, and Armor made from bars, which are stronger than their wooden counterparts.
Lead Bars at the Furnace and use these at a Work Bench to craft an Anvil, which you can then place down. This will let you craft Tools, Weapons, and Armor made from bars, which are stronger than their wooden counterparts.
If you have 50 in your inventory, you can also wait for the Merchant to arrive, who sells Iron Anvils for you to use.
Potions are a type of consumable with a variety of positive effects. You can find them naturally from the environment, or you can craft them from various common materials and ![]() Bottled Water. Potions are crafted at a Placed Bottle crafting station, which you can get by placing a
Bottled Water. Potions are crafted at a Placed Bottle crafting station, which you can get by placing a ![]() Bottle or
Bottle or ![]() Pink Vase on a Work Bench, Table, or Platform. You can find Bottles in chests across the surface, or smelt
Pink Vase on a Work Bench, Table, or Platform. You can find Bottles in chests across the surface, or smelt ![]() Sand from a nearby Desert into Glass and then into Bottles. Bottles can be crafted into Bottled Water at any body of water; doing this does not drain the water. A Pink Vase can instead be crafted using
Sand from a nearby Desert into Glass and then into Bottles. Bottles can be crafted into Bottled Water at any body of water; doing this does not drain the water. A Pink Vase can instead be crafted using ![]() Clay.
Clay.
Exploring
Now that you've created a base, it's time to start exploring the rest of the world. Terraria worlds generate with various different Biomes on the surface that extend into the underground, with the player starting in the Forest biome. Vertically, the world has different Layers, with more dangerous enemies and better loot spawning the deeper you go. Different Biomes serve as completely different environments with different enemy spawns, such as the Desert being made of Sand and spawning ![]() Vultures. More dangerous Biomes, such as the Jungle, also offer better loot to match.
Vultures. More dangerous Biomes, such as the Jungle, also offer better loot to match.
Let's say you explore your surface in search of other biomes. As you travel, it's worth it to break vegetation and see what you can get; each biome has some Herb that's used in Potion recipes, and you harvest them with any weapon. If you encounter enemies on the surface, you can try jumping over them, but this can be difficult depending on the enemy and terrain; platforms and solid blocks can be a great help in getting by enemies, with platforms especially letting you jump between trees. If you hold ⚒ Use / Attack, the platform or block will place as soon as your cursor is in a valid position, making it easier to place blocks as you're moving.
It's also worth it to check caves, at least for a while; ![]() Pots can hold valuable items for travel such as
Pots can hold valuable items for travel such as ![]() Rope, and
Rope, and ![]() Chests can hold a wide variety of useful items. If you see a chest, you can open it with ⚷ Open / Activate, and use Loot All to quickly get everything the chest holds. While the chest is open, it functions as an extended inventory, with you able to move items between chest slots and your own inventory slots. You can mine up empty chests to bring them back to your base as storage, or you can craft them with Wood and Iron/Lead Bars.
Chests can hold a wide variety of useful items. If you see a chest, you can open it with ⚷ Open / Activate, and use Loot All to quickly get everything the chest holds. While the chest is open, it functions as an extended inventory, with you able to move items between chest slots and your own inventory slots. You can mine up empty chests to bring them back to your base as storage, or you can craft them with Wood and Iron/Lead Bars.
You can also choose to follow a surface cave deeper or dig straight down, heading to the Underground and Cavern layers. It's safest to do this in the Forest or Snow biomes, with their weaker enemies. These layers have a lot of loot that you can't get on the surface, including better rewards from Pots, better Chest loot, and better Ores and Gems. Most important, however, are ![]() Life Crystals, which permanently increase your max health. Note, however, that the underground is naturally dark; you should use Torches and
Life Crystals, which permanently increase your max health. Note, however, that the underground is naturally dark; you should use Torches and ![]() Glowsticks to light the space around you and in front of you, so that you don't jump into an enemy you didn't see. Also notable are Traps, which are activated by stepping on
Glowsticks to light the space around you and in front of you, so that you don't jump into an enemy you didn't see. Also notable are Traps, which are activated by stepping on ![]() Pressure Plates and can easily kill the player.
Pressure Plates and can easily kill the player.
It's hard to get back to spawn after digging deep below the ground. If you have a ![]() Recall Potion or
Recall Potion or ![]() Magic Mirror, you can use that and teleport directly back home to organize your loot. Recall Potions can be found from Pots or Chests, while a Magic Mirror is found in chests or crafted. Failing that, dying can teleport you back to the surface, or you can leave and reenter the game.
Magic Mirror, you can use that and teleport directly back home to organize your loot. Recall Potions can be found from Pots or Chests, while a Magic Mirror is found in chests or crafted. Failing that, dying can teleport you back to the surface, or you can leave and reenter the game.
You can illuminate your surroundings using torches, either placing them down or having it selected to hold in your hand. Alternatively, certain weapons, such as ![]() Flaming Arrows, produce light when used, which can illuminate even hard-to-reach areas, or you can use Glowsticks or a
Flaming Arrows, produce light when used, which can illuminate even hard-to-reach areas, or you can use Glowsticks or a ![]() Flare Gun. This lets you see enemies to fight them more easily, marks the way back, and placed torches show where and how far you've gone if you come back to the same cave to explore further. If you have no Glowsticks or Flaming Arrows, you can throw single torches forward with T and they will fall down, lighting up areas below you.
Flare Gun. This lets you see enemies to fight them more easily, marks the way back, and placed torches show where and how far you've gone if you come back to the same cave to explore further. If you have no Glowsticks or Flaming Arrows, you can throw single torches forward with T and they will fall down, lighting up areas below you.
You'll also encounter ![]() Cobwebs, which slow down your movement before breaking. You can cut them down with any weapon or tool and then pick them up. Cobweb can be turned into
Cobwebs, which slow down your movement before breaking. You can cut them down with any weapon or tool and then pick them up. Cobweb can be turned into ![]() Silk at a
Silk at a ![]() Loom, a key ingredient to make a
Loom, a key ingredient to make a ![]() Bed, furniture used to change your spawn point. The Green Arrow on the Map will not disappear when you do this, but a bed icon will appear (Desktop, Console and Mobile versions). Silk can also make decorative items and vanity clothing, and cobwebs can be used to craft
Bed, furniture used to change your spawn point. The Green Arrow on the Map will not disappear when you do this, but a bed icon will appear (Desktop, Console and Mobile versions). Silk can also make decorative items and vanity clothing, and cobwebs can be used to craft ![]() Dangersense Potions(Desktop, Console, Old-gen console and Mobile versions) that let you see all traps from a safe distance.
Dangersense Potions(Desktop, Console, Old-gen console and Mobile versions) that let you see all traps from a safe distance.
While underground it is possible to come across pools of water. Torches do not work underwater, so you must use ![]() Glowsticks, but they cannot be crafted. You can throw them, but they will bounce and move around. You can craft
Glowsticks, but they cannot be crafted. You can throw them, but they will bounce and move around. You can craft ![]() Sticky Glowsticks by combining Gel with a Glowstick; these will stick to walls when thrown, making them easier to place. No matter which you use, however, glowsticks are not permanent when thrown, unlike placed torches. You get some Glowsticks from Pots, but you can also buy them from the Merchant at Night, for far cheaper than normal Torches.
Sticky Glowsticks by combining Gel with a Glowstick; these will stick to walls when thrown, making them easier to place. No matter which you use, however, glowsticks are not permanent when thrown, unlike placed torches. You get some Glowsticks from Pots, but you can also buy them from the Merchant at Night, for far cheaper than normal Torches.

The player sinks in water, and cannot swim by default. Jumping from water has decreased distance, torches don't work, and the player can drown. However, if the player has glowsticks, they can see underwater just fine, and it takes a while to begin drowning, which can be staved off with any air pocket. However, if you are close to running out of air, there is a way to regain air quickly. First either find a wall or make a small shaft at the bottom of the water, and then dig a tunnel in the wall and then upward in the ceiling. The water will not fill the upper squares. As the dug-out space is filled with air, you can jump into it to refill your breath meter.
If you see an area that glows blue and has blue mushrooms, congrats - you have found a Glowing Mushroom biome. This place is useful as it grows ![]() Glowing Mushrooms, a useful and common crafting material. When you return home, you can use a Placed Bottle crafting station to craft
Glowing Mushrooms, a useful and common crafting material. When you return home, you can use a Placed Bottle crafting station to craft ![]() Healing Potions out of
Healing Potions out of ![]() Lesser Healing Potions and those glowing mushrooms. They heal for twice as much as lesser healing potions do, and are the best healing items for the first half of the game, slightly weaker than
Lesser Healing Potions and those glowing mushrooms. They heal for twice as much as lesser healing potions do, and are the best healing items for the first half of the game, slightly weaker than ![]() Honeyfin but far more obtainable. As the biome is naturally well-lit even underground and has wide open spaces, it will often have multiple Chests and
Honeyfin but far more obtainable. As the biome is naturally well-lit even underground and has wide open spaces, it will often have multiple Chests and ![]() Life Crystals for you to loot.
Life Crystals for you to loot.
You may also encounter Gems embedded into a wall or in stone, or Gem Trees underground. The prior can be mined up using your pickaxe, while the latter is chopped down using your axe. These are valuable materials for Hooks, Gem staves and other equipment, and they sell for a lot of money as well. Any Gemcorns obtained can be planted again to get more Gem Trees later.
(Desktop, Console and Mobile versions) Rarely, a Fairy may spawn; they're friendly critters that will attempt to lead you to valuable treasure, providing light and reducing enemy spawns in the meantime.
Afterward
Now that you've learned how to play and survive, the best thing to do would be to simply continue playing, discovering new things on your own. If you do get stuck, find something you're unsure about, or simply want detailed information about one of your items, look up what you need on the wiki, or check out the wiki's Walkthrough. It may be handy to check the Armor or Weapons pages for info on what direction to head next. You might also want to look at the pages about the Bosses of the game so you know what your long term task will be. And remember, you can play the game your way, so don't feel bound by the information on this wiki.
Tips
- Most enemies cannot go through blocks. If you see an enemy heading towards you, you can place blocks in their way to protect yourself without having to kill them.
- You cannot go through blocks. This makes them a great alternative way to avoid dealing with traps or lava, as these can only affect players that are on the naturally generated ground.
- Platforms can be placed in a surprising number of locations, such as beside vines or stalactites. This gives the player a lot more freedom of movement, as they can land on and jump off of platforms as they go. Platforms are also twice as common as wood, as each wood crafts 2 platforms; you may want to use other block types, such as dirt or stone, for blocks, and use wood exclusively for platforms.
- Turning on Smart Cursor with Smart Cursor can help the player by letting tools and platforms function even if the cursor isn't on the exact right tile. Mining with Smart Cursor will create a path wide enough for the player to travel through, and placing platforms with Smart Cursor can create stairs to let the player smoothly move up with platforms.
- Exiting the game then re-entering the world will bring you to your spawn point.
- Despite not being their primary use, Gel and Fallen Stars can be stored as ammo in the inventory, saving space.
- If you want to take full advantage of Magic or Summon weapons, gathering fallen stars at night to craft Mana Crystals to increase your maximum mana is vital.
- If you want to take full advantage of Magic or Summon weapons, gathering fallen stars at night to craft
- If you find
 Sunflowers, place some around your house. It gives some helpful bonuses that can make surviving easier.
- One Sunflower provides the same benefits as ten; you can mine them quickly by mining the grass underneath them, then plant them as you go for movement and spawn rate buffs, or sell them for extra money.
- Campfires,
 Star in a Bottles, and
  Heart Lanterns can also provide great help where placed, although it's recommended to increase your health and mana to maximum before crafting Bottles or Lanterns.
- It's best to build your base close to the original Spawn point so you have less trouble returning to it at Night or if you respawn.
- You can use a Bed to position your base elsewhere, though your spawn point remains an easy place to build a base in.
- When digging deep, it's useful to leave a way back up. The easiest way would be to leave Platforms on a side of the passage as a makeshift ladder, or placing
 Ropes while digging the shaft.
 - Torches last forever so bring plenty along and place them liberally when going mining and exploring.
- Having torches which correspond with the inhabited biome (
 Bone Torches(Desktop, Console and Mobile versions) in the Forest) at base can help greatly, as having torches which match the home biome increases luck, which helps greatly with Enemy drops and damage.
- Having torches which correspond with the inhabited biome (
- Avoid the Corruption / Crimson early on as they contain tough enemies that will kill you.
- If you want an Anvil but do not want to use Bars or coins, you can find them in ruined houses underground.
- Placing NPCs in their favored biome and other liked NPCs can be an effective way to get discounts on goods; see NPCs/preferences for more details.
- Finding a Living Tree is an easy way to get a free NPC house by placing torches. Only works in pre-1.4 versions. 1.4 players may also find deadly gnomes. Leading them to an area without background walls during the day will turn them into objects, and will increase luck of nearby players.
- It is highly advisable to begin gathering materials for a few Buffs. You can quickly gather
 Sand and
  Dayblooms, as well as the
  Daybloom Seeds and
  Clay used to begin Gardening with
  Pots.
Pots.
- Placing a
 Bottle on a Work Bench will allow you to craft Potions while nearby, while Bottles for potion making can be filled when near water.
 - Two of the earliest buffs are the Regeneration Potion and the
 Ironskin Potion, and for the early game can significantly improve your survivability.
- Additionally,
 Shine and
  Night Owl Potions are easy to craft and help greatly with Underground exploration.
- Additionally,
- Placing a
- If you travel far enough into or past the Snow biome, you will eventually come across a dark brick-patterned structure known as the Dungeon. Entering before summoning and killing the Dungeon's boss Skeletron is highly advised against, as
 Dungeon Guardians will spawn and instantly kill you.
- On
 Old-gen console and
  versions, if you find your way into a Dungeon early there is a chance you can obtain a
  Water Bolt, a powerful early-game Magic Weapon.
- On
More information
For more advanced information, please check out the guides listed below.
- Crafting 101 - This is the introductory crafting guide. It contains a detailed explanation of how crafting works, and the ideal crafting station setup.
- NPCs - There are more NPCs than just the
 Guide that you'll want to make homes for.
 - Bases - How to create an effective home base.
- Mining techniques - This guide goes into detail on easy and efficient ways to mine ore, and what to expect when venturing deeper into Terraria.
- Gardening - How to grow gardens of Trees, Mushrooms, and other less savory things. This is a wonderful guide for learning how to properly organize and maintain a garden.
- List of weapons - All the weapons you might find on your travels will be explained here.
- PvP - A great place to start when looking for information on Player vs. Player combat. Not quite for beginners, however it's a great read for those who would like to study beforehand.
- Eye of Cthulhu Boss Fight - One of the Bosses a player might run up against early on in their worlds.
- King Slime boss fight - Another boss the player can encounter early game.
- List of Bosses - A list of all the Bosses players will come in contact with in their worlds. Bosses are powerful monsters that have a lot of health and do devastating damage to the unprepared.
- Practical tips - Some tips for all skill levels of players
All guides have the following list of Guide pages, such as below, that you can use to move between guides very quickly. Use those if you want to learn more things.