Guide:Walkthrough
When progressing through Terraria, many players can be confused about where they should go and what they should do next. Terraria is an open-ended game: Players are not forced to go anywhere or do anything. You are free to set your own goals and follow through with them, whether you are a builder, fighter, explorer, collector, or whatever else. This walkthrough merely aims to provide a logical order of progression through Terraria’s many different biomes, generally in order of increasing difficulty. It is recommended, but there is certainly no requirement to visit each biome, or even in this order if you don't want to.
If you are new to the game or unsure of what map size to choose for a fresh start, choose small. Even in a small world, a player can face long travel times, and it would still take hundreds of hours to explore every cave in a small world at a normal pace. If you're looking for a balanced experience and/or are already experienced in the game, choose a medium sized world, as it has more opportunities for exploration and loot but still allows for quick exploration. Large is suitable for long-term playthroughs or multiplayer games, providing the most space and opportunities for loot, but is not recommended for a new player.
Starting Out
On the creation of a new world, a helpful NPC (Non Player Character) will spawn, and he is called the ![]() Guide. If you are new to Terraria, then chat with him and he will give you advice on different elements of your world based on what stage of the game you're at. Even if you are already quite experienced with the game, it is still a good idea to keep him around as he displays all available crafting recipes when he's given an item. He's also required for game progression, as he is needed to summon the Wall of Flesh far later in the game.
Guide. If you are new to Terraria, then chat with him and he will give you advice on different elements of your world based on what stage of the game you're at. Even if you are already quite experienced with the game, it is still a good idea to keep him around as he displays all available crafting recipes when he's given an item. He's also required for game progression, as he is needed to summon the Wall of Flesh far later in the game.
New players will almost always spawn in the Forest biome.
Starting equipment
 Green Slime
 Blue Slime
 Purple Slime
 Pinky(rare)
 Goblin Scout(only on outer thirds of world)
 Gel
Gel Pink Gel(Desktop, Console and Mobile versions)(rare)
 Slime Staff(extremely rare)
 Tattered Cloth
 Blowpipe
 Grenade
 Shuriken
 Spear
Spear Throwing Knife
 Umbrella(only weapon on (Desktop, Console and Mobile versions))
 Wand of Sparking(Desktop, Console and Mobile versions)
 Wooden Arrow
 Wooden Boomerang
 Aglet
Aglet Climbing Claws
 Guide to Plant Fiber Cordage(Desktop, Console and Mobile versions)
 Radar(Desktop, Console and Mobile versions)
 Step Stool(Desktop, Console and Mobile versions)
 Can Of Worms(Desktop, Console and Mobile versions)
 Herb Bag(Desktop, Console and Mobile versions)
 Glowstick
 Rope
Rope Copper Bar
 Tin Bar
 Iron Bar
 Lead Bar
 Lesser Healing Potion
 Recall Potion
 Builder Potion(Desktop, Console, Old-gen console and Mobile versions)
 Ironskin Potion
 Mining Potion(Desktop, Console, Old-gen console and Mobile versions)
 Night Owl Potion
 Shine Potion
 Swiftness Potion
 Sunflower Minecart(Desktop, Console and Mobile versions)
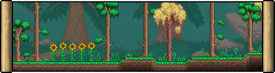
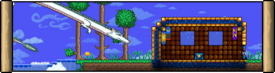
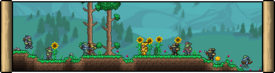
The landscape of a forest includes lots of grass, plenty of trees, several lakes ranging from small to large and, sometimes, Sunflowers. Dayblooms and Pumpkins (the latter of which is Halloween exclusive) can be found growing in this biome. During the day, this biome has the weakest monsters in the game, with peaceful slimes jumping towards the player and only attacking once provoked. Note that Goblin Scouts only spawn in the outer thirds of the map and that Pinkies are fairly rare.
Occasionally, you'll find surface Chests which have some valuable loot in them, ranging from early-game buff and healing potions to mobility accessories to simple weapons.
Beginning
Your goal during the day should be to find some better starting equipment from your surroundings and build a small house to pass the night. Players might want to build sets of 3 houses to house later NPCs without having to worry later. (Desktop, Console and Mobile versions) Give the sets some distance to keep the NPCs happy.
The first thing players should do is cut down several trees (using your ![]() Copper Axe, aim for the lowest block), as wood is needed for many things, then build a
Copper Axe, aim for the lowest block), as wood is needed for many things, then build a ![]() Work Bench. From there, craft a
Work Bench. From there, craft a ![]() Wooden Sword, and perhaps a
Wooden Sword, and perhaps a ![]() Wooden Bow, (alongside some
Wooden Bow, (alongside some ![]() Wooden Arrows which players can soon upgrade to
Wooden Arrows which players can soon upgrade to ![]() Flaming Arrows for extra damage) as a player's starting weapons are next to useless.
Flaming Arrows for extra damage) as a player's starting weapons are next to useless.
One major exception is if you're playing Journey Mode(Desktop, Console and Mobile versions) (a 1.4.0.1(Desktop, Console and Mobile versions)-exclusive game mode), in which you'll start out with some better equipment – you'll have Iron instead of Copper starting tools along with a ![]() Finch Staff(Desktop, Console and Mobile versions) (a weak early game summon weapon), 100
Finch Staff(Desktop, Console and Mobile versions) (a weak early game summon weapon), 100 ![]() Rope and
Rope and ![]() Torches (very useful for exploration),
Torches (very useful for exploration), ![]() Fledgling Wings(Desktop, Console and Mobile versions), a
Fledgling Wings(Desktop, Console and Mobile versions), a ![]() Grappling Hook, and a
Grappling Hook, and a ![]() Magic Mirror. You'll also have many more powers over your gameplay experience, ranging from time control to item duplication, which are further explained in the main Journey Mode article.
Magic Mirror. You'll also have many more powers over your gameplay experience, ranging from time control to item duplication, which are further explained in the main Journey Mode article.
Next, players should explore their surroundings. There are usually some ![]() Chests and
Chests and ![]() Pots on or near the surface near your starting point, which will often contain useful weapons, potions and materials. If you are lucky (a (Desktop, Console and Mobile versions) 10%/ (Old-gen console and 3DS versions) 12.5% chance per chest), you’ll find a Spear, which is one of the best starting weapons, especially against Zombies, which are the biggest threat at this point. If you can find enough
Pots on or near the surface near your starting point, which will often contain useful weapons, potions and materials. If you are lucky (a (Desktop, Console and Mobile versions) 10%/ (Old-gen console and 3DS versions) 12.5% chance per chest), you’ll find a Spear, which is one of the best starting weapons, especially against Zombies, which are the biggest threat at this point. If you can find enough ![]() Cobwebs near the surface (you'll need 20), you can also make a
Cobwebs near the surface (you'll need 20), you can also make a ![]() Wooden Yoyo(Desktop, Console and Mobile versions), which is finicky, but a solid starting weapon. There will also almost always be at least one cave entrance close by, leading Underground signified by a massive domed hill with a cave entrance on one of the sides. Use
Wooden Yoyo(Desktop, Console and Mobile versions), which is finicky, but a solid starting weapon. There will also almost always be at least one cave entrance close by, leading Underground signified by a massive domed hill with a cave entrance on one of the sides. Use ![]() Ropes and
Ropes and ![]() Platforms to reach high ledges, bridge chasms, and safely descend. The
Platforms to reach high ledges, bridge chasms, and safely descend. The ![]() Step Stool(Desktop, Console and Mobile versions) accessory, found in surface Chests, allows you to press the UP to increase your block placing range and jump height. Holding the
Step Stool(Desktop, Console and Mobile versions) accessory, found in surface Chests, allows you to press the UP to increase your block placing range and jump height. Holding the ![]() Umbrella tool (which is also a large shortsword on the
Umbrella tool (which is also a large shortsword on the ![]() Desktop version,
Desktop version, ![]() Console version, and
Console version, and ![]() Mobile version) allow for very slow fall, easing cave exploration early on. Always carry blocks around with you so you can descend safely!
Mobile version) allow for very slow fall, easing cave exploration early on. Always carry blocks around with you so you can descend safely!
Once you have explored your surroundings and cracked open all the chests and pots in sight, you should head to the Underground before night falls to continue your search for useful items and resources. At this point it's likely you've found enough bars (mostly ![]() Iron or
Iron or ![]() Lead Bars) in Surface Chests and small pockets of ore that you'll be able to craft yourself an
Lead Bars) in Surface Chests and small pockets of ore that you'll be able to craft yourself an ![]() Anvil and possibly some starter ore weapons, which will make adventuring a bit easier.
Anvil and possibly some starter ore weapons, which will make adventuring a bit easier.
16.6% every day (approx. every six days)
24 in-game hours (24 real minutes)
 Fries(Desktop, Console and Mobile versions)
 Rain Song(Desktop, Console and Mobile versions)
 Umbrella Hat
 Rain Hat
 Rain Coat
Rain occurs randomly and affects all surface biomes for its duration. Most enemies are only visually different from the normal enemies. The Flying Fish and Umbrella Slime spawn during the day, mimicking the general behavior of the Demon Eye and Slimes, respectively. When a player is in a Snow biome during Rain, it appears as a Blizzard, though this doesn't provide any exclusive loot until Hardmode. If Rain happens at the same time as a Windy Day(Desktop, Console and Mobile versions) it appears as a Thunderstorm(Desktop, Console and Mobile versions) with exclusive music.
Effects of rain:
- +20% Fishing Power while rain is active, regardless of location.
 Waterleaf blooms, meaning mining it up will can also drop
  seeds which can be replanted.
- Increased frequency of
 Worms in Forest biomes.
 - Town NPCs will remain in their houses as if it were night.
When wind reaches 20 miles per hour
Until wind drops to or below 16 miles per hour
 Angry Dandelion(Desktop, Console and Mobile versions)
 Windy Balloon(Desktop, Console and Mobile versions)
 Daybloom
 Paper Airplane(Desktop, Console and Mobile versions)
 White Paper Airplane(Desktop, Console and Mobile versions)
 Kites(Desktop, Console and Mobile versions)
Windy Days occur when the wind speed reaches over 20 miles per hour and end when it drops to or below 16. It is indicated by background objects such as banners, trees, and vines swaying in the direction of the wind, with upbeat background music replacing the regular music. Though the event is mostly aesthetic, with objects in the background and unique NPC quotes, there are some unique changes: ![]() Angry Dandelions(Desktop, Console and Mobile versions) will sometimes spawn, firing dangerous dandelion seeds in the direction of the wind. These can kill the player in one hit, but they also can only attack to one side of them, making them easy to kill if the player is on the opposite side of the wind direction. Additionally, Slimes will spawn drifting on Windy Balloons. Slimes and a variety of other enemies have a small chance of dropping exclusive
Angry Dandelions(Desktop, Console and Mobile versions) will sometimes spawn, firing dangerous dandelion seeds in the direction of the wind. These can kill the player in one hit, but they also can only attack to one side of them, making them easy to kill if the player is on the opposite side of the wind direction. Additionally, Slimes will spawn drifting on Windy Balloons. Slimes and a variety of other enemies have a small chance of dropping exclusive ![]() Kites(Desktop, Console and Mobile versions) when this event is active, which can be flown in the wind.
Kites(Desktop, Console and Mobile versions) when this event is active, which can be flown in the wind.
![]() Ladybugs(Desktop, Console and Mobile versions), used to craft
Ladybugs(Desktop, Console and Mobile versions), used to craft ![]() Luck Potions(Desktop, Console and Mobile versions), spawn in clusters frequently near towns and are very useful to catch to make farming in the game easier. Touching them (before catching them) will also give an invisible but useful luck bonus for several minutes. Be warned not to accidentally kill them with stray projectiles, as they inflict a negative luck penalty on the player.
Luck Potions(Desktop, Console and Mobile versions), spawn in clusters frequently near towns and are very useful to catch to make farming in the game easier. Touching them (before catching them) will also give an invisible but useful luck bonus for several minutes. Be warned not to accidentally kill them with stray projectiles, as they inflict a negative luck penalty on the player.
If Rain happens at the same time as a Windy Day it appears as a Thunderstorm with exclusive music and visuals.
9 in-game hours (9 real minutes)
 Iron or
  Lead Broadsword,
 Iron or
  Lead Bow(with
  Flaming Arrows),
- Spear,
 Wooden Yoyo(Desktop, Console and Mobile versions),
- Throwing Knife,
- Shuriken
- Grenade
- Wand of Sparking(Desktop, Console and Mobile versions)
Night will fall at 7:30 PM, 11 minutes and 15 seconds after you enter your world for the first time. It is signified by an obviously dark sky and a change in music. Slimes will stop spawning and those that are left from the daytime will become hostile, seeking out players to attack. In addition, two new enemies will spawn: Demon Eyes, a flying enemy which chases players, bounces off blocks, and turns slowly, often linger around. Zombies also spawn, which will follow a basic pattern of slowly walking towards the player in hordes.
Night has multiple effects on gameplay:
 Fallen Stars will randomly fall from the sky with a glowing animation, and can be picked up by the player and crafted into a variety of things. Note that these disappear after sunrise.
 Moonglow will bloom.
- Town NPCs sell a variety of new items, such as the
 Arms Dealer selling
  Illegal Gun Parts.
 - Town NPCs will remain in their houses and no new ones will move in.
- (Desktop, Console and Mobile versions) Unique music exclusive to night in that respective biome will play in the Jungle, Ocean, and Space.
Additionally, on the ![]() Desktop version,
Desktop version, ![]() Console version, and
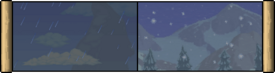
Console version, and ![]() Mobile version, two additional peaceful events can occur at Night. The Meteor Shower has a 1 in 10 chance of occurring each night and will show stars falling in the background. It's accompanied by 200% to 400% increased
Mobile version, two additional peaceful events can occur at Night. The Meteor Shower has a 1 in 10 chance of occurring each night and will show stars falling in the background. It's accompanied by 200% to 400% increased ![]() Fallen Star rates and
Fallen Star rates and ![]() Enchanted Nightcrawler(Desktop, Console and Mobile versions) critters, which make for great bait early on, will spawn naturally. Lantern Nights, which feature lanterns floating up into the sky in the background, will also occur the night after defeating a boss or event, increasing the player's Luck.
Enchanted Nightcrawler(Desktop, Console and Mobile versions) critters, which make for great bait early on, will spawn naturally. Lantern Nights, which feature lanterns floating up into the sky in the background, will also occur the night after defeating a boss or event, increasing the player's Luck.
It is recommended to stay Underground (or inside your House if you built it) during night time until you are strong enough to deal with Zombie packs, as there is little to be gained and so much to lose for a new character during night. If you find yourself outside without a base to hide in or a cave to go down, you can simply build a box around yourself to hide for the night. A two-block wide hole on either side of the box should be enough for you to attack Zombies and gain some starter gear and money, but Zombies can not attack you through that hole. If you're not used to playing Sandbox building/mining games, it is easy to forget your greatest ability: the power to move blocks.
![]() Fallen Stars will often be found shooting down from the sky (and are even more common during Meteor Showers(Desktop, Console and Mobile versions)) and are some of the most useful crafting materials at the beginning of the game.
Fallen Stars will often be found shooting down from the sky (and are even more common during Meteor Showers(Desktop, Console and Mobile versions)) and are some of the most useful crafting materials at the beginning of the game. ![]()
![]()
![]()
![]() 5 /
5 / ![]() 3 can be used to craft a
3 can be used to craft a ![]() Mana Crystal, which increases the player's maximum mana by 20 upon each usage until the player reaches their maximum attainable base mana at 200. This is very useful once you've obtained magic weapons, and is a good pairing with the
Mana Crystal, which increases the player's maximum mana by 20 upon each usage until the player reaches their maximum attainable base mana at 200. This is very useful once you've obtained magic weapons, and is a good pairing with the ![]() Wand of Sparking(Desktop, Console and Mobile versions) if you happen to find it in surface Chests. As an alternative, they can be turned into
Wand of Sparking(Desktop, Console and Mobile versions) if you happen to find it in surface Chests. As an alternative, they can be turned into ![]() Jester's Arrows, which are some of the best arrows you can obtain at this stage of the game – they pierce infinitely and are unaffected by gravity, making them invaluable for fighting against hoardes of Zombies or against enemies Underground.
Jester's Arrows, which are some of the best arrows you can obtain at this stage of the game – they pierce infinitely and are unaffected by gravity, making them invaluable for fighting against hoardes of Zombies or against enemies Underground.
As for other quickly accessible weapons, the ![]() Spear, occasionally found in surface Chests, can shred groups of Zombies and makes close-range fighting quite easy. The
Spear, occasionally found in surface Chests, can shred groups of Zombies and makes close-range fighting quite easy. The ![]() Wooden Boomerang is useful if you master how to use it, and can be further upgraded into the more powerful
Wooden Boomerang is useful if you master how to use it, and can be further upgraded into the more powerful ![]() Enchanted Boomerang by combining it with a
Enchanted Boomerang by combining it with a ![]() Fallen Star (note that this crafting recipe is only available on the
Fallen Star (note that this crafting recipe is only available on the ![]() Desktop version,
Desktop version, ![]() Console version, and
Console version, and ![]() Mobile version).
Mobile version).
There are some valuable mob drops you can find at night. Zombies have a 2% chance of dropping the ![]() Shackle, one of the earliest available accessories. It'll provide you with plus one defense point, which may not seem valuable, but it can still lend a helpful reduction to enemy damage and can drop with a modifier further increasing its defense. Additionally, Zombies can also drop the
Shackle, one of the earliest available accessories. It'll provide you with plus one defense point, which may not seem valuable, but it can still lend a helpful reduction to enemy damage and can drop with a modifier further increasing its defense. Additionally, Zombies can also drop the ![]() Zombie Arm, a sword with stats comparable to that of the
Zombie Arm, a sword with stats comparable to that of the ![]() Tungsten Broadsword, making it a very feasible starter weapon. Demon Eyes will regularly drop
Tungsten Broadsword, making it a very feasible starter weapon. Demon Eyes will regularly drop ![]() Lenses, a material which has a variety of uses, and have a rare chance of dropping the
Lenses, a material which has a variety of uses, and have a rare chance of dropping the ![]() Black Lens, which will be useful much later on.
Black Lens, which will be useful much later on.
Once the sun rises and morning arrives at 4:30 AM, Night will end, causing Demon Eyes and Zombies to flee and the day to begin once again. At this point you'll be able to explore the world more – your first priority should be to find an entrance to a cave to obtain more loot and become more powerful.
Going Underground
- Iron or Lead Broadsword,
- Iron or Lead Bow,
- Spear,
- Wooden Yoyo(Desktop, Console and Mobile versions),
- Throwing Knives,
- Shurikens
- Grenades
- Wand of Sparking(Desktop, Console and Mobile versions)
 Flare Gun
- Shuriken
- Throwing Knife
 Mace(Desktop, Console and Mobile versions)
 Magic Mirror
 Extractinator
 Angel Statue
- Rope
 Bomb
Bomb- Iron Bar
- Lead Bar
 Silver Bar
 Tungsten Bar
- Wooden Arrow
 Torch
Torch- Lesser Healing Potion
 Gravitation Potion
 Featherfall Potion
- Shine Potion
- Night Owl Potion
- Swiftness Potion
 Archery Potion
 Gills Potion
 Hunter Potion
- Mining Potion(Desktop, Console, Old-gen console and Mobile versions)
 Dangersense Potion(Desktop, Console, Old-gen console and Mobile versions)
- Recall Potion
- Gel
- Pink Gel(Desktop, Console and Mobile versions)
- Slime Staff(extremely rare)
- Glowstick
 Jellyfish Necklace(rare)
 Whoopie Cushion(rare)
 Suspicious Looking Apple(3DS version)
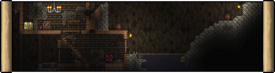
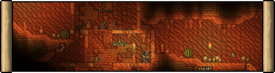
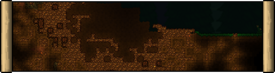
The Underground can be identified by its background. It is the first layer below the surface. Copper/Tin and Iron/Lead deposits can be found in this layer as well as Silver/Tungsten and Gold/Platinum, though infrequently.
The short depth of this layer (particularly on small worlds), combined with its limited rewards, means you will probably not be spending too much time here before moving on to the more lucrative Caverns. Copper/Tin is highly abundant, but experienced players can skip them by farming cactus or ebon/shadewood equipment.
While exploring the Underground (and, by extension, the Caverns), you might find ![]() Life Crystals: you can mine and use them to increase your maximum life by 20 (up to a maximum of 400). You can also stockpile Life Crystals and use them to craft
Life Crystals: you can mine and use them to increase your maximum life by 20 (up to a maximum of 400). You can also stockpile Life Crystals and use them to craft ![]() Heart Lanterns, which increases life regeneration as long as you stay near to it. It's critical that you increase your max life, as it significantly boosts your survivability. That said, your first few crystals will also unlock various events: The first unleashes Blood Moons, the third allows Slime Rains, and the fifth allows the Eye of Cthulhu to spawn. It may be wise not to use the first crystal until you have Iron/Lead or better armor, and to hold off on the fifth until you have Gold/Platinum armor.
Heart Lanterns, which increases life regeneration as long as you stay near to it. It's critical that you increase your max life, as it significantly boosts your survivability. That said, your first few crystals will also unlock various events: The first unleashes Blood Moons, the third allows Slime Rains, and the fifth allows the Eye of Cthulhu to spawn. It may be wise not to use the first crystal until you have Iron/Lead or better armor, and to hold off on the fifth until you have Gold/Platinum armor.
Once you have increased your maximum life by by 40 or more and have some speed enhancements like boots, it may be a good idea to clear out an area in the Underground near your base/spawn point and learn about strategies against the Torch God. The reason for this is luck, a very complex hidden calculation that is often impacted by what type of torches you put down as you move into which biome. With the resulting Torch God's Favor you can just keep placing regular torches and they will automatically be turned into the appropriate biome's type, increasing your luck rather than decreasing it. Luck affects loot drops, rare NPC spawns, damage, and fishing in complicated ways.
Iron broadsword or equivalent, Iron bow or equivalent, Wooden Yoyo or any of the surface Chest weapons.
 Black Slime
 Mother Slime
 Giant Worm
 Skeleton
 Cave Bat
 Tim
Tim Lost Girl
- Pinky
 Cochineal Beetle
 Blue Jellyfish
 Piranha
 Wall Creeper
 Undead Miner/
 Vampire Miner(Old-gen console and 3DS versions)
And only two of these three enemies can spawn in any given world:
 Salamander(Desktop, Console and Mobile versions)
 Crawdad(Desktop, Console and Mobile versions)
 Giant Shelly(Desktop, Console and Mobile versions)
- Slime Staff
 Bone Sword
 Chain Knife
 Rally(Desktop, Console and Mobile versions)
- Jellyfish Necklace
 Compass(Desktop, Console, Old-gen console and Mobile versions)
 Depth Meter
 Metal Detector(Desktop, Console and Mobile versions)
- Gel
- Whoopie Cushion
- Suspicious Looking Apple(3DS version)
 Hook
Hook Skull
Skull Bone (3DS version)
 Vial of Blood(Old-gen console and 3DS versions)
- Pink Gel(Desktop, Console and Mobile versions)
 Dart Trap
 Boulder
 Explosives
 Enchanted Sword
 Terragrim(Desktop, Console and Mobile versions)
- Underground Chest contents
 Lava Charm
 Wolf Fang(Old-gen console and 3DS versions)
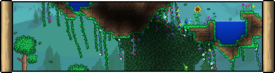
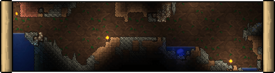
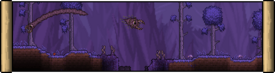
The Caverns can be identified by their background. It is the second layer below the surface and is by far the largest pre-hardmode biome. The Caverns are divided into two halves. In the top half, lakes of water are found, while in the bottom half, lava is found instead. All pre-hardmode ores except Hellstone and Meteorite ore can be found frequently in this layer (Demonite Ore or Crimtane Ore rarely). Caves of ![]() Glowing Mushrooms can also be encountered.
Glowing Mushrooms can also be encountered.
The Caverns are a massive biome with many useful items and treasures, and as such, players may find themselves spending a lot of time here. Although its monsters can be dangerous for a new player, the greatest threat in this layer may be the danger of falling into its deep chasms, frequently with the aid of the bats. Should you find yourself falling to death, don’t forget there are a number of items that can break your fall: ![]() Cloud in a Bottle's (or equivalents) extra jump, Grappling any surface (with a
Cloud in a Bottle's (or equivalents) extra jump, Grappling any surface (with a ![]() Grappling Hook), including the ground you’re about to hit, or even an
Grappling Hook), including the ground you’re about to hit, or even an ![]() Umbrella. Pools of water (1+ block deep) and Cobwebs will also save you if you’re lucky enough to fall into them.
Umbrella. Pools of water (1+ block deep) and Cobwebs will also save you if you’re lucky enough to fall into them.
This ever-present danger is closely followed by the devious and near-invisible traps sprinkled throughout the dark caves. A bold, fearless new player skipping heedlessly through the caves for the first time will quickly meet with a ![]() Boulder landing on their head, or even, a landmine powerful enough to destroy the surrounding terrain. These dangers can be fatal to Hardcore characters. Needless to say, tread with extreme caution, and take advantage of the
Boulder landing on their head, or even, a landmine powerful enough to destroy the surrounding terrain. These dangers can be fatal to Hardcore characters. Needless to say, tread with extreme caution, and take advantage of the ![]() Dangersense Potion(Desktop, Console, Old-gen console and Mobile versions). Using generous amounts of light sources is one of the best ways to mitigate both of these dangers. The
Dangersense Potion(Desktop, Console, Old-gen console and Mobile versions). Using generous amounts of light sources is one of the best ways to mitigate both of these dangers. The ![]() Flare Gun,
Flare Gun, ![]() Mining Helmet, and
Mining Helmet, and ![]() Shine Potions can prove useful additions to the usual sources. Skeleton Merchants may show up, who can sell a plethora of exploration and lighting tools such as
Shine Potions can prove useful additions to the usual sources. Skeleton Merchants may show up, who can sell a plethora of exploration and lighting tools such as ![]() Bone Arrow(Desktop, Console and Mobile versions), Torches,
Bone Arrow(Desktop, Console and Mobile versions), Torches, ![]() Spelunker Glowstick(Desktop, Console and Mobile versions), and more.
Spelunker Glowstick(Desktop, Console and Mobile versions), and more.
Although there are many helpful items to be collected in this layer, probably at the top of the list will be a ![]() Grappling Hook and a
Grappling Hook and a ![]() Magic Mirror. Both of them will make getting around much easier and faster. Fortunately, with the Gem hooks, it is trivial to craft one, and Magic Mirrors are also very common. Besides these two, a player may want to craft a
Magic Mirror. Both of them will make getting around much easier and faster. Fortunately, with the Gem hooks, it is trivial to craft one, and Magic Mirrors are also very common. Besides these two, a player may want to craft a ![]() Gem Staff, as they tend to outclass most other weapons at this stage of the game, limited by the number of stars you’ve managed to collect so far.
Gem Staff, as they tend to outclass most other weapons at this stage of the game, limited by the number of stars you’ve managed to collect so far.
Note that should you descend too far, you will actually find yourself in the Underworld. This will be marked by a change in music and background, and its enemies will start spawning, which you probably won’t want to face at this stage.
A quick note on weapons and armor: at this stage, you have a lot of choices of Ore-based weapons and armor that you can craft. It is entirely feasible to be constantly upgrading your weapons if you desire, as they don’t cost much. The ![]() Iron Broadsword, for example, only costs 8 Iron Bars – 24 iron ore – which is about one to three ore veins. Armor is a different question. Because of set bonuses, it is wise to try and complete an armor set rather than mixing and matching different pieces. Because of how Defense works, there isn’t a huge benefit from upgrading from one armor set to the next. The Copper armor set, for example, reduces damage taken by 3, Iron armor reduces damage by 5, so the difference in damage reduction is only 2, which is barely noticeable. Yet to complete the Iron armor set requires 225 ore, which represents a significant amount of mining time.
Iron Broadsword, for example, only costs 8 Iron Bars – 24 iron ore – which is about one to three ore veins. Armor is a different question. Because of set bonuses, it is wise to try and complete an armor set rather than mixing and matching different pieces. Because of how Defense works, there isn’t a huge benefit from upgrading from one armor set to the next. The Copper armor set, for example, reduces damage taken by 3, Iron armor reduces damage by 5, so the difference in damage reduction is only 2, which is barely noticeable. Yet to complete the Iron armor set requires 225 ore, which represents a significant amount of mining time.
It is therefore recommended to mine Silver or Tungsten Ores for the Armor because they are good enough to take on the first bosses, it's significantly faster to complete than Gold or Platinum, and allows you to save the latter for Weapons and Tools.
Building a Base

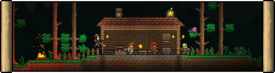
Once you’ve filled your inventory with blocks and loot, you may want to consider starting to build a base, as now you have some building materials and money to buy things. A base can take anywhere from a single in-game day to more than an in-game week to complete, depending on the player's tastes. It is not necessary, however, to build the entire base right away. Waiting to build the majority of the base can be advantageous, as it will allow the player to use the large stores of blocks they will end up gathering as a by-product of mining. Regardless of when or what the player builds, it is recommended to build houses for the Guide, Merchant and Nurse, craft a ![]() Campfire, and an area for storage and crafting before progressing. It is also wise to create a layout that can be easily added onto later as more NPCs are available and more storage is needed.
Campfire, and an area for storage and crafting before progressing. It is also wise to create a layout that can be easily added onto later as more NPCs are available and more storage is needed.
You should have at least the following in your base before moving on:
- Of course, houses for the Guide, Merchant and Nurse, as well as a valid empty house or two for other NPCs.
- Several organized chests for item storage. You don't want to have a cluttered inventory every time you leave your base.
- A campfire and sunflowers, both of which provide helpful buffs to those nearby. (Sunflowers also block the spread of Corruption and Crimson until hardmode, if you happen to have such biomes near your base.)
- A crafting room, preferably with a chest or two in it to store crafting materials. Eventually, you're going to want a unified place for all your crafting needs. By now, you'll have a
 Work Bench, a
  Bottle on that Work Bench, a
  Chair next to it, a
  Furnace, an
  Iron/
Iron/ Lead Anvil, and probably a
  Sawmill and a
  Loom. A Chair and a Table adjacent to each other will serve as a crafting station for Watches. You should also leave some space for later-game crafting stations and more chests, but with just this setup, you'll be able to craft anything up to this point, from swords to robes to potions and building blocks.
If you die a lot, consider using the tombstones produced to make a flat, spread-out tree-free graveyard. If easily accessible early on it is a simple way to check regularly for Abigail's Flower which is a powerful early summon. The Ecto Mist in a graveyard is also needed to forge a Gravedigger's Shovel which can speed up digging immensely. Try to distance the graveyard slightly from the rest of the base area, as nighttime enemies can spawn at anytime in graveyards, as can other powerful enemies.
A Traveling Merchant will show up fairly early in game and sells many useful items, some of which are crucial for each class. Also, look out for the food items Pad Thai and Pho early on. Note that the merchant will despawn if you leave the game world and depart at 6:00 PM, so if you are far from him, you have to use a Recall Potion or leg it if you want the goods.
Beyond the Forest
Once the player obtains strong enough weapons many mid-tier biomes open up. These biomes contain crafting materials as well as other treasures.
Starting equipment
 Ice Slime
 Frozen Zombie (Desktop, Console and Mobile versions) / Zombie Eskimo (Old-gen console and 3DS versions)
- Gel
- Slime Staff
 Snow Hood(Desktop, Console and Mobile versions) / Eskimo Hood (Old-gen console and 3DS versions)
 Snow Coat(Desktop, Console and Mobile versions) / Eskimo Coat (Old-gen console and 3DS versions)
 Snow Pants(Desktop, Console and Mobile versions) / Eskimo Pants (Old-gen console and 3DS versions)
 Shackle
 Zombie Arm
 Snow Block
 Ice Block
 Boreal Wood(Desktop, Console, Old-gen console and Mobile versions)
 Shiverthorn(Desktop, Console, Old-gen console and Mobile versions)
 Shiverthorn Seeds(Desktop, Console, Old-gen console and Mobile versions)
 Atlantic Cod
 Frost Minnow
 Marshmallow
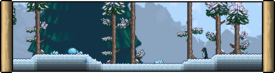
Your spawning location will often be close to or sometimes even in the Snow biome. This biome will always lie opposite the Jungle in a world, and on the same side as the Dungeon. This biome offers similar challenges and rewards to the Forest biome.

- Chain Knife
- Depth Meter
 Snowball Launcher
- Compass(Desktop, Console, Old-gen console and Mobile versions)
- Gel
- Slime Staff
- Hook
 Viking Helmet
- Bomb
 Mining Helmet
 Mining Shirt
 Mining Pants
 Bone Pickaxe
 Cyan Husk(Desktop, Console, Old-gen console and Mobile versions)
- Metal Detector(Desktop, Console and Mobile versions)
 Flinx Fur(Desktop, Console and Mobile versions)
 Ice Boomerang
 Ice Blade
 Ice Skates
 Snowball Cannon
 Blizzard in a Bottle
 Flurry Boots
- Extractinator
 Ice Machine(Desktop, Console, Old-gen console and Mobile versions)
 Ice Mirror(Desktop, Console and Mobile versions)
 Fish
Fish
The Ice biome can be reached from the surface Snow, or from the Caverns, although sometimes there is no natural entrance from one or both. It ends where the lava layer begins. It is somewhat harder than the Caverns. Though there may not be a large quantity of ores or gems in this biome, it is still worth exploring for its unique loot. Note that ![]() Frozen Chests are less common than Gold Chests and it can take a lot of exploring to find all the unique loot. However, you should be wary of the thin ice pockets scattered throughout the biome to avoid a fall to your death.
Frozen Chests are less common than Gold Chests and it can take a lot of exploring to find all the unique loot. However, you should be wary of the thin ice pockets scattered throughout the biome to avoid a fall to your death.
Wooden Sword, Spear, Any thrown weapon (![]()
![]()
![]() )
)
 Antlion
 Albino Antlion(Old-gen console and 3DS versions)
 Antlion Swarmer(Desktop, Console and Mobile versions)
 Antlion Charger(Desktop, Console and Mobile versions)
 Vulture
 Sand Slime(Desktop, Console and Mobile versions)
 Antlion Larva(Desktop, Console and Mobile versions)
 Giant Antlion Swarmer(Desktop, Console and Mobile versions)
 Giant Antlion Charger(Desktop, Console and Mobile versions)
 Tomb Crawler(Desktop, Console and Mobile versions)
 Antlion Mandible
 Mandible Blade(Desktop, Console and Mobile versions)
- Gel
- Slime Staff
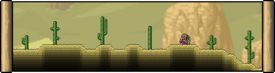
The monsters in the Desert are weak and can be easily dealt with using ranged weapons, although Antlions, Vultures and (Desktop, Console and Mobile versions) Antlion Swarmers may present a moderate challenge. If you visit it, you can craft equipment from cactus, which is slightly stronger than Wooden equipment.
One of them will contain an entrance to the Underground Desert, which is a large deep hole. If you're standing on the edge of this entrance, a monster may cause you to fall, so be careful. You can prevent this by building a bridge.
If you are lucky, Deserts may contain a Pyramid, either sticking slightly out of the sand or buried just underneath. Digging down through the Pyramid's sandstone walls will bring you to a chamber with a chest which may contain a ![]() Flying Carpet or
Flying Carpet or ![]() Sandstorm in a Bottle, both very useful accessories, and you're guaranteed to gain a least a few gold coins from the chest, money sacks, and pots in the temple chamber.
Sandstorm in a Bottle, both very useful accessories, and you're guaranteed to gain a least a few gold coins from the chest, money sacks, and pots in the temple chamber.
On the other hand, if you are unlucky to find a Sandstorm, it may be best to explore the desert later.
Silver Broadsword or better, Spear, Rally
Iron or better
- Antlion
- Antlion Larva(Desktop, Console and Mobile versions)
- Antlion Swarmer(Desktop, Console and Mobile versions)
- Giant Antlion Swarmer(Desktop, Console and Mobile versions)
- Antlion Charger(Desktop, Console and Mobile versions)
- Giant Antlion Charger(Desktop, Console and Mobile versions)
- Tomb Crawler(Desktop, Console and Mobile versions)
- Antlion Mandible
- Mandible Blade(Desktop, Console and Mobile versions)
 Hardened Sand Block(Desktop, Console and Mobile versions)
 Sandstone Block(Desktop, Console and Mobile versions)
 Desert Fossil(Desktop, Console and Mobile versions)
 Sand Block
 Ancient Chisel(Desktop, Console and Mobile versions)
 Bast Statue(Desktop, Console and Mobile versions)
 Dunerider Boots(Desktop, Console and Mobile versions)
 Magic Conch(Desktop, Console and Mobile versions)
 Snake Charmer's Flute(Desktop, Console and Mobile versions)
 Storm Spear(Desktop, Console and Mobile versions)
 Thunder Zapper(Desktop, Console and Mobile versions)
 Desert Minecart(Desktop, Console and Mobile versions)(secondary item)
 Encumbering Stone(Desktop, Console and Mobile versions)(secondary item)
The Underground Desert is about as difficult as the Ice biome and is a good source of treasure otherwise found in the Caverns. A key resource here is the Desert Fossils(Desktop, Console and Mobile versions), which you can put through an Extractinator to get germs, ores, coins, and ![]() Sturdy Fossils(Desktop, Console and Mobile versions) for advanced equipment. Sturdy Fossils are used to craft consumable throwing weapons and a set of Armor that will greatly help rangers throughout Pre-Hardmode. Desert fossils are fragile, and crumble around a pickaxe -- bombs are the best method for harvesting them. The Sturdy Fossils can also be used for an Amber Staff (amber is common underground), or for more of the useful Scarab Bombs.
Sturdy Fossils(Desktop, Console and Mobile versions) for advanced equipment. Sturdy Fossils are used to craft consumable throwing weapons and a set of Armor that will greatly help rangers throughout Pre-Hardmode. Desert fossils are fragile, and crumble around a pickaxe -- bombs are the best method for harvesting them. The Sturdy Fossils can also be used for an Amber Staff (amber is common underground), or for more of the useful Scarab Bombs.

Ebonwood or Shadewood Sword, Bow, Gem Staff
Cactus, or Ebonwood or Shadewood
- Hook
 Robot Hat
- Compass(Desktop, Console, Old-gen console and Mobile versions)
- Depth Meter
- Gel
- Slime Staff
- Shackle
- Zombie Arm
- Wooden Arrow
 Archaeologist's Hat
- Moonglow
 Jungle Rose
 Jungle Grass Seeds
 Sky Blue Flower
 Rich Mahogany
 Double Cod
 Neon Tetra
 Jungle Crate(Desktop, Console and Mobile versions)
 Do Not Step on the Grass
The jungle is one of the more difficult surface biomes. The Underground Jungle should not be attempted early on.
Ebonwood Sword, Bow, Rally, Gem Staff
Ebonwood or Cactus
 Vile Mushroom
 Deathweed
 Ebonwood
 Ebonstone Block
 Ebonsand Block
 Purple Ice Block
 Ebonkoi
 Purple Clubberfish
 Corrupt Crate(Desktop, Console and Mobile versions)
The Corruption can be a challenging biome for players. Demonite is found in small deposits in this biome, a Gold Pickaxe or equivalent is needed to mine it. Ebonstone can only be mined with a Nightmare Pickaxe, which can only be obtained after defeating the Eater of Worlds, but you can use ![]() Purification Powder,
Purification Powder, ![]() Bombs and/or
Bombs and/or ![]() Dynamite to destroy it before you’ve defeated him. Once you can, it's recommended that you destroy 2 shadow orbs for you to obtain a Musket and another random item, as destroying the 3rd will summon the boss.
Dynamite to destroy it before you’ve defeated him. Once you can, it's recommended that you destroy 2 shadow orbs for you to obtain a Musket and another random item, as destroying the 3rd will summon the boss.
Shadewood Sword, Bow, Rally, Gem Staff
Shadewood or Cactus
 Crimstone Block
 Crimsand Block
 Red Ice Block
 Shadewood
 Vicious Mushroom(Desktop, Console and Mobile versions)
 Crimson Tigerfish
 Hemopiranha
 Crimson Crate(Desktop, Console and Mobile versions)
 Deadland Comes Alive
 The Undertaker and
  Musket Ball
 The Rotted Fork
 Crimson Rod
 Panic Necklace
 Crimson Heart(Desktop, Console and Mobile versions)
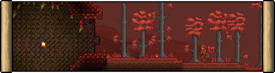
The Crimson is the other possible variant of the evil biome present in your world, instead of the Corruption. In general, the Crimson comtains slightly better loot as well as slightly stronger enemies. However, it is not a strictly "better" evil biome, as the Corruption provides some very useful items with no counterpart in the Crimson, like the Vilethorn, Worm Teeth (for Unholy Arrows), and the Band of Starpower.
Cave generation is different to the Corruption: instead of deep shafts, it contains one big neuron-shaped cave that you can walk down more easily. If the Crimson presents in your world, Crimtane replaces natural Demonite spawns, and bosses would drop Crimtane as well.
Crimstone can only be mined with a Deathbringer Pickaxe or better, which can only be obtained after defeating the Brain of Cthulhu, but you can use ![]() Purification Powder,
Purification Powder, ![]() Bombs and/or
Bombs and/or ![]() Dynamite to destroy it before defeating the boss. It's recommended that you destroy 2 crimson hearts (but not the third) to obtain The Undertaker and another 1 of the 5 possible items, as destroying the 3rd will summon the boss.
Dynamite to destroy it before defeating the boss. It's recommended that you destroy 2 crimson hearts (but not the third) to obtain The Undertaker and another 1 of the 5 possible items, as destroying the 3rd will summon the boss.
Shadewood Sword, Bow, Rally, Gem Staff
Shadewood or Cactus
- Glowstick
- Jellyfish Necklace
 Purple Mucus(Desktop, Console, Old-gen console and Mobile versions)
 Black Ink(Desktop, Console, Old-gen console and Mobile versions)
 Diving Helmet
 Shark Fin
 Coral
Coral Seashell(Desktop, Console, Old-gen console and Mobile versions)
 Starfish(Desktop, Console, Old-gen console and Mobile versions)
 Palm Wood(Desktop, Console, Old-gen console and Mobile versions)
 Pink Jellyfish (bait)
 Reaver Shark
 Red Snapper
 Sawtooth Shark
 Shrimp
 Swordfish
 Trout
Trout Tuna
Tuna Ocean Crate(Desktop, Console and Mobile versions)
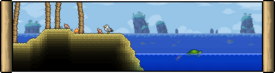
Oceans are always found at the edge of the world, usually next to beaches containing Palm Trees and decorative seashells and starfish. Water Chests are found typically in the deepest parts. New characters may have problems working in this biome because of sharks and a lack of air supply. ![]() Gills Potions can help in this regard.
Gills Potions can help in this regard.
This is also where you will find the Angler, who will help set you up for Fishing. You will definitely want to do some fishing in this biome -- the varied loot can provide for a bit of money, and (Old-gen console and 3DS versions) if you catch a ![]() Reaver Shark, you won't have to get a new pickaxe until Hardmode! The Sawtooth Shark is an amazing chainsaw.
Reaver Shark, you won't have to get a new pickaxe until Hardmode! The Sawtooth Shark is an amazing chainsaw.
For convenient fishing, set up a 30x10 lake near your base and/or pylons in Forest, Underground, Desert, Jungle, and Sky biomes. Having one near a base in the Forest will also give you a steady supply of Ducks for the Plenty Satisfied buff. Filling a lake can be done with a water-filled Bucket and placing blocks to duplicate the liquid.
Silver minimum, better recommended
![]() Gravitation Potion,
Gravitation Potion, ![]() Featherfall Potion, other buff potions
Featherfall Potion, other buff potions
 Shiny Red Balloon
 Starfury
 Lucky Horseshoe
 Fledgling Wings(Desktop, Console and Mobile versions) ((Desktop, Console and Mobile versions))
 Sky Mill(Desktop, Console, Old-gen console and Mobile versions)
Floating islands and Lakes are typically found around 475ft on small, at 500-700ft on medium, and at 600-1000ft on large maps. A small map can have up to 3 islands and a 1 Lake; medium maps up to 4 islands and 2 lakes; large maps up to 6 islands and 3 lakes. Each island contains a ![]() Skyware Chest, along with ore deposits and unique Skyware blocks and furniture. Floating Lakes have a chance of containing Water Chests.
Skyware Chest, along with ore deposits and unique Skyware blocks and furniture. Floating Lakes have a chance of containing Water Chests.
It can be difficult to find, reach, and loot floating islands. Although there are many ways to approach this problem, the quickest and most straightforward is to use ![]() Gravitation Potions found in underground chests to fly across the map at the appropriate height. Featherfall Potions will make flying a bit easier to control and help prevent you to fall to your death. It's also recommended that you should set out in the day to maintain good visibility of
Gravitation Potions found in underground chests to fly across the map at the appropriate height. Featherfall Potions will make flying a bit easier to control and help prevent you to fall to your death. It's also recommended that you should set out in the day to maintain good visibility of ![]() Harpies.
Harpies.
Reaching the Space biome risks you to be surrounded by flocks of harpies, making floating islands hard to explore even with decent equipment.
If you do fight Harpies, because of their attacks from distance and erratic flight pattern, it can be quite difficult to hit them, and it’s advisable to use a weapon with a long range and high velocity: the ![]() Space Gun (especially with Meteor armor) is perfect for this job, but any long-range weapon will do.
Space Gun (especially with Meteor armor) is perfect for this job, but any long-range weapon will do.
If you plan to revisit a floating island or lake, you may wish to drop a line of ![]() Rope.
Rope.
It’s recommended to loot the floating islands as soon as you get Gravitation Potions, as it is fast and all the loot is highly useful -- removing falling damage eliminates a huge pain, and Starfury is a very strong weapon at this stage, making cave exploration immeasurably easier.
As you continue your exploration of the surface, you should also expect to encounter this event:

Given those criteria, 1 in 9 chance (11.11%) of occurring.
 The Groom
 The Bride(Desktop, Console and Mobile versions)
 Blood Zombie(Desktop, Console and Mobile versions)
 Drippler(Desktop, Console and Mobile versions)
 Corrupt Bunny or
  Vicious Bunny(Desktop, Console and Mobile versions)
 Corrupt Goldfish or
  Vicious Goldfish(Desktop, Console and Mobile versions)
 Corrupt Penguin or
  Vicious Penguin(Desktop, Console and Mobile versions)
 Top Hat
 Brain(Old-gen console and 3DS versions)
 Wedding Veil(Desktop, Console and Mobile versions)
 Wedding Dress(Desktop, Console and Mobile versions)
 Shark Tooth Necklace(Desktop, Console and Mobile versions)
 Money Trough(Desktop, Console and Mobile versions)
 Bunny Hood
 Suspicious Looking Egg(3DS version)
 Pedguin's Hood(Desktop, Console and Mobile versions)
 Pedguin's Jacket(Desktop, Console and Mobile versions)
 Pedguin's Trousers(Desktop, Console and Mobile versions)
 Corrupt Seeds or
  Crimson Seeds(Desktop, Console, Old-gen console and Mobile versions)
 Deathweed Seeds
 Mime Mask
 Fallen Tuxedo Shirt(Desktop, Console and Mobile versions)
 Fallen Tuxedo Pants(Desktop, Console and Mobile versions)
 George's set(Old-gen console and 3DS versions) or
  Fabulous set(Old-gen console and 3DS versions)
 Vile Powder or
  Vicious Powder(Desktop, Console and Mobile versions)
 Silver Bullet
- Throwing Knife
 Evil Presence
During a Blood Moon bunnies, goldfish, and penguins will turn hostile, and the spawn rate of all monsters on the surface will increase dramatically. Additionally, enemies will be able to spawn near NPCs and Zombies can force doors open.
![]() Deathweed will bloom, and some NPCs will also sell special wares.
Deathweed will bloom, and some NPCs will also sell special wares.
If you do not wish to fight in a Blood Moon, you should probably seek shelter underground where you will be beyond its effects. But with increased danger comes increased reward.
The Bosses: Dealing with the first three
Once you’ve survived the first couple nights and started work on a base, you should begin preparations for the upcoming boss battles, as even if you do not wish to go looking for them, they will come looking for you.
King Slime
King Slime is an entirely optional but fun boss: none of its drops are necessary for game advancement.
King Slime can spawn rarely in Grass at the outer sixth of the world, by using a ![]() Slime Crown, or during a Slime Rain if the player kills 150 slimes (75 if King Slime has already been defeated). As with all monsters that can spawn naturally, the King Slime has a better chance of spawning while standing near a placed Water Candle or under the effects of a Battle Potion. It's extremely unlikely you will ever come across King Slime without planning to. King Slime is a good challenge for a beginning player and can be easily defeated by tactical use of terrain.
Slime Crown, or during a Slime Rain if the player kills 150 slimes (75 if King Slime has already been defeated). As with all monsters that can spawn naturally, the King Slime has a better chance of spawning while standing near a placed Water Candle or under the effects of a Battle Potion. It's extremely unlikely you will ever come across King Slime without planning to. King Slime is a good challenge for a beginning player and can be easily defeated by tactical use of terrain.
Still, savvy players may want to defeat King Slime for the chance of getting a good ![]() Slime Hook(Desktop, Console, Old-gen console and Mobile versions), as it's better than any hook obtainable up to this point. In the
Slime Hook(Desktop, Console, Old-gen console and Mobile versions), as it's better than any hook obtainable up to this point. In the ![]() Desktop version,
Desktop version, ![]() Console version, and
Console version, and ![]() Mobile version, the
Mobile version, the ![]() Ninja Armor it drops provides critical hit bonuses, useful for all weapons except summoning weapons, which aren't affected by critical hits. It also drops the
Ninja Armor it drops provides critical hit bonuses, useful for all weapons except summoning weapons, which aren't affected by critical hits. It also drops the ![]() Slimy Saddle(Desktop, Console, Old-gen console and Mobile versions), a mount with a fast fall speed that is useful for dodging in boss fights even into Hardmode.
Slimy Saddle(Desktop, Console, Old-gen console and Mobile versions), a mount with a fast fall speed that is useful for dodging in boss fights even into Hardmode.
Eye of Cthulhu
Although not required, the Eye of Cthulhu can be a beneficial boss to fight, providing ![]() Demonite or
Demonite or ![]() Crimtane Ore without the need to mine for the respective ore.
Crimtane Ore without the need to mine for the respective ore.
The Eye of Cthulhu takes the form of an enormous Demon Eye. His fight is composed of two phases. During the first phase, he spawns Servants of Cthulhu while hovering over the player. After spawning a few Servants of Cthulhu, he will make a series of three charges towards the player before repeating this process. When the Eye’s health falls below half (or 65% at Expert/Master mode), he transforms into his second phase. In this second phase, the Eye of Cthulhu no longer spawns Servants, but in turn follows the player more aggressively. His defense is also lowered in this phase, speeding up the fight as his health depletes faster.
In Expert Mode, as the Eye of Cthulhu's health is drained in his second phase, he gains the ability to perform a chain of swift charges toward the player, which eventually replace his standard charges at low health. As his health is drained further, the chain of charges grows longer while decreasing the time interval between each chain. With a sliver of health left, the Eye of Cthulhu enters a state of permanent charging, making constant short lunges at the player.
Eater of Worlds or Brain of Cthulhu
After the Eye of Cthulhu is defeated, you should do the following:
- Be sure the Dryad has a home: she sells Purification Powder, a less explosive option for getting to the Shadow Orbs and Crimson Hearts, and planters, a more convenient way to grow your plants.
- Make sure to have at least 12 valid NPC houses and be sure you can access them without having to walk or ride a minecart all the way across the map. One way to do this is to have them linked by (Desktop, Console and Mobile versions) Pylons.
- Start on your herb farm: Potions will be immeasurably helpful throughout the rest of the game.
- Build a chest room: It's not a bad idea to have plenty of storage to put away items you'll find later on.
After this, head to the Corruption or Crimson to smash a Shadow Orb or Crimson Heart. Smashing your first orb or heart allows (Old-gen console and 3DS versions) two events/ (Desktop, Console and Mobile versions) 1 event to occur in short order:
50% on (Old-gen console and 3DS versions) breaking a Shadow Orb or Crimson Heart (Desktop, Console and Mobile versions) defeating the Eater of Worlds/Brain of Cthulhu
Silver/Tungsten
![]() Dynamite,
Dynamite, ![]() Sticky Bombs, Gold or Platinum Pickaxe, buff potions
Sticky Bombs, Gold or Platinum Pickaxe, buff potions
(Old-gen console and 3DS versions) Smashing an orb/heart (Desktop, Console and Mobile versions) Defeating the Eater of Worlds/Brain of Cthulhu will give a 50% chance for a meteorite to land the next night, (Old-gen console and 3DS versions) smashing additional orb/hearts (Desktop, Console and Mobile versions) defeating additional Eaters of Worlds/Brains of Cthulhu after the first one on the same day will not increase your chance of a meteorite landing. However, if it is between midnight and dawn (04:30), the meteorite may land immediately.
Meteorite mining can be challenging. You will be constantly harassed by the ![]() Meteor Heads, and touching any part of what you are trying to mine will burn you. An Obsidian Skull can prevent this damage. Mining with a pickaxe is slow, tedious, and frustrating.
Meteor Heads, and touching any part of what you are trying to mine will burn you. An Obsidian Skull can prevent this damage. Mining with a pickaxe is slow, tedious, and frustrating.
(Old-gen console and 3DS versions) The ![]() Dynamite is perfect with a large blast radius. You can build a wood platform over the middle of the crater to make it easier to throw them as well as allowing you to easily deal with meteor heads coming from below. You can then quickly clean up remaining sections with sticky bombs. Once there are fewer than 50 meteorite blocks in the area, it will cease to be a Meteorite biome and Meteor heads will no longer spawn.
Dynamite is perfect with a large blast radius. You can build a wood platform over the middle of the crater to make it easier to throw them as well as allowing you to easily deal with meteor heads coming from below. You can then quickly clean up remaining sections with sticky bombs. Once there are fewer than 50 meteorite blocks in the area, it will cease to be a Meteorite biome and Meteor heads will no longer spawn.
On ![]() Desktop,
Desktop, ![]() Console, and
Console, and ![]() Mobile, the player can kill 50 meteor heads to obtain their banner, which makes it easier to deal with meteorite biomes.
Mobile, the player can kill 50 meteor heads to obtain their banner, which makes it easier to deal with meteorite biomes.
Breaking a Shadow Orb or Crimson Heart, 10 hearts
1/3 for first invasion, 1/30 subsequently
![]() Space Gun, Platinum/Demon/Tendon Bow with Unholy/Jester’s Arrows, Ruby/Diamond Staff,
Space Gun, Platinum/Demon/Tendon Bow with Unholy/Jester’s Arrows, Ruby/Diamond Staff, ![]() Grenades,
Grenades, ![]() Molotov Cocktails(Desktop, Console, Old-gen console and Mobile versions),
Molotov Cocktails(Desktop, Console, Old-gen console and Mobile versions), ![]() Spiky Balls
Spiky Balls
Silver or better
![]() Ironskin Potion,
Ironskin Potion, ![]() Regeneration Potion,
Regeneration Potion, ![]() Thorns Potion,
Thorns Potion, ![]() Archery Potion (if applicable),
Archery Potion (if applicable), ![]() Well Fed
Well Fed
The Goblin Army will invade at dawn on the map’s original spawn point. You must kill 120 goblins (plus 40 per additional 200+ HP player) to defeat the invasion. It can also be summoned with a Goblin Battle Standard.
Every third Orb or Heart you smash in the world will spawn either Eater of Worlds or Brain of Cthulhu respectively:
Eater of Worlds
Eater of Worlds is a worm boss 50 segments long , each with their own health. When a segment in the middle is destroyed, the two severed parts will each become new worms, each with their own head and tail. This boss must be fought in the Corruption, and will disappear if you leave it at any point during the fight.
You will not face an easier boss in Terraria than EoW, especially in melee. The reason for this is when you swing your melee weapon as the worm glides past, is running itself into your swing and damaging many segments, and rangers can use a demon bow and jester arrows for penetration,which is very useful, when Magic weapons at this point usually only hit 2-4 times per shot.
In Expert mode, you may not want to take the EoW aboveground because its damaging ranged attacks will no longer be frequently blocked if you do so.
Brain of Cthulhu
The Brain of Cthulhu is a boss that teleports and has two stages. In the first stage, it is invincible and surrounded by 20 Creepers. You must kill all the creepers before you can damage the Brain. In the second stage, you fight the Brain directly as it tries to charge you.
In Expert mode, when you reach its second phase, the Brain creates three fake copies of itself. The copies become more opaque as the Brain loses health.
The Late Pre-Hardmode
The four late pre-hardmode biomes — the Underground Jungle, Underground Desert, Dungeon, and Underworld — are all of the roughly similar difficulty and can be done in any order or concurrently.
The Underground Jungle

 Stinger
 Vine
Vine- Hook
 Bezoar
 Violet Husk(Desktop, Console, Old-gen console and Mobile versions)
 Ancient Cobalt armor
- Archaeologist's Hat
 Anklet of the Wind
 Feral Claws
 Flower Boots(Desktop, Console and Mobile versions)
 Fiberglass Fishing Pole
 Seaweed
 Living Mahogany Wand(Desktop, Console and Mobile versions)
 Rich Mahogany Leaf Wand(Desktop, Console and Mobile versions)
 Honey Dispenser(Desktop, Console, Old-gen console and Mobile versions)
The Underground Jungle lies directly below the surface Jungle, beginning at variable depths, and extends to the Underworld. It also contains multiple Bee Hives and a Jungle Temple, which can not be entered until Hardmode, although Temple enemies, like the Lihzahrd, may spawn, if the player is standing in front of Temple Walls.
The primary threats in the Underground Jungle are the Hornet, which flies, attacks from range, and generally keeps its distance, and the Spiked Jungle Slime, which can launch venomous spikes at you from a surprisingly far distance. You may note that there are bigger, more open spaces than in the Caverns. This can lead to high spawn rates and swarms of hornets attacking from all directions which can be very dangerous. If you have low-tier gear when first exploring it, it is safer to stay to the side tunnels and the edges of the large caves until you've acquired better gear and more life.
Be on the lookout for the following loot and materials in the underground jungle:
- Feral Claws: These will increase your melee speed, and can prove very helpful later on in hardmode.
- Anklet of the Wind: This greatly increases your movement speed without having to be charged up, and can also be tinkered with Spectre Boots and an Aglet to make Lightning Boots.
- Bezoar: Immunity to poison is extremely useful while you're in the Underground Jungle, and this accessory is very helpful when coming up against Queen Bee. This accessory is also needed to craft the Ankh Charm later on.
- Honey: This will give you a healing buff upon touching it and is therefore very useful in boss arenas. Consider bringing Buckets along to pick it up.
- Stingers and Jungle Spores: These can be used to craft gear that's useful against some of the upcoming challenges.
- Vines: These can be used to craft an Ivy Whip, which allows you to grapple to three different spots. Vines can also be used to craft the Blade of Grass and the Snapthorn.
- Flower Boots: These are useful for creating farms for harvesting hay.
The Underground Desert
- Antlion
- Antlion Charger(Desktop, Console and Mobile versions)
- Antlion Larva(Desktop, Console and Mobile versions)
- Antlion Swarmer(Desktop, Console and Mobile versions)
- Giant Antlion Swarmer(Desktop, Console and Mobile versions)
- Giant Antlion Charger(Desktop, Console and Mobile versions)
- Sand Slime(Desktop, Console and Mobile versions)
- Tomb Crawler(Desktop, Console and Mobile versions)
- Antlion Mandible
- Mandible Blade(Desktop, Console and Mobile versions)
 Amber
Amber- Desert Fossil(Desktop, Console and Mobile versions)
 Sturdy Fossil(Desktop, Console and Mobile versions)
- Storm Spear(Desktop, Console and Mobile versions)
- Thunder Zapper(Desktop, Console and Mobile versions)
- Ancient Chisel(Desktop, Console and Mobile versions)
- Dunerider Boots(Desktop, Console and Mobile versions)
- Bast Statue(Desktop, Console and Mobile versions)
- Magic Conch(Desktop, Console and Mobile versions)
- Encumbering Stone(Desktop, Console and Mobile versions)
- Snake Charmer's Flute(Desktop, Console and Mobile versions)
- Desert Minecart(Desktop, Console and Mobile versions)
The Underground Desert lies directly below the surface Desert, beginning at variable depths, and extends to the Underworld. The structure of the Underground Desert resembles that of a real-world ant hive, featuring numerous small caves mainly composed of Sandstone Blocks and Hardened Sand Blocks, which are connected in varying degree. It is very large when fully explored, rivaling even the Dungeon in size, and is always either circular or oval in shape. The Underground Desert is inhabited by many types of Antlion enemies and is also riddled with traps, making it a challenge to navigate.
The primary threats in the Underground Desert are the various forms of Antlions: the Antlion Swarmer, which flies, the Chargers, which hence their name, charge at you, and the Rolling Cactus, which can easily kill you in any mode. The Underground Desert is full of small chambers which restrict movement, making it difficult to run from enemies, while those who box themselves in will have to deal with Tomb Crawlers. Having a Flinx Staff will significantly improve survival chances.
Be on the lookout for the following loot and materials in the underground desert:
- Bast Statue: This will increase your defense significantly for early boss fights.
- Ancient Chisel: This increases mining speed by 25%, and is useful throughout the game.
- Sturdy Fossil and Amber: These can be used early on to craft the Amber Staff (the second best gem staff), the Bone Javelin and Bone Throwing Knife (two exceptionally powerful throwing weapons), and Fossil armor (the earliest available ranged armor).
- Magic Conch: This is invaluable for quickly traversing the world or visiting the Dungeon (usually close to one of the oceans).
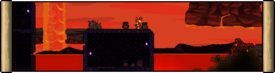
The Underworld
![]() Lava Waders or
Lava Waders or ![]() Lava Charm,
Lava Charm, ![]() Water Walking Potion,
Water Walking Potion, ![]() Obsidian Skin Potion,
Obsidian Skin Potion, ![]() Obsidian Skull or other obsidian accessory
Obsidian Skull or other obsidian accessory

 Demon Scythe
 Obsidian Rose
 Guide Voodoo Doll
 Plumber's Hat
 Magma Stone
 Cascade(Desktop, Console and Mobile versions)
 Dark Lance
 Flower of Fire
 Sunfury
 Flamelash
 Hellwing Bow(Desktop, Console and Mobile versions)
 Treasure Magnet(Desktop, Console and Mobile versions)
The Underworld is found at the bottom of the world. The best items pre-hardmode can be found in or crafted from items found in this biome. Shadow Chests found here can only be opened with the Shadow Key, found in the Dungeon.
The Underworld is the hardest pre-hardmode biome, and the last biome that players explore.
The greatest danger working in the Underworld is, unsurprisingly, the wide expanses of molten lava. There are many tools which you can use: one these is probably the Water Walking Potion. The Lava Waders are the ultimate accessory in the Underworld, although it can be difficult to find all the components. Otherwise, the Lava Charm is an invaluable aid. If you have neither of these accessories, Obsidian Skin Potions are a fantastic alternative. When used, the potion gives you a four-minute invulnerability to lava. There is no breath meter in lava, so as long as you have potions, you can stay in lava indefinitely.
Hellstone mining is quite time-consuming and is the main reason to spend time in it. You'll need an Obsidian Skull or better to prevent Hellstone ore and bricks from burning you. Abundant deposits of Hellstone spawn next to the buried Ruined Houses, and instead of going to burrow deep into the ash and build lava channels, mine the ones that spawn close to the walls. Monster spawn rates are low in the Ruined Houses, and the buildings prevent most of them from bothering you, except the Fire Imps and Bone Serpents which can penetrate blocks. You can block the Fire Imp shots with any weapon or projectile, including your swinging pickaxe.
Be mindful that if you kill a Voodoo Demon, you better be ready to get under that ![]() Guide Voodoo Doll before it drops into the lava, or you will be in for a nasty fight you're not prepared for. Should you accidentally awaken the Wall of Flesh, you cannot escape. Using a Magic Mirror will result in your death.
Guide Voodoo Doll before it drops into the lava, or you will be in for a nasty fight you're not prepared for. Should you accidentally awaken the Wall of Flesh, you cannot escape. Using a Magic Mirror will result in your death.
Queen Bee
Queen Bee is not difficult to fight with at this stage in the game. Her charge attack is predictable and easy to dodge, and you can stand in the honey for a big healing boost.
Many of the Queen Bee's drops may be better than what you already have. Even if they aren't, farming Queen Bee is a good source of income before Hardmode. Plus, the Bee mount is the earliest mounts that can fly, although it's slow on land and hates water.
Skeletron
To gain entrance to the dungeon, Skeletron must be defeated. To summon Skeletron, talk to the Old Man in front of the dungeon at night.
 Skeletron Mask
 Skeletron Hand
 Book of Skulls
 Chippy's Couch(Desktop, Console and Mobile versions)
 Skeletron Trophy
 Healing Potions(5-15)
 Gold Coins(5)
 Treasure Bag(only in Expert Mode)(Desktop, Console and Mobile versions) (
 Bone Glove(Desktop, Console and Mobile versions))
 Possessed Skull(only in Master Mode)(Desktop, Console and Mobile versions)
 Skeletron Relic(only in Master Mode)(Desktop, Console and Mobile versions)
- (400)

 Exquisitely Stuffed(Desktop, Console and Mobile versions)
 Ironskin
 Rage
Rage Wrath
Wrath Endurance
 Regeneration
 Archery (for bow users)
 Magic Power (for magic players)
 Mana Regeneration (for magic players)
 Summoning (for summoner players)
 Sharpened(Desktop, Console and Mobile versions) /
  Sharpening Station(Desktop, Console and Mobile versions) (for melee players)
 Tipsy (for melee players)
 Strategist(Desktop, Console and Mobile versions) /
  War Table(Desktop, Console and Mobile versions) (all players)
 Swiftness (doesn't affect Mounts)
Skeletron is one of the most difficult pre-hardmode bosses, and is generally fought after Queen Bee. It consists of a head and 2 hands that fly around and follow the player.
The head has the most health of all the segments of Skeletron and when it is defeated, the player would kill the whole boss, regardless if there are hands or not. The head will float around the player for a few seconds and then start spinning and chasing down the player. This repeats for the whole fight.
The hands of Skeletron will mostly stay underneath the head, and will try to hit the player constantly. It is recommended to go for the hands first before fighting the head, especially in Expert and Master mode, where the head's defense will increase by 25 for the amount of hands that are remaining.
The Dungeon
 Space Gun
 Vilethorn
 Jester's Arrows
- Grenades
 Molotov Cocktails(Desktop, Console, Old-gen console and Mobile versions)
 Spiky Balls

 Aqua Scepter
 Blue Moon
 Handgun
 Magic Missile
 Muramasa
 Valor(Desktop, Console and Mobile versions)
 Shadow Key
 Bone Welder(Desktop, Console, Old-gen console and Mobile versions)
The Dungeon can be found near the right or left edge of the map, always on the opposite side of the Jungle and on the same side as the Snow biome. Note that attempting to enter the Dungeon before Skeletron is defeated will lead to an unpleasant surprise.
With its extremely high spawn rates, the abundance of dangerous traps, and general inability to use terrain as cover, even experienced players can be overwhelmed. If you find yourself overwhelmed by enemies, taking down every water candle you see will significantly reduce spawn rates (you may even want to use a Calming Potion). Certain room geometries can lead to a continuous stream of enemies spawning, generally rooms with large sections offscreen and multiple hallways leading into them. In these cases, it may be wise to move on as quickly as possible.

Make sure to get the following loot before leaving the Dungeon:
- Shadow Key: This item can unlock any Shadow Chest in the Underworld. These chests contain many weapons which are unrivaled in power in easy mode and often still remain decent in early hardmode.
- Cobalt Shield: Protection against knockback can be invaluable. The Cobalt Shield can also be tinkered with an Obsidian Skull to make an Obsidian Shield, which will prove very valuable in the Underworld as well.
- Muramasa: This is one of the swords used to make the Night's Edge, which is useful to have before Hardmode.
- Water Bolt: This weapon's piercing and bouncing projectiles can wreck any enemy in the Dungeon, Jungle, and Underworld.
- Valor: Like all yoyos, this can help greatly in tight situations.
- Handgun: This weapon is a strong, reliable ranged weapon, provided you can click fast enough. Can be upgraded into the more powerful Phoenix Blaster.
- Nazar: Although not very useful outside the Dungeon, this accessory is needed to craft the Ankh Charm. It is highly recommended to farm for this accessory before unlocking the Hardmode dungeon, as the Cursed Skulls which drop it will become much rarer then.
Preparing For Hardmode
At this point you have no deadlines or threats looming over you. You should be more-or-less the master of all you survey, and you have a wide variety of resources available. This is a good time to do large projects like arenas, bases, or farms, though you should keep in mind that depending on location, your base or arena might end up in an infected biome. You'll also need to collect some materials that will be needed in Hardmode, as farming is a lot easier in pre-Hardmode.
The following is a list of preparations you may wish to consider before summoning the Wall of Flesh:
- Obtain maximum Health and Mana if you have not already done so.
- Craft endgame equipment:
![]() Feral Claws
Feral Claws![]() Counterweight(Desktop, Console and Mobile versions)
Counterweight(Desktop, Console and Mobile versions)![]() String(Desktop, Console and Mobile versions)
String(Desktop, Console and Mobile versions)![]() Magma Stone
Magma Stone
![]() Sharpening Station(Desktop, Console and Mobile versions)
Sharpening Station(Desktop, Console and Mobile versions)![]() Ale
Ale![]() Sake(Desktop, Console, Old-gen console and Mobile versions)
Sake(Desktop, Console, Old-gen console and Mobile versions)![]() Flask of Poison
Flask of Poison
![]() Star Cannon[a]
Star Cannon[a]![]() Hellwing Bow(Desktop, Console and Mobile versions)(Hellfire Arrow)
Hellwing Bow(Desktop, Console and Mobile versions)(Hellfire Arrow)![]() The Bee's Knees(Desktop, Console and Mobile versions)(Wooden Arrow)
The Bee's Knees(Desktop, Console and Mobile versions)(Wooden Arrow)
![]() Star Cannon[a]
Star Cannon[a]![]() Hellwing Bow(Desktop, Console and Mobile versions)(Unholy Arrow, Wooden Arrow)[b]
Hellwing Bow(Desktop, Console and Mobile versions)(Unholy Arrow, Wooden Arrow)[b]
![]() Archery Potion
Archery Potion![]() Ammo Reservation Potion
Ammo Reservation Potion![]() Ammo Box(Desktop, Console, Old-gen console and Mobile versions)((Old-gen console version))
Ammo Box(Desktop, Console, Old-gen console and Mobile versions)((Old-gen console version))
![]() Demon Scythe
Demon Scythe![]() Aqua Scepter
Aqua Scepter![]() Gray Zapinator(Desktop, Console and Mobile versions)
Gray Zapinator(Desktop, Console and Mobile versions)
![]() Aqua Scepter
Aqua Scepter![]() Demon Scythe
Demon Scythe![]() Gray Zapinator(Desktop, Console and Mobile versions)
Gray Zapinator(Desktop, Console and Mobile versions)
![]() Crimson Rod
Crimson Rod![]() Weather Pain(Desktop, Console and Mobile versions)
Weather Pain(Desktop, Console and Mobile versions)
![]() Wizard Hat
Wizard Hat![]() Mystic Robe(Desktop, Console, Old-gen console and Mobile versions)
Mystic Robe(Desktop, Console, Old-gen console and Mobile versions)![]() Meteor Leggings
Meteor Leggings
![]() Celestial Cuffs(Desktop, Console, Old-gen console and Mobile versions)
Celestial Cuffs(Desktop, Console, Old-gen console and Mobile versions)![]() Magnet Flower(Desktop, Console and Mobile versions)
Magnet Flower(Desktop, Console and Mobile versions)
![]() Vampire Frog Staff(Desktop, Console and Mobile versions)(1x)
Vampire Frog Staff(Desktop, Console and Mobile versions)(1x)![]() Flinx Staff(Desktop, Console and Mobile versions)(2x)
Flinx Staff(Desktop, Console and Mobile versions)(2x)![]() Imp Staff(Desktop, Console, Old-gen console and Mobile versions)(1x)
Imp Staff(Desktop, Console, Old-gen console and Mobile versions)(1x)![]() Hornet Staff(Desktop, Console, Old-gen console and Mobile versions)(2x)
Hornet Staff(Desktop, Console, Old-gen console and Mobile versions)(2x)
![]() Spinal Tap(Desktop, Console and Mobile versions)
Spinal Tap(Desktop, Console and Mobile versions)
![]() Bee armor(Desktop, Console, Old-gen console and Mobile versions)
Bee armor(Desktop, Console, Old-gen console and Mobile versions)![]() Obsidian armor(Desktop, Console and Mobile versions)
Obsidian armor(Desktop, Console and Mobile versions)
![]() Feral Claws((Desktop, Console and Mobile versions))
Feral Claws((Desktop, Console and Mobile versions))![]() Pygmy Necklace((Desktop, Console and Mobile versions))
Pygmy Necklace((Desktop, Console and Mobile versions))![]() Apprentice's Scarf(Desktop, Console and Mobile versions)
Apprentice's Scarf(Desktop, Console and Mobile versions)![]() Squire's Shield(Desktop, Console and Mobile versions)
Squire's Shield(Desktop, Console and Mobile versions)
![]() Summoning Potion
Summoning Potion![]() Bewitching Table(Desktop, Console and Mobile versions)
Bewitching Table(Desktop, Console and Mobile versions)![]() War Table(Desktop, Console and Mobile versions)
War Table(Desktop, Console and Mobile versions)![]() Flask of Poison((Desktop, Console and Mobile versions))
Flask of Poison((Desktop, Console and Mobile versions))
Bee armor is preferable if you are planning to use your minions more often and would like to play a more passive role focusing on dodging more than attacking yourself, but Obsidian armor (on ![]() Desktop,
Desktop, ![]() Console, and
Console, and ![]() Mobile) trades 1 of your minions for +7% additional summon damage, +30% whip range, and +15% speed.
Mobile) trades 1 of your minions for +7% additional summon damage, +30% whip range, and +15% speed.
![]() Bee Headgear(Desktop, Console, Old-gen console and Mobile versions)
Bee Headgear(Desktop, Console, Old-gen console and Mobile versions)
![]() Bundle of Horseshoe Balloons(Desktop, Console and Mobile versions)
Bundle of Horseshoe Balloons(Desktop, Console and Mobile versions)![]() Shield of Cthulhu(Desktop, Console and Mobile versions)
Shield of Cthulhu(Desktop, Console and Mobile versions)![]() Amphibian Boots(Desktop, Console and Mobile versions)
Amphibian Boots(Desktop, Console and Mobile versions)![]()
![]()
![]() Lightning Boots(or better)
Lightning Boots(or better)
![]() Worm Scarf(Desktop, Console and Mobile versions)
Worm Scarf(Desktop, Console and Mobile versions)![]() Brain of Confusion(Desktop, Console and Mobile versions)
Brain of Confusion(Desktop, Console and Mobile versions)
![]() Stinger Necklace(Desktop, Console and Mobile versions)
Stinger Necklace(Desktop, Console and Mobile versions)![]() Shark Tooth Necklace(Desktop, Console and Mobile versions)
Shark Tooth Necklace(Desktop, Console and Mobile versions)![]() Bone Glove(Desktop, Console and Mobile versions)
Bone Glove(Desktop, Console and Mobile versions)![]() Bone Helm(Desktop, Console and Mobile versions)
Bone Helm(Desktop, Console and Mobile versions)![]() Hive Pack(Desktop, Console and Mobile versions)
Hive Pack(Desktop, Console and Mobile versions)
![]()
![]()
![]() Food buffs
Food buffs![]() Regeneration Potion
Regeneration Potion![]() Ironskin Potion
Ironskin Potion![]() Swiftness Potion
Swiftness Potion![]() Rage Potion
Rage Potion![]() Wrath Potion
Wrath Potion![]() Heartreach Potion
Heartreach Potion![]() Endurance Potion
Endurance Potion![]() Gravitation Potion
Gravitation Potion![]() Slice of Cake(Desktop, Console and Mobile versions)
Slice of Cake(Desktop, Console and Mobile versions)
- Armor: If you're doing a general playthrough, it's likely you'll want Molten armor, which provides 25 defense, which is necessary for basic survival in Hardmode. You may, however, have reason to prefer Shadow armor or Crimson armor, as they both provide more general stat bonuses and are easier to get. The former gives (Old-gen console and 3DS versions) +21% melee speed (Desktop, Console and Mobile versions) +15% critical strike chance and increased movement speed, while the latter boosts damage by 6% along with increasing life regeneration. However, at this point in the game, classes begin to diverge into different, distinct groups and you're going to have to be more specific with the type of damage you use. Therefore, you'll want to use the appropriate armor that corresponds with the weapons you have, as opposed to just taking whatever has the highest defense.
- Melee: Melee players should have the Molten armor set, which costs 45 Hellstone Bars and not only provides 25 defense (which is needed for melee players as you'll be taking many hits in Hardmode) but also 17% increased melee damage, (Desktop, Console and Mobile versions) 7% melee critical strike chance, and 7% melee speed.
- Ranged: Rangers should have the Necro armor set, a post-Skeletron set that is crafted with 150 Bones and 135 Cobwebs. Despite having lower defense, it makes up for this by increasing ranged damage by 15% and a Set Bonus of (Desktop, Console and Mobile versions) 10% increased ranged critical strike chance/(Old-gen console and 3DS versions) 20% chance not to consume ammo.
- Magic: Magic users, as opposed to other classes, actually have three different armor options. The first is Jungle armor, which boosts maximum mana by (Desktop, Console and Mobile versions) 80/(Old-gen console and 3DS versions) 60, mana cost reduction by 16%, magic critical strike chance by (Desktop, Console and Mobile versions) 12%/ (Old-gen console and 3DS versions) 9%, and (Desktop, Console and Mobile versions) magic damage by 6%. It's easily craftable once the player has made one or two adventures into the Underground Jungle, made with 32 Jungle Spores, (Desktop, Console and Mobile versions) 10/(Old-gen console and 3DS versions) 12 Stingers, and 2 Vines. Your second option is the Meteor armor, which costs (Desktop, Console and Mobile versions) 45/ (Old-gen console and 3DS versions) 60 Meteorite Bars (meaning that it can be easily accessed after a Meteorite falls), and increases magic damage by 21%. It also has a Set Bonus of the Space Gun, Gray Zapinator(Desktop, Console and Mobile versions), and Orange Zapinator(Desktop, Console and Mobile versions) all costing 0 mana to use, so it's preferred if you're using any of those weapons. Your final option is a bit of a mixed set, consisting of the Wizard Hat, Mystic Robe, and Meteor Leggings. The Wizard Hat is dropped by the rare Tim enemy underground, the Mystic Robe is sold by the Traveling Merchant for (Desktop, Console and Mobile versions) 3 GC50 SC/(Old-gen console version) 2 GC, and the Meteor Leggings are crafted from 15 Meteorite Bars. This set increases magic damage by (Old-gen console version) 28%/ (Desktop, Console and Mobile versions) 20%, magic critical strike chance by 16%, and reduces mana usage by 10%. This set generally provides the best magic damage while having the lowest defense.
- Summoner: Summoners should use either Bee armor(Desktop, Console, Old-gen console and Mobile versions) or Obsidian armor(Desktop, Console and Mobile versions). Bee armor is made with 30 Bee Wax, meaning that crafting it requires defeating Queen Bee twice. It gives 2 minion slots and 23% summon damage. The Obsidian armor is more focused on whips, giving 31% summon damage, 1 minion slot, 15% whip speed, and 30% whip range. It is crafted with 60 Obsidian, 30 Silk, and 20 Shadow Scales or Tissue Samples.
- Weapons: At this point of the game, weapon classes begin to noticeably diverge. You should now start to focus on one or two classes, as it's much easier to progress when focusing on a few classes. Though many weapons are available at this stage, here are the ones you should have to make taking down the Wall of Flesh and handling Hardmode much easier.
- Melee: The strongest sword available in pre-Hardmode is the Night's Edge, which is made by combining the Blade of Grass, Volcano, Muramasa, and either Light's Bane or Blood Butcherer (in Corruption and Crimson worlds respectively) at an Altar. This sword deals (Desktop, Console and Mobile versions) 40/(Old-gen console and 3DS versions) 42 melee damage and will later be used to craft the Terra Blade, one of the most iconic and powerful swords in Hardmode. However, you may have reason to prefer some other swords. (Old-gen console and 3DS versions) The Blade of Grass and Volcano both have a greater range than the Night's Edge and inflict the Poisoned and On Fire! debuffs respectively. (Old-gen console and 3DS versions) The Night's Edge also lacks autoswing, while the Muramasa does have it. You're also going to want some melee weapons with larger range, as Hardmode enemies can easily overwhelm you if you're too close. The Flamarang (10 Hellstone Bars and an Enchanted Boomerang at an Iron/Lead Anvil) is the strongest pre-Hardmode boomerang, dealing (Desktop, Console and Mobile versions) 49/(Old-gen console and 3DS versions) 37 damage, and can be very efficient when used strategically. The same applies to the Sunfury, the strongest flail, which is found in Shadow Chests and is extremely effective with large groups of enemies, dealing (Desktop, Console and Mobile versions) 64/(Old-gen console and 3DS versions)33 damage. Both of these weapons have a chance of inflicting the On Fire! debuff, making them even more effective. The strongest yo-yos(Desktop, Console and Mobile versions) at this stage are the Cascade and the Hive-Five. The Cascade has a 1 in 400 (0.25%) chance of being dropped by any enemy killed in the Underworld after Skeletron is defeated and inflicts the On Fire! debuff. The Hive-Five is crafted from 14 Bee Wax and spawns bees. They are both great weapons for stunlocking enemies or dealing with enemies in tight spaces. Finally, the strongest spear available is the Dark Lance, which can also be found in Shadow Chests.
- Ranged: The ranger class, along with having multiple weapon choices, also has multiple ammunition choices. The Molten Fury, crafted with 15 Hellstone Bars at an Iron/Lead Anvil, is generally the best bow. Although it cannot autofire, it's accurate, does (Desktop, Console and Mobile versions) 31/(Old-gen console and 3DS versions) 29 damage, and turns Wooden Arrows into Flaming Arrows when fired. Another option for your bow is the Hellwing Bow, which is looted from Shadow Chests. Though it is less accurate and only does 22 damage, it turns Wooden Arrows into homing Hellwings (Flaming Bats). Additionally, it autofires and is very fast in doing so, making it especially efficient in the Wall of Flesh fight dealing with the Hungry or when fighting many enemies in a large range. Both bows are best used with Hellfire Arrows, as they not only deal high damage, but also have a large explosive effect that can easily deal with large groups. The Hellwing Bow is also well used with Wooden Arrows, as the homing ability of the arrows can quickly overwhelm enemies. The Phoenix Blaster is the best pre-Hardmode gun, crafted with 10 Hellstone Bars and a Handgun at an Anvil. Though it isn't autofire, it has a very fast use time, and therefore firing rate. It deals (Desktop, Console and Mobile versions) 24/(Old-gen console and 3DS versions) 23 damage, and is very effective when paired with Meteor Shots. The Star Cannon (crafted with a Minishark, 20 Meteorite Bars, and 5 Fallen Stars) deals an insanely high 55 damage and is autofire. Though the Fallen Stars it uses as ammo can be hard to accumulate, building a skybridge can easily collect them, and using it as ammo against both the Wall of Flesh and the mechanical bosses can quickly take them down.
- Magic: Magic users will begin to see their weapons heavily diversify – arguably making it the most unique class at this point. There are tons of items you can fight with. One is the Demon Scythe, which has a 1 in 35 (2.86%) chance of dropping from Demons and Voodoo Demons in the Underworld. It fires a Demon Sickle that hovers around the player then slowly accelerates until reaching full speed. Though it doesn't autofire, it is quick to use, pierces four enemies, and firing multiple Demon Sickles at a time can easily kill most enemies. The Book of Skulls is another great option for mages. It has a 36/343 (10.5%) / 1/3 (33.33%) chance of dropping from Skeletron and fires slow flying skulls that can pierce two enemies and, on the
 Desktop version,
  Console version, and
  Mobile version, flies towards enemies. The way it "juggles" enemies makes it a formidable weapon through Hardmode. The Water Bolt can be found on the shelves of the Dungeon amongst other Books, and autofires multiple bolts of water that both pierce enemies and ricochet off blocks, making it especially effective in arenas and dense caves. Against the Wall of Flesh, the player can bounce them off the ceiling, allowing them to repeatedly pierce the Wall of Flesh's eyes and mouth. The Flamelash and Flower of Fire are both found in Shadow Chests: the former fires a ball of fire that can be controlled by the cursor, and, on the Desktop version, Console version, and Mobile version, will home into enemies and, after hitting it, will home on and explode on contact with another enemy. Meanwhile, the latter fires a slow fireball that doesn't pierce but ricochets 4 times and deals (Desktop, Console and Mobile versions) 48/ (Old-gen console and 3DS versions) damage. These are generally all the magic weapons you'll need – however, if you have the Meteor armor, the Space Gun fires very rapidly and doesn't cost any mana, meaning it could still remain effective.
 - Summon: Finally, there are summoning weapons, which are generally the most limited at this stage of the game. There are really only two formidable choices. The first is the Hornet Staff, crafted with 14 Bee Wax, which inflicts 9 damage and shoots stingers at enemies, inflicting Poisoned for 4 to 7 seconds. Your second option is the Imp Staff, which is crafted with 17 Hellstone Bars and inflicts (Desktop, Console and Mobile versions) 17/ (Old-gen console version) 21 damage and fires fireballs at enemies every 0.75 to 1.5 seconds, inflicting the On Fire! debuff for 3 to 6 seconds. Though the Imp Staff deals much more base damage and the debuff it inflicts is more damaging over time, its fire rate is a lot slower. Therefore, either summon is effective, though the latter may be preferred. (Desktop, Console and Mobile versions) The Spinal Tap is the most powerful pre-hardmode whip in both terms of direct damage and summon tag damage, and is highly recommended. (Desktop, Console and Mobile versions) The Snapthorn is another whip you could use, with benefits over the Spinal Tap being its chance of inflicting Poisoned onto enemies and its buff which provides an increase in attack speed compatible with other weapons.
- Tools: The Molten Pickaxe is the highest tier pickaxe you can obtain at this stage, crafted with 20 Hellstone Bars. It can mine Cobalt and Palladium ore, the first tier Hardmode ores. However, on the
 Old-gen console and
  versions, the Reaver Shark can be fished up in the Ocean with a 1 in 100 chance with 50% fishing power and has the same pickaxe power as the Molten Pickaxe, meaning it can be obtained early game rather than after defeating the Eater of Worlds/Brain of Cthulhu. The Molten Hamaxe, crafted with 15 Hellstone Bars, functions as both an axe and a hammer, and is the strongest hamaxe in pre-Hardmode.
 - Ensure you've obtained key accessories Many of these accessories are produced at the Tinkerer's Workshop, and the components will be much harder to get in Hardmode due to the much stronger enemies.
- If at all possible, you should have created the following:
- Frostspark Boots which allows flight, very fast running, and extra mobility on ice, alongside boosting movement speed on 8%. This accessory is especially necessary during boss fights. Lava Waders are another important mobility accessory underground, which provides the ability to walk on honey, lava, and water. It also grants immunity to fire blocks and 7 seconds of immunity when in lava. On the Desktop version, Console version, and Mobile version, these two can be combined into the Terraspark Boots.
- One of the Horseshoe Balloons, which provide increased jump height, double jump (the best double jump is from the Yellow Horseshoe Balloon, crafted with the Sandstorm in a Bottle), and immunity to fall damage. (Desktop, Console and Mobile versions) The Bundle of Horseshoe Balloons, while being much more expensive than other Horseshoe Balloons, provides the quadruple jump ability of the Bundle of Balloons along with fall damage immunity.
- Other useful equipment includes Lava Waders, Frog Leg, Jellyfish Diving Gear, Flying Carpet (if you have a Pyramid), Obsidian Shield, and Celestial Cuffs.
- Frostspark Boots which allows flight, very fast running, and extra mobility on ice, alongside boosting movement speed on 8%. This accessory is especially necessary during boss fights. Lava Waders are another important mobility accessory underground, which provides the ability to walk on honey, lava, and water. It also grants immunity to fire blocks and 7 seconds of immunity when in lava. On the
- If at all possible, you should have created the following:
- Armor: If you're doing a general playthrough, it's likely you'll want Molten armor, which provides 25 defense, which is necessary for basic survival in Hardmode. You may, however, have reason to prefer Shadow armor or Crimson armor, as they both provide more general stat bonuses and are easier to get. The former gives (Old-gen console and 3DS versions) +21% melee speed (Desktop, Console and Mobile versions) +15% critical strike chance and increased movement speed, while the latter boosts damage by 6% along with increasing life regeneration. However, at this point in the game, classes begin to diverge into different, distinct groups and you're going to have to be more specific with the type of damage you use. Therefore, you'll want to use the appropriate armor that corresponds with the weapons you have, as opposed to just taking whatever has the highest defense.
- Ensure you've obtained key items. Many of these items are produced at the Tinkerer's Workshop, and the components will be much harder to get in Hardmode due to the much stronger enemies.
- If at all possible, you should have created the following:
- (Desktop, Console and Mobile versions) Cell Phone, an informational accessory that displays current DPS, fishing power, location (horizontal and vertical), moon phase, nearest valuable items (such as chests, Life Crystals and Life Fruit, ore, and pots), player speed, rare creatures nearby, time, total amount of enemies nearby, total kills of the last enemy attacked, and weather. It also has the function of the Magic Mirror, returning the player home when they use it. The hardest parts of this accessory to obtain will likely be the Fisherman's Pocket Guide, Sextant, and Weather Radio, all rare rewards from the Angler. (Desktop, Console and Mobile versions) Players on 1.4.4 can combine the Cell Phone with the Magic Conch and Demon Conch to make the Shellphone, providing the ability to teleport to the initial world spawn, the Underworld, and the Oceans in addition to the set spawn point.
- (Desktop, Console and Mobile versions) The Grand Design, a versatile wiring item that gives the player access to a menu easily controlling wiring. The player can place or remove actuators and any color of wire almost effortlessly, and the menu (accessed by right clicking) allows the player to easily change between wiring options. This makes it incredibly easy to create farms and other mechanisms requiring wiring.
- Mining Armor is also useful.
- You will need a good multi-line Hook such as the Ivy Whip, Fish Hook, Skeletron Hand, or even the Slime Hook.
- And some company: At least one minion as above, one or more Mounts, and a light pet. The Shadow Orb or Crimson Heart are basic and easy to obtain, while the Magic Lantern can help when exploring). A regular pet is optional and purely a cosmetic, but by now you should have some appealing choices.
- Some items are meant for later: Feral Claws will start you on the path to the Fire Gauntlet, while a Bezoar and Nazar will be the first components of an Ankh Shield.
- If at all possible, you should have created the following:
- Ensure you have a sufficient stock of Potions.
- You should have a farm for herbs (see Guide:Gardening)
- Build secure fishing bases in all the major biomes, especially near your base. You might also want to build a lake of Honey for Honeyfins.
- Build a bait farm to be able to fish sustainably.
- Find Demon or Crimson Altars. Most Altars are found in the Corruption and Crimson respectively, so explore each Corruption or Crimson biome in the world. They need to be easily accessible when hardmode begins (further information in the Hardmode section).
- Reforge Weapons and Accessories. You'll generally want Warding (+4 Defense), Menacing (+4% Damage), or Lucky (+4% Critical strike chance).
- Build a surface Mushroom biome with a house for the Truffle NPC, as gathering the necessary materials will become much harder during hardmode.
- Make sure you have 21 valid NPC houses, so you don't have to worry about building them later on. In fact, you should have rather more that that, but they shouldn't all be together. Have spare houses at all your bases, so that if a bunch of NPCs find themselves in the middle of the Corruption/Crimson, they have someplace to respawn.
Here are some more open-ended ideas, many of which qualify as "big projects".
- Creating quarantines. You probably want to limit the spread of the Corruption or Crimson, and the Hallow as well. Without preparation, the Hallow and your "evil" biome will quickly divvy up your world between them. There are a few reasons this is bad: These biomes are very hard when first entering Hardmode; NPCs will not live near Corruption or Crimson (which is a problem if your town gets converted); and there are some unique drops and resources only available from uninfected biomes. (Old-gen console and 3DS versions) You should particularly protect the Jungle and Ocean biomes in their natural state; in particular, if a Jungle or Mushroom Biome gets taken by evil, the conversion is irreversible. To block the spread of the biomes, you will need to dig tunnels and hellevators to chop up your world, restricting any infection to a relatively small area (or at least keeping it away from your more valuable areas). For more information on building quarantines, see Guide:Maintaining world purity.
- Make the world accessible. Build a skybridge or a tunnel across your world, ideally with minecart tracks, to allow you to visit the new Hardmode biomes relatively safely and quickly. (Desktop, Console and Mobile versions) The Magic Conch and Demon Conch allow you to quickly teleport to the ocean shores and the center of the underworld.
- Rebuild your base. This is a good time to reconsider your main base(s) and rebuild them to something that has space for all your crafting stations and chests, with extra for growth, and houses for convenient access to favored NPCs.
- Farming money. Some vendors sell new, but expensive items in Hardmode and reforging Hardmode weapons is extremely expensive. For more information on farming money, see Guide:Making money.
- Rearrange the Landscape. Is there some area that's inconvenient to you? Change it! Want a lake or a mountain someplace? You can do it now.
Activating Hardmode
Once the player is ready to move on to the next phase of their world, Hardmode, then they will have to head to the underworld and fight the Wall of Flesh. Once the player defeats this boss, they will receive weapons and accessories to boost their survivability in early Hardmode. The player will also receive a message saying, "The ancient spirits of light and dark have been released." This indicates that the world has transitioned into hardmode.
Hardmode
Footnotes
- ↑ 1.0 1.1 Due to this weapon being expensive to use, this weapon should be used with Fossil Armor for its ammo conversation
- ↑ Unholy Arrows are better against medium crowd of up to 6 enemies, Wooden Arrows are better against large crowds, but due to the bow's inaccuracy, it is difficult to pierce every enemy with it