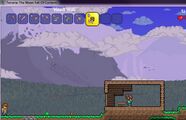
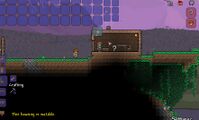
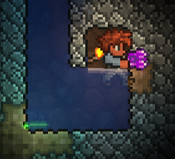
User:Spinfx/Guide Getting started
Welcome to Terraria!
If you're here then chances are you've begun playing and have wondered what you're supposed to be doing (and perhaps how to keep yourself from dying). Or maybe you haven't begun playing yet and are wondering where to start. Either way, we've got you covered. Everyone has to start somewhere and since we've all been there before, we made this handy guide to take you through surviving your first Terraria days, on through where to go afterwards.
This guide should help turn a person with no knowledge of the game into a bona fide Terraria explorer! And don't worry, we won't bite, but be careful of the monsters because they will.
Game mode
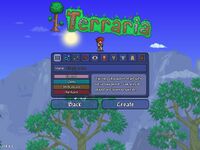
In Terraria's opening screen, choose a game mode to play, by clicking either Single Player or Multiplayer.
For now we recommend that you choose Single Player for your first Terraria experience. Learning is easier in Single Player mode. From this point on the Guide assumes that you have chosen Single Player.
Character Creation
After choosing which mode to play, click on New at the character selection screen to create a new character. Once at the character creation screen, you will see all the character properties that can be customized. Note: None of the settings are mandatory and you can skip any number of them. You can even skip all of them and head directly to the next section, Finishing Up, below. AppearanceThe first four character properties change your character's looks: Hair, Eyes, Skin, and Clothes. Note: These settings are purely cosmetic and do not affect gameplay.
GenderThe only difference between a Male and Female character is how they look, and the sounds they make when hurt. Note: You can change your character's gender after you create it using a Gender Change Potion. DifficultyA Character Difficulty mode must be chosen in the PC and console versions, but there is no character difficulty option in the mobile version where you will see that Softcore is displayed by default. Note: For your first Terraria experience, it is recommended that you leave your character in Softcore mode. It is the easiest mode, and will make learning how to play a more pleasant experience. The character difficulty setting determines what happens when the character dies - it does not affect any other aspects of gameplay, including how hard the enemies will be.
Finishing Up
This marks the end of character creation - the newly created character will added to the list of characters in the menu. |
At the character selection list, pick your character. The World selection screen will display.
World Creation
Select New. You will be presented with 3 World Size options: Small, Medium, and Large.
Note: We recommend you create a small world for your first Terraria experience. Medium and Large worlds provide more space for exploration which you'll likely want once you've gained some experience, but as a beginner you'll appreciate having less distance to travel. Don't worry though, small worlds are still rather massive especially for a beginner - fully exploring one can easily take many real days of play. After selecting a world size, you will be asked to choose between Normal and Expert mode.
For now, select normal. Next you're asked to enter a name for your new World. You can leave the displayed name (usually "World #"), or erase it and type any name you like. When done select Accept. This marks the end of World Creation - the newly created world will be added to the list of worlds in the menu. |
At the world selection list, pick your world to load the game.
Now it's time to finally enter Terraria!
Beginning Gameplay
Upon entering a world for the first time, your character will spawn (be placed into the game) at the center of the map, so you have half of the world to explore to the left, and half to the right. This location is known as the Spawn Point (or simply, the "Spawn") and will be where your character is placed each time this world is entered. Most world spawn points are located in Forest biomes.
Note: The spawn point can be changed later using Beds, but we'll get to that later.
First let's take a look at the game interfaces.
Movement and Tool Use
Movement uses the keyboard, while most interactions like mining, building, and fighting use the mouse. These can be customized in the settings menu before entering a world, but for now we'll assume you haven't changed the default controls. For a quick recap of the available keys or the controls for other devices, see the game controls page.
|
Hotbar and Inventory
The hotbarIn the upper-left corner of the screen are ten boxes numbered from 1 to 0 (zero). These are special Inventory slots referred to as the "hotbar", and they contain the items you currently have access to for use. Press the Esc key to see the rest of the inventory slots; if you have autopause toggled on, opening the inventory also pauses the game. These are empty right now since you haven't acquired any items yet but don't worry, before long you'll have more than you can carry. Press the Esc key again to close the inventory. All newly created characters begin with the following tools in the hotbar: a Copper Pickaxe, a Copper Axe and a Copper Shortsword.
The slot of the currently selected item in the hotbar will be slightly larger than the other slots and have a highlighted background color, with the name of the item listed above the hotbar. This item will be used when you click the left mouse button. The current selection can be changed by:
If you do not want to accidentally click on other hotbar slots (the third feature), you can lock the hotbar by clicking on the padlock button to the left of the hotbar while the inventory is open. To toggle the feature back on simply click on the padlock one more time to unlock it again. Rearranging the hotbar
Try it now with the Copper Axe: open the inventory, and bring the mouse pointer over the axe and click on it. If you move the mouse pointer now you will see the axe attached to it. Point to one of the empty slots in the lower portion of the inventory, and click once more to place the axe down in the slot. What you've done is moved an item from the hotbar into a storage slot. Items in storage slots cannot be used directly when the inventory is closed, unlike items in the hotbar - they are simply being carried by your character. Move the axe back to a hotbar slot. While the inventory is open you may pick up and rearrange the items in the hotbar to your liking. Later in the game when you acquire more items you'll have to decide which items to have accessible in the hotbar, while everything else is put into storage. Generally you'll want your best Tools and Weapons in the hotbar, along with at least one Light Source, and one type of Blocks. The inventoryBelow the hotbar is the remainder of the inventory. 10 hotbar slots plus 40 inventory storage slots give you a total of 50 slots. Additionally, you have a trash slot, and a row of 4 slots apiece for coins and another for ammunition. On the lower right is a separate section for equipment and accessories, while below left is the Crafting section. For the purposes of this guide these sections will be ignored - you can look them up later in the detailed Inventory article. |
Other interface elements
All characters begin with 100 health points (indicated by five hearts) and can currently go up to 400 via Life Crystals, then further boosted to 500 with Life Fruits. Health starts regenerating after a short period of not taking further damage. Standing still increases the rate of regeneration.
New characters start with 20 mana, represented by 1 star. As the maximum mana is increased (by using Mana Crystals), additional stars will be displayed below the original. Mana regenerates shortly after mana usage is stopped, and at a much faster baseline rate compared to health regeneration. Note: For more details on health and mana, refer to the respective articles. |
The First Day
After loading up the world your character will be standing at the spawn point, with an NPC nearby, the Guide. Talk to him if you want, he has some tips for new players, and will show you the available crafting recipes if you show him an item.
Let's try out the tools you start with.
Digging and placing things
Start by selecting the Copper Pickaxe in the hotbar. Move the mouse pointer over some nearby Dirt or Stone, then click and hold the left mouse button to use the pickaxe to hit each block several times. The blocks will be freed, and if you're close enough they will be automatically picked up by your character. Notice that the blocks you picked up are now displayed in another slot of your hotbar. Continue until you have at least 5 or so blocks. The number of blocks in the slot is indicated by the number displayed there. That's how to dig stuff! Easy, wasn't it? On to building! Select a hotbar slot that contains blocks, and left click in an empty space near your character to place a block. Note that you need to place blocks on top of existing blocks, they cannot be placed free-floating in mid-air (unless there is a background wall they can adhere to). If you've done this correctly, a block from your hotbar should fall into place with a "thump". Try placing another block on top of the one you just placed, then try holding the left mouse button while you move the pointer, to continually place connecting blocks. (Your character must be close enough to place the blocks - if you are too far away nothing will happen.) You can remove any previously placed blocks by digging them back out with your pickaxe, even the block originally connecting to the ground - blocks above it will not fall due to gravity. This is true for most blocks except for a small handful like sand and silt, which do fall when there are no supporting blocks below them. |
Okay, let's start with something useful!
Building a Home...
While it's fun to run around exploring, it would be nice to have a base of operations, right? Somewhere to store the inevitable hoard of loot you will amass, as well as a place for shelter. The latter is especially important for NPCs because they will only move in (or respawn after being killed) if there is a place for them to stay. So let's start by building a house for the Guide.
Once you've obtained around 100 pieces of wood, find a nice level spot of land - use the pickaxe to flatten the ground and fill any holes with the dirt blocks you dug up. Time to get cracking!
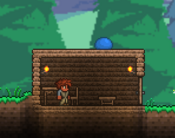
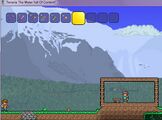
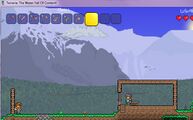
All you need to do is follow the steps shown in the image gallery. 1) Start by placing wood on the ground to make the floor of the house, then add the walls and ceiling. Make sure it's at least 4 blocks high. Don't worry about background walls or doors yet. The size isn't terribly important as long as it's not too small. By the way, you can even use dirt blocks as building material if you're afraid of running out of wood. Trees can be replanted (using the acorns they drop when you chop one down), but they take some time to grow. 2) That box is nowhere near as enticing as it seems (even if it actually keeps enemies from reaching you), so you'll have to do some crafting to turn it into a habitable structure. Expand the inventory and look down at the bottom left corner of the interface. This is the crafting corner, which will display what items you may currently craft. Its contents will change based on what you are carrying, and which Crafting stations you are standing close to. Even though you do not have any crafting stations yet, there are a few basic crafting recipes available. Assuming you have extra wood and some gel (from killing slimes), you should see crafting available for making Torches, Wood Platforms, and a Work Bench. The work bench is an important item because it is the first crafting station available to you. 3) Click on it to make it the current craft recipe selection, or scroll to it using the mouse wheel, then click once more on it to create one. A work bench will automatically be crafted from your store of wood and placed in your inventory. 4) Move the work bench to a hotbar slot so you can place it down on the floor of the house. Now that you have a crafting station (the work bench you just placed down), there will be additional crafting recipes available to you when you stand near it and open up the crafting interface.
With a work bench in place, let's make a few more items:
Next, create a door for the house so that it can be entered without needing to leave a permanent hole in the wall open. 5) Wooden Door – requires: 6 wood. Dig out one side of the house and place the door there. Doors can be opened and closed by right clicking on them, and the direction the door will open is based on the direction the character is facing. All NPCs can open doors, while monsters cannot except during events like Blood Moons or invasions. Some monsters can bash down doors though - in general, doors are not foolproof against monsters. Still looks like a rather breezy box, doesn't it? The next step in building is to craft and place some background walls. This also prevents monsters from spawning inside. 6) Wood Wall - requires 1 wood per 4 pieces of wall. For seamless visual looks walls need to be placed overlapping each other, so you'll actually need more than first impressions suggest. No cracks should exist either, so walls will have to be placed overlapping the blocks making up the frame of the house as well. Fortunately most wall recipes create multiple pieces; the 1:4 ratio is common. For now, use up 20 pieces of wood to create 80 pieces of wood wall. Looks better even if it's still a box, now with a door. We're almost done - all that's left is some furniture and lighting. After all nobody wants to stand around in the dark, not even NPCs. If you haven't already, craft several torches and place a couple of them in the house. Torches last forever, and they're very useful as markers indicating where you've explored, so later on when you have enough wood and gel make sure to create a whole stack (99) of them. Finally, no house is considered NPC-suitable without a chair and a table, so craft one of each and place them in the house. 7) Let's check if this house is now ready to be occupied. Open the inventory interface, then over to the right in the equipment slots click on the Housing icon. Click on the big white question mark sign, then move the pointer to anywhere in the interior of the house and click. If the house is acceptable, you will get a message in yellow font saying so in the lower left of the screen. 8) Now that the house is considered valid, let's tell the Guide to move in. In the housing section, look below the question mark sign - you'll see a portrait of all NPCs present in the world. Currently there is only 1, the Guide. Click on this portrait, then click anywhere in the interior of the house (just like placing an item). Voila! This house now belongs to the Guide. When night falls, all NPCs will return to their designated houses and stop moving. NPCs without housing will mill around warily - generally this doesn't happen because NPCs only spawn into a world when their requirements are met in addition to there being an empty house for them to move into. Still, it's possible to dismantle a house after an NPC moves in, leaving them stranded - for example, if you demolished their house in order to build a better replacement. You can temporarily surround them with blocks of dirt to prevent monsters from reaching them.
|
Now it's time to do some exploring (and killing!)
... And Defending it
Wielding weapons works the same as using other items - equip them in a hotbar slot and select to use. Below are the different types of weapons, along with early ones you may be able to craft immediately:
Health and DyingTaking damage and dying will be an inevitable part of early life in Terraria.
EnemiesDepending on the time of day, there will be different kinds of enemies. All monsters in the game drop Coins in addition to a possibility of a monster type specific drop. Assuming you remain in the vicinity of the forest biome you started at, you will typically encounter the three following common monsters. During the day:
During the night:
Events / InvasionsLater in the game depending on whether the criteria are met, certain events (also known as Invasions) may occur that add extra challenge to the game. However, these events should be of no concern to fresh characters - among the requisite conditions is that the character's maximum health meets or exceeds certain minimums. Therefore it's possible to prevent them from happening by simply keeping and not using any Life Crystals you find, to be used when you finally feel that you are adequately prepared to experience them. Additionally, most events take place on the surface of the world around your spawn point. Remaining underground or far away from there will also cause some events to expire. Note: For more information, see the individual event links in the Events article. |
Mining
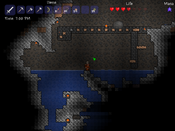 3. A gapped bridge, also a Mother Slime. It's time to begin the wonderful process that is getting upgrades, as there are no advancement paths apart from the power that comes from better gear. However, a Workbench will not be enough to craft our gear; a Furnace is needed. A Furnace will serve to transform Ore into Bars (and can also be used to make glass and ceramic items), which are the main building materials of weapons, tool, and armor . Venture out and find deposits of Stone, and mine up at least 20 blocks of stone. Torches are also needed for creating a Furnace, so make sure to kill a few slimes to get a bit of Gel. Finally, a small bit of Wood is all that's needed. Head to the Workbench and craft a Furnace, then place it down. Ore is a fundamental material in Terraria, and in order to survive the later sections of the game you will forge and create a lot of Bars. While exploring the world keep an eye out for odd colored blocks as these will most likely be ore deposits. The picture to the right (1) shows the five most common types of ore and stone. We also need to make an Iron Anvil or Lead Anvil (some worlds will have lead instead of iron; iron and lead are identical except for appearance and name). Anvils are used to create items from Bars. Go out and find some Iron Ore or Lead Ore. In order to smelt one Iron Bar/Lead Bar, three Iron/Lead ore must be present. As we need five bars total; to successfully create the Anvil we need 15 Iron/Lead Ore. Once the ore is gathered and smelted at the Furnace, head to the workbench and create an Iron/Lead Anvil (you can also buy an anvil from a Merchant for 50 silver). When placed down (preferably next to the Furnace) an entire new set of Recipes become available. The surface has its share of ore, but in order to get the best items in the game, you have to dig a bit deeper. It is highly advisable to begin gathering materials for a few Buffs. A fresh character on a new map can quickly gather Sand and Daybloom necessary for some early buff potions, as well as the Daybloom Seeds and Clay used to begin Gardening with Clay Pots. All Buff potions use Bottled Water, at least one of the six Herbs, and in most cases another item such as Ore, enemy drops, or other naturally occurring objects. Two of the earliest buffs that can be easily concocted are the Regeneration Potion and the Ironskin Potion, and for the early game can significantly improve your survivability. Cave explorationThere are a few options when choosing how to dig: Digging straight down or searching for an open cave to explore. At this early stage in the game use caution when digging holes. Using the blocks picked up while digging or creating Wood Platforms, you can construct a way back. Another thing to watch out for is deep caverns. When falling great distances the character will take damage. When underground there will be no light. To illuminate your area and see, you can hold a torch in your hand by putting a torch stack in your hotbar and selecting it. However, you will be unable to use anything else while holding the torch. You can stick a torch on a wall or on the ground by left clicking where you want to place it. This will not only let you see mobs so you can fight them, but you can leave behind a trail of torches to see mobs coming at a greater distance, mark the way back out, and show where and how far you've gone if you come back to the same cave to explore further. In addition to placing torches, you can throw one (the T button by default), which is useful for seeing what's at the bottom of a pit, and how far down it goes (unlike with all other items in the game, throwing a torch only throws one item in the stack, instead of the whole stack). When exploring caves you will frequently come across pots. You can smash these with a weapon or tool to get some loot. Less common are chests and golden chests. When you are near or in front of a chest you can right click, which will show your inventory and below your inventory the contents of the chest. You can click on a chest item to grab it, then click again on an inventory square to put it in your inventory. Alternatively, you could click "Loot All" to the right of the chest contents grid to grab everything in the chest. Once the chest is empty you can repeatedly hit it with your pickaxe in order to pick it up and take it with you, and then place it elsewhere like you'd place any other piece of furniture (if the chest isn't completely empty then it will remain there no matter how many times you hit it). It's recommended that you take a few of the chests you find back to your house to store stuff with, since crafting your own chest or barrel uses Iron Bars, and you'll want to save up your iron for other purposes. Another thing you'll run into underground is cobwebs, which slow you down when you try to move through them. You can cut them down with any weapon or tool and then pick them up. Harvested cobweb can be turned into silk, which is used to make a bed, which can be used to change your spawn point. Silk can also be used to make some type of decorative items and vanity clothing, or can be sold for two silver coins a piece if you need money. Harvested cobweb itself can be placed like furniture or a torch (select it and left click), either for use as decoration, or placed at the bottom of a tall pit to break your fall for preventing fall damage. While mining underground it is possible to come across pools of water. Torches do not work underwater. Glowsticks work underwater, but they cannot be crafted and must be found at this stage of the game. Also, they cannot be attached to blocks. You can throw them, but they will bounce and move around and may be hard to place exactly where you want them. You can craft Sticky Glowsticks anywhere by combining Gel with a Glowstick; these will stick to walls when thrown, making them easier to place. No matter which you use, however, glowsticks are not permanent when thrown, unlike placed torches, though they do last for 5 minutes. Also note that just as with other projectiles, a glowstick should be thrown with the attack command. The default button to "throw" an item is the "T" button, but using this method the entire stack of glowsticks will be thrown. Using the throw command is for dropping a stack of the item from your inventory on the ground. Instead, you should use the attack command, which throws an individual glowstick. When stepping into a pool of water the character will sink as if weighted down. Don't fear diving down underwater to continue moving downwards, as the character has a rather large air meter. However, if close to running out of air there is a way to regain air quickly. First either find a wall or make a small shaft at the bottom of the water. (The shaft should be around 10 squares deep) Then dig a 3 high 1 wide hole in the wall and then a 4-6 high and 2 or more wide hole in this wall. The water will not fill the upper squares. As the air supply runs low jump into the hole. This will restart the meter. (2) There are many deep chasms inside the caves. An efficent way to traverse them is to create a gapped bridge (3). To do this create a background wall of any material. Stone and dirt will be in excess so those are recommended. Place a strip as far as the character can reach then build stepping stones at least one block apart. There are two benefits to this:
Note that the character cannot pass through the one space gaps either; so it would be a good idea to leave an opening somewhere along the bridge. |
Where to go from here
Now that you've learned how to play and survive, the best thing to do would be is to continue exploring and discovering new things. If you do get stuck, find something you're unsure about, or simply want detailed information about something, look up what you need on the wiki. Here's a hint: progression is based on your gear, so improving it is the way to go. The bosses are key checkpoints in advancement, so if you can't find anything else to do with what you already have, try fighting a boss and see what new things become available to craft with the drops you get from them.
Above all, play your way and have fun!
Tips
- Exiting the game then re-entering the world will bring you back to your spawn point.
- It's best to build your base close to the original spawn point so you have less trouble returning to it at night or if you respawn.
- When digging very deep, it's convenient to leave a way back up. The easiest way would be to leave blocks jutting out on alternate side of the passage to serve as a makeshift ladder.
- Torches last forever (unless dislodged by water) so bring plenty along and place them liberally when going mining and exploring.
More information
For more detailed information, check out the guides listed below.
Crafting 101 - This guide contains a detailed explanation on how crafting works and various crafting station setups.
NPCs - There are more NPCs than just the Guide that you'll want to make homes for.
Bases - This explains what features a useful base should provide.
Mining techniques - This guide goes into detail on easy and efficient ways to mine ore, and what to expect when venturing deeper into Terraria.
Gardening - How to grow gardens of Trees, Mushrooms, and other less savory things. This is a wonderful guide for learning how to properly organize and maintain a garden.
PvP - A great place to start when looking for information on Player vs. Player combat. Not quite for beginners, however it's a great read for those who would like to study beforehand.
List of Bosses - A list of all the Bosses players will come in contact with in their worlds. Bosses are powerful monsters that have a lot of health and do devastating damage to the unprepared.
Video guides
Note: As of version 1.2.4.1 (May 15, 2014) these videos are outdated. Do not fully rely on the information shown even though most basic principles may still apply.

