Guide:Lunar Events strategies
The Lunar Events start immediately after beating the Lunatic Cultist boss. Four Celestial Towers will spawn on the map, each corresponding to one of the four classes-- Melee, Ranged, Magic, and Summoner. Before trying to beat this event, make sure you are completely prepared, as the event cannot be cancelled without entering combat.
Before You Begin
The first thing you should do after defeating the Lunatic Cultist is open your Map and note the locations of each Pillar. If you need a safe haven, teleport to the map's original spawnpoint, as no pillars will exist at the center of the world.
Gear
Armor
- For melee characters,
 Beetle armor is a great option. The
  Beetle Scale Mail potentially provides the highest offensive melee bonuses in the game, while the
  Beetle Shell is much tankier, especially if you can avoid taking hits frequently. The latter is a viable option even for those who don't wish to use melee weapons.
- For health regeneration, a set consisting of the
 Hallowed Mask,
  Valhalla Knight's Breastplate(Desktop, Console and Mobile versions), and
  Valhalla Knight's Greaves(Desktop, Console and Mobile versions) is a good choice. Swapping the Hallowed Mask for the
  Shinobi Infiltrator's Helmet(Desktop, Console and Mobile versions) gives a significant increase to minion damage and sentry capacity, at the cost of weaker defense and melee bonuses.
- For health regeneration, a set consisting of the
- For ranged characters, the strongest set consists of a
 Shroomite Headpiece,
  Red Riding Dress(Desktop, Console and Mobile versions), and
  Red Riding Leggings(Desktop, Console and Mobile versions). The full Shroomite set also works, but it will be nearly impossible to safely activate its set bonus when the screen is filled with enemies.
- The chest piece can be swapped with the Valhalla Knight's Breastplate(Desktop, Console and Mobile versions) if more survivability is needed.
- The chest piece can be swapped with the
- For a magic user, the strongest armor is a hybrid set consisting of the
 Spectre Mask(Desktop, Console, Old-gen console and Mobile versions), Valhalla Knight's Breastplate(Desktop, Console and Mobile versions), and
  Dark Artist's Leggings(Desktop, Console and Mobile versions).
 Dark Artist's Robes(Desktop, Console and Mobile versions) can be substituted into the above setup for even more damage, though it gives up a significant amount of survivability.
 Spectre armor is another viable option. The Spectre Mask should be used as much as possible, and the Spectre Hood should only be used to heal when at low health.
- A summoner should wear
 Spooky Armor. The
  Tiki Armor can be used if extra whip range is desired.
Weapons
For Melee users:
- The
 Influx Waver and the
  Terra Blade are the best swords available. The Influx Waver is best used against single targets such as the Pillars, while the Terra Blade excels against crowds.
  The Eye of Cthulhu yoyo is very effective with the
  Yoyo Bag equipped.
 Flairon possesses high damage and homing projectiles. The
  Scourge of the Corruptor provides a similar function.
- The
 Vampire Knives can be used for quick healing.
 - The
 North Pole is effective against the celestial events, as it is against all events. It is particularly good for taking down the pillars themselves, not due to DPS but because its secondary projectiles can defeat nearby enemies while you attack the pillar.
 - Once the Solar Pillar has been defeated, the
 Solar Eruption and
  Daybreak are both extremely good choices, though the Solar Eruption has a significant edge against the high-density crowds you will encounter.
For Ranged users:
- The
 Xenopopper with
  Crystal Bullets is the best gun available. The
  Chain Gun with
  Chlorophyte Bullets is a viable alternative.
 - The
 Tsunami with
  Holy Arrows is excellent for crowd control while also having amazing DPS.
 - The
 Electrosphere Launcher easily cuts through clusters of grounded enemies. The
  Snowman Cannon trades power for homing projectiles.
 - Once the Vortex Pillar has been defeated, the
 Vortex Beater and
  Phantasm are both extremely powerful weapons.
For Magic users:
- The
 Razorblade Typhoon performs extremely well as a main crowd control weapon.
 - The
 Razorpine and
  Blizzard Staff are extremely strong for DPS, while still being good for crowds. The
  Laser Machinegun has comparable power, but performs worse against crowds.
 - The
 Magnet Sphere,
  Rainbow Gun and
  Nimbus Rod are good secondary weapons. A
  Golden Shower never hurts either.
 - Once the Nebula Pillar has been the defeated, the
 Nebula Arcanum is available as a really strong weapon with insane DPS potential. The
  Nebula Blaze can also be used as a weaker but more accurate Razorpine.
For Summoners:
- The
 Xeno Staff or
  Tempest Staff are very good options. The former is more accurate against fast-moving enemies.
 - Should the
 Terraprisma have been obtained pre-lunar events, it is the absolutely best option.
 - The
 Staff of the Frost Hydra or the Tavernkeep's Sentries can be used as secondary weapons. They are more effective when fighting in a flat area.
 - The
 Kaleidoscope(Desktop, Console and Mobile versions) is the best whip available.
 - Once the Stardust Pillar has been defeated, the
 Stardust Dragon Staff and
  Stardust Cell Staff are available as incredibly good choices.
Accessories
- Wings are mandatory at this point in the game. The
 Fishron Wings offer the longest flight time and highest ascent speed, and
  Betsy's Wings and the
  Hoverboard offer extra horizontal mobility.
- The
 Frog Leg makes all Wings ascend significantly faster. A
  Double Jump Balloon gives a lower increase to flight speed, but also adds a vertical jump when flying.
- The
- The
 Master Ninja Gear will help greatly in dodging attacks. The Expert Mode
  Shield of Cthulhu(Desktop, Console and Mobile versions) provides a shorter dash, but allows for temporary invincibility when dashing into an enemy.
 - The Expert mode
 Worm Scarf(Desktop, Console and Mobile versions) provides a damage reduction to all attacks. The
  Frozen Turtle Shell can be used for the same purpose.
 - Melee users should use the
 Frozen Shield(Desktop, Console and Mobile versions), as it grants 6 extra defense and 25% damage reduction under half life.
 - A
 Celestial Shell(Desktop, Console and Mobile versions) or
  Celestial Stone gives very welcomed increases to all stats, most notably damage and health regeneration.
 - Damage boosting accessories such as the
 Destroyer Emblem,
  Magic Quiver, or
  Mechanical Glove are all very good.
 - The
 Shiny Stone(Desktop, Console and Mobile versions) can be used for very quick healing after retreating.
 - The
 Charm of Myths reduces the length of the
  Potion Sickness debuff by 1/4 (15 seconds), so
  Healing Potions can be used a lot more frequently as well as giving a small life regeneration increase. For the Philosopher's Stone effect to work, it only needs to be equipped the instant a potion is drunk.
 - In
 Desktop version,
  Console version, and
  Mobile version, the Expert mode
  Brain of Confusion(Desktop, Console and Mobile versions) has a 1/6 chance of dodging an attack, and gives the player an increase of 20% critical strike chance for 4 seconds if successful.
 - The
 Magic Conch(Desktop, Console and Mobile versions)can help mitigate the length of the fight, as each of the furthest pillars are much closer to the Oceans than they are to the center of the world.
Mounts
 Brain Scrambler is very good to use as it has very high mobility, elevated jumps and the ability to shoot lasers automatically.
 Cosmic Car Key or
  Shrimpy Truffle can prove useful with their permanent flight, but are poor for quick dodging.
- If playing on Expert Mode,
 Witch's Broom is a great option as it has infinite flight and decent mobility and is accessible.
The Pillars
Pillar Order
It is difficult to decide which order to fight the different pillars in, but here are some suggestions.
- It is always good to begin with the respective pillar for your preferred combat class, as the pillar drops will allow you to craft weapons suited to your class.
- If you built a house far away from your spawnpoint, it is possible that a pillar will spawn on top of or very close to your house (and/or NPC town, if built next to your house), causing a lot of trouble for you. If this happens, you should definitely try to take out that pillar first.
- The Stardust Pillar is arguably the easiest, and so it should be targeted first if your goal is to obtain a powerful weapon quickly. Even if you are not a summoner, the Stardust Dragon Staff will be extremely effective against the remaining pillars.
- The Solar Pillar is dangerous for those who do not have prior knowledge of its enemies' mechanics. Selenians can reflect projectiles when spinning, and Crawltipedes quickly kill flying players.
- The Vortex or Nebula pillars are not easy but also not difficult. As with the other pillars, they can be taken down early if you need their respective weapons, or saved for last if you do not.
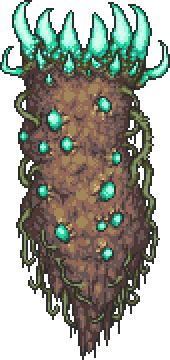
Stardust Pillar

| Type | |
|---|---|
| Environment | |
| AI Type | Celestial Pillar AI |
| Damage | 0 |
| Max Life | 20000 |
| Defense | 20 |
| KB Resist | 100% |
| Immune to | All debuffs except Whip debuffs |
- Item (Quantity)Rate
 Stardust Fragment(Desktop, Console and Mobile versions) (12–6024–100)100%
- Starmark

- Released Energy

| Hurt | |
|---|---|
| Killed | |
| Released Energy | |
| Shield destroyed |
- Internal NPC ID: 493
- Internal Projectile ID: 540, 629
The Stardust Pillar is the Summoner-themed pillar. It applies a royal blue shader to the screen.
Enemies
The Flow Invader is easily the most dangerous of the creatures spawned, as it is capable of shooting high damaging projectiles at a steady pace. Continually move while defeating one. When the Flow Invader is killed, it will launch 1-3 projectiles at you immediately. This attack is the most crucial to dodge.
The Star Cell is a melee-based enemy that resembles a blue plasma globe. It is spawns smaller versions of itself on "death", and if these aren't killed, they will grow to full size. This mechanic can be exploited to make progressing the event much faster.
The Twinkle Popper is a ground enemy that spawns smaller versions of itself that shoot a spreading attack on death. If you are fighting in an arena with lava, the Twinkle Popper's minions will fire their attacks almost instantly.
The Milkyway Weaver is a worm-like creature capable of high melee damage. It can avoid damage by tunneling through the ground, so you should stay in the air to bait it into the open. Unlike other Worm enemies, its only vulnerable spot is its head, making piercing weapons ineffective.
The Stargazer is a fast-moving humanoid creature that shoots a laser beam periodically. It is capable of dealing very high-damage lethal hits and should be treated with the same level of caution as a Flow Invader. Moving too quickly may cause you to run into the beam, so be cautious.
Strategies
- As most attacks from the enemies cannot penetrate 2 block thick barriers, with the sole exception of the Milkyway Weaver, the player can gain easy kills by building a 2 block thick platform several blocks off the ground with minions or yoyos. By using flight, the player can also easily dispatch any Milkyway Weavers without taking serious damage.
- For mages who have defeated the Nebula pillar, the Nebula Arcanum is a recommended weapon, due to the high area-of-effect damage that can destroy many enemies at the same time.
- Keep your distance from the pillar, as it spawns enemies on-screen directly above it with a special animation.
- Any defensive barriers should be at least 2 blocks thick, as both the beams from Stargazers and the projectiles from Flow Invaders are capable of penetrating one block thick walls.
- An extremely quick and easy way to disperse the Stardust Pillar's shield is to build a long bridge of Wood Platforms. Then, lead a few Star Cells to the Wood Platforms, then get underneath the Wood Platforms, and attack the Star Cells until they die and split into smaller Star Cells. Then wait for the Star Cells to regrow, kill them again, and repeat the process. You can retreat from the pillar and the kills will still count; this way you will only have to deal with the relatively slow and predictable Star Cells.
Vortex Pillar
| Type | |
|---|---|
| Environment | |
| AI Type | Celestial Pillar AI |
| Damage | 0 (contact) 100200300 (Vortex Lightning)[1] |
| Max Life | 20000 |
| Defense | 20 |
| KB Resist | 100% |
| Immune to | All debuffs except Whip debuffs |
- Item (Quantity)Rate
 Vortex Fragment(Desktop, Console and Mobile versions) (12–6024–100)100%
- Vortex Lightning

- Vortex
- Vortex Lightning
- Released Energy
| Hurt | |
|---|---|
| Killed | |
| Summon Vortex | |
| Summon Alien Hornet | |
| Released Energy | |
| Shield destroyed |
- Internal NPC ID: 422
- Internal Projectile ID: 578, 579, 580, 629
The Vortex Pillar is the ranged-themed pillar. It applies a blue-green shader to the screen.
Enemies
The Vortexian is incapable of firing projectiles, but will relentlessly pursue grounded players. They pose little threat for flying players and can be easily picked off by any class. They will also summon a portal that shoots a very low damaging lightning on the players location upon death.
The Alien Queen shoots bullet-like projectiles at you that give the Distorted debuff. She also spawns Alien Larva that grow into the Alien Hornet. When fighting the Alien Queen, move vertically to avoid the projectiles and use a area-of-effect weapon to destroy the Alien Larva before they can transform. She is the highest-threat enemy and should be killed as quickly as possible. If you leave Alien Larvae and Alien Hornets for too long, expect to get outnumbered by Alien Queens later.
The Alien Hornet can spawn from an Alien Larva or a vortex from the pillar. They are fast-moving creatures that should be taken out quickly. They do not pose a major threat unless attacking in numbers, so use a piercing or area-of-effect weapon to kill the swarms.
The Storm Diver is a floating humanoid creature that wields a shotgun that looks and sounds like the Tactical Shotgun. They can deal moderate damage but easily miss their attacks. Pick them off early to avoid problems.
Strategies
- One of the simplest ways to defeat the Vortex pillar is to dig a 2*4 tunnel directly under the Pillar, and attacking upwards. Almost no enemies can get into the hole, which should result in an easy battle.
- Being hit with an attack from the enemies may give you the Distorted debuff, which will suspend a player in midair, unable to control their vertical movement. This debuff may prove deadly, so projectiles from the Alien Queen should be avoided at all costs.
- The pillar spawns portals in the sky that will summon Alien Hornets. Keep your distance from it.
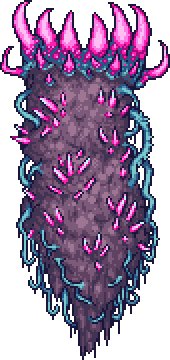
Nebula Pillar
| Type | |
|---|---|
| Environment | |
| AI Type | Celestial Pillar AI |
| Damage | 0 |
| Max Life | 20000 |
| Defense | 20 |
| KB Resist | 100% |
| Immune to | All debuffs except Whip debuffs |
- Item (Quantity)Rate
 Nebula Fragment(Desktop, Console and Mobile versions) (12–6024–100)100%
- Released Energy
| Hurt | |
|---|---|
| Killed | |
| Released Energy | |
| Shield destroyed |
- Internal NPC ID: 507
- Internal Projectile ID: 629
The Nebula Pillar is the mage-themed pillar. It applies a magenta-purple shader to the screen.
Enemies
The Nebula Floater is the most dangerous of the group. It floats around, shooting lasers that do high damage. Upon taking damage, it will often teleport to a different part of the screen, making it very difficult to kill. The Nebula Floater will shoot a laser immediately after teleporting and periodically afterwards. When fighting it, be prepared to dodge and change direction.
The Brain Suckler is a melee-based creature. If it lands a hit, it will attach to the player's head and inflict the Obstructed debuff until it's killed. A Brain Suckler attached to the player deals damage very rapidly and must be killed immediately.
The Predictor is a ground creature that throws a spread of star-shaped projectiles as its main attack. When fighting, do not stray too close to the ground. At a higher altitude, it is easy to dodge the Predictor's attacks. They are easy to kill otherwise.
The Evolution Beast preys on grounded players with its fast charging attack. The Evolution Beast will also shoot a slow Nebula Sphere that homes in on the player and cannot be destroyed by an attack. Only engage the enemy in the air--never in grounded melee combat.
Strategies
- The main sources of damage, Evolution Beasts and Nebula Floaters, can be nullified by building a small box in the sky. As Nebula Floaters cannot fire lasers through blocks, building such structure forces them to ram the player, making them highly susceptible to wall penetrating attacks and minion damage. If the box is sufficiently high, Evolution Beasts will not spawn, thus avoiding their wall penetrating Nebula Spheres.
- The Evolution Beast is deadly to a grounded character. Always stay in the air.
- Most enemies are extremely mobile and some avoid damage by teleporting. Stay on the move or you will die very quickly.
- If you are blinded by an attack, kill the nearest Brain Suckler to regain your sight. It should be on your head. Don't let the blindness stop you from moving, as that will quickly lead to your demise.
- Unlike the other pillars, the Nebula Pillar does not perform any special attacks or actions in combat. Use this to your advantage and stay near the pillar.
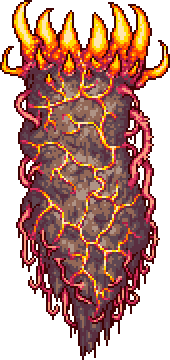
Solar Pillar
| Type | |
|---|---|
| Environment | |
| AI Type | Celestial Pillar AI |
| Damage | 0 120240360 (Solar Fragment) |
| Max Life | 20000 |
| Defense | 20 |
| KB Resist | 100% |
| Immune to | All debuffs except Whip debuffs |
- Item (Quantity)Rate
 Solar Fragment(Desktop, Console and Mobile versions) (12–6024–100)100%
- Released Energy
| Hurt | |
|---|---|
| Killed | |
| Released Energy | |
| Shield destroyed |
- Internal NPC ID: 517
- Internal Projectile ID: 629
The Solar Pillar is the melee-based pillar. It applies a yellowish-orange shader to the screen.
Enemies
The Selenian is a humanoid sword-wielding enemy that can curl up and charge at you. However, while curled up, most projectiles that you fire at it will be reflected towards you, including all bullets and arrows. This enemy is the bane of the ranged class: if you play with ranged weapons, only attack the Selenian if it is not curled up.
The Drakomire is a ground-based enemy that can spawn with a Drakanian riding it. The Drakomire beast can charge the player if nothing is riding it. If the Drakanian is riding it, the pair can do incredible damage. Use a crowd-control weapon to take out the pair, and utilize knockback to keep them out of melee distance.
The Corite is a fast-moving enemy that resembles a Meteor Head. It attacks by launching itself into the sky and coming back down like a meteor, shrouded in flame. They are very fast, and almost immune to knockback. They also deal very high damage on contact, so they should be prioritized first.
The Sroller is the more down-to-earth version of the Corite, utilizing a weaker, more frequent rolling attack that deals more damage. These enemies pose the most threat when in a swarm. Use dodging and knockback to keep them at bay while using a crowd-control weapon.
The Crawltipede is the deadly counter to a flying player. It only attacks players that are flying, and otherwise hovers in the air, ignoring them. Its only attackable spot is the bulging orb on its tail, but all damage dealt against it is multiplied by 10. Do not stay in the air for too long, as Crawltipedes can very easily kill a player.
Strategies
- An Ice Rod can be a great help in fighting this pillar. Because Crawltipedes target you when you are distant from a solid block, you can fly up above the level at which the pillar spawns fireballs, place an ice block below you, and then build a 10-20 block wide platform off either side of the ice block. Standing on the platform and using weapons that work through blocks, or leaving small gaps to attack through, will allow you to avoid most enemies, except for Corites, who can fly through blocks with their rush attack, and Crawltipedes, who will fly around in the pattern of their non-targeting idle AI.
- Hitting the tail of a Crawltipede while using the Spectre Hood or Vampire Knives will result in a very large amount of healing.
- The Scutlix Mount is recommended for this fight, as it disables your flying while still giving you incredible mobility and an extra ranged attack.
- Although flying is out of the question, staying on the move is still a must, due to the number of charge attacks that enemies will employ against you.
- While Mages are recommended to use the Razorblade Typhoon during the Lunar Events if beating the Pillars for the first time, or either the Nebula Blaze or Nebula Arcanum after beating the Nebula Tower, Solar Pillars might require you to stick with the Razorblade Typhoon even after obtaining the latter two, considering those other weapons will be reflected by Selenians. (The Arcanum is slightly less deadly to its user due to the slower projectile velocity, while the Nebula Blaze often becomes deadly to its user). While the Bubble Gun may seem like a good idea due to it's insanely high DPS but short range, the lack of piercing may cause you to be easily overwhelmed by the high spawn rate of the pillar enemies. On one-on-one interactions however, the Bubble Gun does work on some Solar Enemies, specifically the Corites that are highly knockback resistant and agile, while also killing Srollers and Selenians that also dash at you quite often and quickly. But the spawnrate of the Pillars may prove this to be a rare occurence.
- Summoners should use the Stardust Dragon Staff, as it is a great help in taking out the enemies. With the Stardust Dragon Staff at hand, all you need to do is trap yourself in a little box and watch the dragon kill all of the enemies for you. Corites will still be able to get into your box however.