Guide:Old One's Army strategies
The Old One's Army event differs from others in that the invading enemies do not attempt to kill the player; instead, they focus on destroying the Eternia Crystal used to summon it.
The invasion is separated into three Tiers depending on progression. It will start at Tier 1, and after a mechanical boss has been defeated Tier 2 can be fought. Then, after taking down Golem for the first time, Tier 3 is available.
The objective is to protect the Eternia Crystal from the enemies until all waves have been defeated.
Summoning Conditions
In order to summon the event, the Player must place the ![]() Eternia Crystal Stand in a roughly flat terrain: a maximum of three tiles of vertical deviation is allowed, any more and the Stand will not accept the
Eternia Crystal Stand in a roughly flat terrain: a maximum of three tiles of vertical deviation is allowed, any more and the Stand will not accept the ![]() Eternia Crystal.
Eternia Crystal.
The arena needs to be at least 61 tiles long on each side of the Eternia Crystal Stand, measured from the center of the Stand (a 123-tile clearing in total, with the Stand at the center tile). The enemy portals will spawn further away if given the space however, up to 120 tiles away from the center of the Stand on each side. The area also needs 10 tiles of clear vertical space.
General strategies
Arena

Before facing the event, making a completely flat arena works very well. If an enemy's path to the Eternia Crystal is blocked, it will phase through obstacles, so trying to stop their progress with blocks won't be very effective. Building the floor with ![]() Asphalt Blocks will greatly increase movement speed. Using Potions is always a good idea, while it is also good to place
Asphalt Blocks will greatly increase movement speed. Using Potions is always a good idea, while it is also good to place ![]() Campfires,
Campfires, ![]() Heart Lanterns,
Heart Lanterns, ![]() Honey,
Honey, ![]() Heart Statues and
Heart Statues and ![]() Bast Statues (Desktop, Console and Mobile versions) to survive for longer. When fighting Tier 2 and 3, building a ceiling above the Eternia Crystal will protect it from Kobold Gliders, since they explode on contact with blocks.
Bast Statues (Desktop, Console and Mobile versions) to survive for longer. When fighting Tier 2 and 3, building a ceiling above the Eternia Crystal will protect it from Kobold Gliders, since they explode on contact with blocks.
Build a raised platform 20 blocks off the ground, halfway between the Eternia Crystal and the expected portal location. Placing ![]() Flameburst Towers on these platforms will allow them to target flying enemies more easily, which can reduce swarming of the Crystal in later waves.
Flameburst Towers on these platforms will allow them to target flying enemies more easily, which can reduce swarming of the Crystal in later waves.
Placing a vertical wall behind the spawning points of the portals will allow you to effectively cover both sides of the arena with bouncing projectile weapons like the Water Bolt and Pulse Bow. It may also be a good idea to build houses for competent combat NPCs like the Princess or Pirate behind the portals, so they can help kill enemies without any danger to themselves.
Sentries
Using one of the Tavernkeep's Sentries is also highly recommended, as they will greatly help when dealing with the many enemies the player will encounter. There are four different types with three tiers: Rod, Cane, and Staff, with the last being the strongest.
 Flameburst Towers have average damage, fire speed and range. They shoot fireballs which deal splash damage and inflict the
  On Fire! debuff. When using
  Apprentice armor or
  Dark Artist armor, their range is greatly increased.
 Ballistas have the highest damage, but also the slowest fire speed. They shoot bolts that can pierce through enemies. When wearing
  Squire armor or
  Valhalla Knight armor, the bolts will pierce more and the player will get the
  Ballista Panic! buff when hit, which will double their fire speed. In addition, the Valhalla Knight armor will increase the attack speed.
 Explosive Traps are placed on the ground, and they will explode when enemies get near it. They do not disappear after exploding. When used with
  Huntress armor or
  Red Riding armor, they will attack much faster and oil enemies, making the On Fire!,
  Cursed Inferno,
  Frostburn, and
  Shadowflame debuffs do (Desktop, Console and Mobile versions)25 more damage over time.
 Lightning Auras are a circle of lightning centered on the base that damages enemies repeatedly as they walk through them. They have the lowest base damage, but their damage is unaffected by enemy Defense. When used while wearing
  Monk armor or
  Shinobi Infiltrator armor, they will deal damage slightly faster and they will receive a set 16% (for Monk) or 25% (for Shinobi Infiltrator) critical strike chance. In addition, the Shinobi Infiltrator set will increase the area of effect.
After the event is summoned, the player will obtain ten ![]() Etherian Mana, enough to summon one Tavernkeep's Sentry. Two Mysterious Portals will appear on the opposite ends of the arena; this where the enemies will spawn. Enemies will drop Etherian Mana when killed, allowing a player to summon more sentries as the event goes on.
Etherian Mana, enough to summon one Tavernkeep's Sentry. Two Mysterious Portals will appear on the opposite ends of the arena; this where the enemies will spawn. Enemies will drop Etherian Mana when killed, allowing a player to summon more sentries as the event goes on.
It is easy to get overwhelmed when fighting the enemies coming from both sides, so the player should constantly move to the left and right of the Crystal in order to prevent the enemies from reaching it. They should also always be on the watch for Etherian Wyverns and Kobold Gliders, as they can quickly get to the Crystal and deal a lot of damage to it. The Tavernkeep's Sentries will deal with the weaker grounded enemies; however, they are not very effective against flying enemies.
It isn't necessary to get every sentry for each tier. An effective strategy is to use a close-range sentry, like the Lightning Aura or Explosive Trap at the portals and a long-range sentry like the Ballista or Flameburst closer to the center.
Specific strategies
Boulder Drop
An effective and easy to use strategy, especially pre-Hardmode. First, you must add a roof to your arena, about 15-25 blocks above the ground. Then, you must collect as much Stone as you think is necessary, which may take some time. You must then take a Heavy Work Bench to a Graveyard and craft as many Boulder Statues as possible. Bring the statues back to your arena, and place them along your newly constructed roof. You should get some wire, wrenches, and a timer, and a switch is recommended, all of which can be bought from the Mechanic. All you need to do now is connect the wires to the Boulder Traps and timer, and place two blocks on each side of the Eternia Crystal to prevent the boulders from damaging it or you, without being too high to start the event. You may also place some platforms above the boulders, so you can still move around without taking as much damage from them. Note that the boulders only fall every 15 seconds, which means you should leave enough space for the portals to spawn at maximum distance. You will also want the ground to be flat, so the boulders can go all the way across the arena. Using this tactic, you only need to defeat flying enemies, such as Etherian Wyverns or Lightning Bugs, along with any bosses that spawn. Note that this tactic works best in lower tiers, and only adds additional damage to enemies on higher ones.
Actuator Drop
Since the crystal stand can be actuated, the entire event crystal can be dropped down, much like the flat terrain the event requires. If the ![]() Eternia Crystal (NPC) stands on sufficient ground for the various grounded enemies in the event to stand on, or on its initial elevation, they will float toward the crystal with a shadow aura and still reach it. However, if the crystal is dropped to a single platform or block, and grounded enemies are dropped beforehand (recommended roughly 40 blocks from the center), they'll only float if they get far enough down from the crystal, in which case they float diagonally toward the crystal. When employing this strategy, you should consider placing a water platform (using
Eternia Crystal (NPC) stands on sufficient ground for the various grounded enemies in the event to stand on, or on its initial elevation, they will float toward the crystal with a shadow aura and still reach it. However, if the crystal is dropped to a single platform or block, and grounded enemies are dropped beforehand (recommended roughly 40 blocks from the center), they'll only float if they get far enough down from the crystal, in which case they float diagonally toward the crystal. When employing this strategy, you should consider placing a water platform (using ![]() Bubbles) and using some iteration of
Bubbles) and using some iteration of ![]() Water Walking Boots or a
Water Walking Boots or a ![]() Water Walking Potion to provide yourself with a platform underneath the crystal, but also to cancel enemies floating toward the crystal: since water is considered a physical block, they'll stop floating. The by far most effective strategy, to solve the issue of floating, is on the other hand placing a long platform of blocks at least 65 blocks below the crystal entity's platform, with a 5 wide by 10 high chamber in the middle.
Water Walking Potion to provide yourself with a platform underneath the crystal, but also to cancel enemies floating toward the crystal: since water is considered a physical block, they'll stop floating. The by far most effective strategy, to solve the issue of floating, is on the other hand placing a long platform of blocks at least 65 blocks below the crystal entity's platform, with a 5 wide by 10 high chamber in the middle.

If the ![]() Eternia Crystal (NPC) is dropped down onto a single block, the enemies are dropped down 40 blocks away from the center and a platform 65 blocks down is built, with a 5 by 10 chamber, these are the results:
Eternia Crystal (NPC) is dropped down onto a single block, the enemies are dropped down 40 blocks away from the center and a platform 65 blocks down is built, with a 5 by 10 chamber, these are the results:
- No ground based enemies, i. e. no
 Etherian Goblins,
  Etherian Goblin Bombers,
  Etherian Javelin Throwers,
  Kobolds,
  Drakins or
  Wither Beasts are able to be in range of or reach the crystal, and effectively deal no damage, with one exception, discussed below.
 - A Lightning Aura can be placed in the 5 by 10 chamber to provide consistent damage against all of the above. The tougher enemies (not Etherian Goblins or Etherian Goblin Bombers) won't consistently spend time in the chamber (instead they'll skip out) but since they can't damage the crystal this is irrelevant to the progress of the event. Using higher level Lightning Auras provides faster progression, which is useful when you're trying to farm the event for
 Defender Medals.
- Note that this is a much better solution than only using summons, since only using summons can actually incite Drakins to float up toward the crystal. Using summons in conjunction with a Lightning Aura is effective.
- An alternative is not to use Lightning Auras but instead rely on piercing weapons such as the
 Magical Harp. This strategy is extremely viable since the NPC limit of 200 is quickly reached when the player isn't actively killing the enemies, which means that the flying enemies attacking the portal will spawn predictably and in lower numbers. The number of enemies spawning from new waves will also be controllable.The main downside to this is that Drakins can follow you and float toward the crystal if inadequately dealt with when visiting the platform. Standing right below the crystal does temporarily disable their floating when they reach your position, but due to their high damage this can be extremely deadly, especially considering the high health of Drakins.
- Note that this is a much better solution than only using summons, since only using summons can actually incite
- The
 Dark Mage and
  Ogre are unable to damage the
  Eternia Crystal (NPC). The 40 blocks in distance from the center are valuable since the Dark Mage will stop roughly that length away from the crystal and try to summon
  Old One's Skeletons, a spell which will fail since there is no ground for them to be summoned on. The Dark Mage is thereby unable to inflict any damage. Likewise, the 65 blocks down the platform was placed is specifically such that the Ogre's balls of snot won't hit a player defending the crystal slightly from below, or the crystal itself.
 - Effectively, the player can go the all three tiers worrying solely about
 Etherian Wyverns,
  Kobold Gliders and
  Etherian Lightning Bugs, as well as
  Betsy. For enemies, placing Flameburst Towers is an effective way to provide damage and knockback high enough to keep the flying enemies away from the crystal, even more so with summoner gear. With effective placement and sufficient armor, the event becomes mostly automatic even in Master Mode, apart from Betsy. It's always a good idea to keep an eye on the Eternia Crystal (NPC) at all times, on the other hand, especially in earlier waves.
Bootstrapping (Desktop, Console and Mobile versions)
The higher tiers of the Old One's Army, especially in Master Mode, are incredibly difficult. This strategy, though, relies on the first tier being comparitively easy.
The main idea here is that almost all damage is done by the sentries. So this strategy focuses on getting the best sentries and maximizing summon damage.
- Beat the first tier of the Old One's Army using one of the strategies on this page (an especially easy strategy is Jester Arrows for ground-based enemies and the Imp Staff for flying enemies).
- Repeat. Save up 15 Defender Medals. Saving up 30 will make things even easier.
- Craft a Queen Spider Staff. If possible, also find a Nimbus Rod and/or Clinger Staff
- Unlock tier 2 of the Old One's Army by defeating a mechanical boss. Immediately buy a Tier 2 sentry from the Tavernkeep, or two if you have saved up 30 defender medals.
- Defeat as many rounds of Tier 2 OOA as you can, using the Queen Spider Staff, Nimbus Rod, Clinger Staff, tier 2 sentries, and your best weapon. If you can't defeat Round 7, collect as many defender medals as you can and save up for one of the armor pieces sold by the Tavernkeep. The chest piece should generally be bought first, as it tends to have very good bonuses to both sentries and the class of your choice. Wearing the full set will allow you to place 3 Spider Queen Sentries, gives you bonuses comparable to Hallowed Armor in your favored class, boosts your sentry damage by 30%, and (for all classes except mages) boosts their preferred Sentries DPS significantly.
- Farm the Ogre for one of the +1 sentry accessories. Collect at least 60 defender medals, or 120 to be safer.
- Try to collect the rainbow gun (optional), Frost Hydra (optional) a Papyrus Scarab, and a Necromantic Scroll.
- Unlock Tier 3 of OOA by defeating Golem. Immediately purchase 1-2 tier 3 sentries.
- Wear your papyrus scarab, necromantic scroll, +1 sentry accessory, and any other damage-increasing accessories (such as Summoner Emblem or Celestial Shell, but not including critical hit accessories, as they don't affect summons). Wear the armor you received from the Tier 2 OOA, even if it's worse than your other armor; remember, you're trying to maximize sentry damage, not weapon damage.
- Farm rounds 1-6 for medals. Start replacing your tier 2 armor with tier 3 armor, one at a time.
- Once you have full tier 3 armor, you are ready to face Betsy. Make sure many of your sentries are in the middle of the map, since they will do most of the damage. When she attacks, your sentries should be powerful enough to kill all enemies approaching the crystal, especially if you use an AOE/homing weapon like Seedler, Flairon, Cluster Rocket I, Bat Scepter, etc. that can take out the Wyverns she occasionally summons.
If you are unable or unwilling to farm for medals ahead of time for buying armor from the Tavernkeep, wearing Obsidian armor for tiers 1 and 2 and Spooky armor for tier 3 will give you similar benefits.
Finally, since your build maximizes summon damage in this method, you might as well use the best minions available, such as the Sanguine Staff or Xeno Staff.
Tips
Do note that ![]() Etherian Lightning Bugs fly in line with the crystal's height rather than quite far above it like the other flying enemies, so anyone entering Tier 3 should be ready to place
Etherian Lightning Bugs fly in line with the crystal's height rather than quite far above it like the other flying enemies, so anyone entering Tier 3 should be ready to place ![]() Flameburst Towers close to and in level with the crystal to ensure aid with the bugs.
Flameburst Towers close to and in level with the crystal to ensure aid with the bugs.
Additionally, make sure to bring a ![]() Treasure Magnet and a
Treasure Magnet and a ![]() Rod of Discord to be able to safely teleport under the platform and collect the
Rod of Discord to be able to safely teleport under the platform and collect the ![]() Etherian Mana. Also, consider building the platform out of
Etherian Mana. Also, consider building the platform out of ![]() Conveyor Belts to collect the mana in a more central location.
Conveyor Belts to collect the mana in a more central location.
Most importantly, to be able to view the ![]() Eternia Crystal (NPC) while killing the
Eternia Crystal (NPC) while killing the ![]() Ogre, collecting
Ogre, collecting ![]() Etherian Mana, or personally killing the enemies in the box, bring
Etherian Mana, or personally killing the enemies in the box, bring ![]() Binoculars, a
Binoculars, a ![]() Sniper Rifle or simply use any iteration of the
Sniper Rifle or simply use any iteration of the ![]() Rifle Scope to provide an increased range of view and some oversight of the crystal. Ranged builds are recommended for this strategy since they can utilize a scope for accessible good sight and high precision in killing the flying enemies. Use non-homing bullets.
Rifle Scope to provide an increased range of view and some oversight of the crystal. Ranged builds are recommended for this strategy since they can utilize a scope for accessible good sight and high precision in killing the flying enemies. Use non-homing bullets.
Consider placing banners for ![]() Wyverns,
Wyverns, ![]() Harpies and
Harpies and ![]() Angry Nimbuses if the arena is placed relatively high above the surface, since they can spawn during the event and be a significant distraction, as well as deal damage. Especially
Angry Nimbuses if the arena is placed relatively high above the surface, since they can spawn during the event and be a significant distraction, as well as deal damage. Especially ![]() Wyverns.
Wyverns.
Tier 1

| Type | |
|---|---|
| Environment | |
| AI Type | Dark Mage AI |
| Damage | 40/80/120 (contact) 80160240 (Dark Energy) [1] |
| Max Life | 800/1600/2040 |
| Defense | 18 |
| KB Resist | 100% |
| Immune to |
| Hurt | |
|---|---|
| Killed |
- Internal NPC ID: 564
Tier 1 is the easiest, as it possesses the weakest enemies and lasts five waves. It can only be summoned after the Eater of Worlds/Brain of Cthulhu have been defeated, as then the Tavernkeep will spawn for the first time.
The player will see five different enemies:
- The Etherian Goblin is the basic enemy of the event as well as the most common. It doesn't possess high stats or a special attack, making them very easy to kill.
- The Etherian Goblin Bomber and Etherian Javelin Thrower are stronger enemies with ranged attacks. They will start spawning on Waves 2 and 3 respectively.
- Etherian Wyvern is a highly damaging enemy with the ability to fly. It will quickly fly towards the Crystal, and then it will dive towards it. It will start spawning on Wave 4.
- The Dark Mage is the Boss of the tier, spawning on Wave 5. It will alternate between shooting magical energy at the player, summoning
 Old One's Skeletons and healing all enemies around it. It needs to be killed in order to finish the event.
Master Mode: Ballistas are not fast enough to kill the grounded mobs, but three Lightning Aura sentries at each entrance can kill them quickly enough. In this mode, Etherian Wyverns can destroy your crystal in just seconds, so placing a couple Ballista sentries on a platform about 20 blocks off the ground can help in killing them.
Recommended gear
While the event can be summoned at any time after defeating Eater of Worlds/Brain of Cthulhu, it's better to use the best gear available in Pre-Hardmode.
Armor
 Molten armor provides the highest defense and good bonuses for Melee characters.
 Necro armor will give greater bonuses to Ranged characters.
- The Wizard set with
 Wizard Hat and
  Gypsy Robe or
  Diamond Robe provides the best offensive bonuses.
 - A Summoner should not attempt the event without obtaining
 Bee Armor or
  Obsidian Armor first.
Weapons
In addition to their normal weapons, all classes should also use one of the Tavernkeep's Sentries.
- For Melee users
- The
 Night's Edge,
  Bee Keeper or the
  Dark Lance are great weapons at close range.
 - If obtained, the
 Arkhalis or the
  Terragrim can do great damage to all enemies despite its short reach.
 - The
 Cascade is a great weapon, but it's better suited for single targets.
 - The
 Sunfury is great against crowds.
- For Ranged users
- The
 Phoenix Blaster with
  Meteor Shots is the best gun available.
 - A
 Molten Fury with
  Jester's Arrows will excel against crowds. The
  Hellwing Bow can serve the same purpose.
 - The
 Bee's Knees is also a very strong weapon to use.
 - The
 Sandgun with Ebonsand/Crimsand pierces an infinite number of times without any damage penalty. It can be obtained before defeating any boss. By placing Background objects across the entire arena to prevent sand from obstructing it, the weapon can steamroll the entire event , even without support from sentries.
- For Magic users
- The
 Water Bolt and
  Demon Scythe excel against crowds. Water Bolt travels back through the enemies if a wall is placed behind each portal beforehand.
 - The
 Flamelash and
  Flower of Fire are better against single targets.
 - The
 Crimson Rod is an acceptable secondary weapon.
 - The
 Aqua Scepter's piercing capability clears most enemies in this event.
 - The
 Weather Pain is a homing secondary weapon that is especially good at defeating Etherian Wyverns.
- For Summoners
- At this point in the game, the best minions available are the
 Hornet Staff and
  Imp Staff.
 - The best whip is either the
 Snapthorn or the
  Spinal Tap
Accessories
- Mobility accessories such as the
 Lightning Boots, variants of the
  Cloud in a Balloon and
  Shield of Cthulhu are always good to have.
 - The
 Shark Tooth Necklace provides a high damage upgrade to all weapons. The
  Hive Pack is also good when using Bee weapons.
 - Melee players may want to use
 Feral Claws for an attack speed boost and auto swing. Summoners may also want to use it as it grants auto swing to whips.
  Magic Cuffs are useful to quickly regain mana as a mage.
 Mana Regeneration Band is better as it provides steady mana regeneration when not using magic weapons.
 Worm Scarf can reduce damage taken by 17%.
- In Hardmode, the Ancient Horn (Basilisk) or Blessed Apple (Unicorn) allows quick movement and charging through enemies.
- The
 Bone Helm attacks automatically, pierces through several enemies and is good against Etherian Wyverns.
Tier 2

| Type | |
|---|---|
| Environment | |
| AI Type | Attacker AI |
| Damage | 70/140/210 (contact) 122245367 (club swing) [3] 120160240 (Ogre's Stomp) 80120180 (Ogre Spit) [4] |
| Max Life | 5000/10000/12750 |
| Defense | 34 |
| KB Resist | 100% |
| Immune to |


| Hurt | |
|---|---|
| Killed |
- Internal NPC ID: 576
After a mechanical boss has been defeated, the second tier can be fought. The guide assumes that this tier will be fought before defeating Plantera, but post-Plantera equipment will make it easier.
The player will find five new enemies, and the four basic ones from the previous tier will get significantly higher stats, which is reflected by their different designs.
- Kobolds are one of the new enemies found. When near the player or the Eternia Crystal, it will quickly dash towards them, exploding on contact. The explosion deals high splash damage.
- In the later waves, the player will also find Kobold Gliders, a variant with much lower stats but the ability to fly like Etherian Wyverns.
- In the later waves, the player will also find
- Drakins have high health, defense, and knockback immunity, making them very hard to kill. They are very slow, however they will fire magical shots from a distance.
- Wither Beasts will surround themselves with an aura of crystals which will inflict the
 Withered Armor debuff, halving defense of players inside of it. They also possess high health, and they can regenerate damage taken.
 - The Ogre is the boss of the tier. It possesses very high damage and health, and does three dangerous attacks. From a long range, the Ogre will hurl a ball of snot at a target, it will only damage targets it hits but it will inflict the
 Oozed debuff on any nearby player, slowing them down significantly. It can also jump into the air and land with a shockwave, doing area damage about ten blocks forward in each direction on the ground. At very close range, it will strike with its club, dealing very high damage. Like the Dark Mage, it needs to be the last enemy killed in order to finish the event. When killed also drops an unique Accessory or Weapon.
Recommended gear
Armor


 Hallowed armor is a strong choice with its Holy Protection buff.

 Chlorophyte armor is very good for melee, ranged, and magic.
 Crystal Assassin armor is another excellent choice, as it boosts all types of damage.
 Titanium armor is a decent choice for melee users who plan to use close-ranged weapons, thanks to its Titanium Barrier buff. It is not particularly useful for ranged or magic users.

 Orichalcum armor is especially useful as its set bonus can hit many enemies at once.
 Spider armor is the strongest choice for summoners pre-Plantera, though Hallowed armor is more defensive.
- Obsidian armor is another option with higher raw summon damage boosts.
 Forbidden armor is the best choice for magic users despite its mediocre magic bonuses, due to its respectable boosts to summon damage.
Weapons
Just like in Tier one, all classes should also use one of the Tavernkeep's Sentries with their normal weapons.
- For all classes
- The
 Clinger Staff is the single most impactful non-summoner weapon due to its high knockback, which completely neutralizes most of the weaker enemies.
 - The
 Nimbus Rod can contribute a bit of damage when placed over the portals.
 - The
 Queen Spider Staff can be used as an extra sentry.
- For Melee users
- The
 True Excalibur and
  True Night's Edge are best performing swords overall.
 - The
 Fetid Baghnakhs is an extremely powerful weapon, but requires a defensive loadout to be used effectively.
 - The
 Death Sickle is a very good weapon as well.
 - The
 Drippler Crippler deals massive damage to crowds of enemies.
 - The
 Yelets and
  Valkyrie Yoyo or
  Red's Throw are the strongest yoyos available.
 - The
 Chlorophyte Partisan and
  Mushroom Spear are both very strong spears.
 - A
 Flask of Ichor or
  Flask of Cursed Flames should always be used if available.
- For Ranged users
- The
 Chlorophyte Shotbow with
  Holy Arrows is the strongest bow available before Plantera.
 - The
 Daedalus Stormbow with
  Ichor Arrows works well against single targets.
 - The
 Hallowed Repeater with Jester's Arrows performs extremely well against the lines of enemies that will be faced in the event.
 - The
 Pulse Bow is excellent for crowd control. It should be used with the highest base damage arrow available.
 - The
 Megashark with
  Crystal Bullets is very strong against single targets. (Desktop, Console and Mobile versions) High Velocity Bullets can be used for crowd control.
 - The
 Dart Rifle or
  Dart Pistol with
  Crystal Darts or
  Cursed Darts excel against crowds, while
  Ichor Darts are better for single targets.
 - It is always good to have a secondary weapon with
 Ichor ammo.
 - The
 Flamethrower is extremely good both against crowds and single enemies, but a fair amount of
  Gel is used (from 300 to 500 per event). It can be easily farmed from King Slime. Killing 3 of them for one event is enough.
- For Magic users
- The
 Magical Harp is excellent against crowds. The
  Shadowflame Hex Doll is useful as well.
 - The
 Unholy Trident is harder to get than the above two weapons but is more powerful against crowds.
 - The
 Life Drain has no pierce cap and can kill large groups of weak enemies very quickly.
 - The
 Meteor Staff is good for all enemies.
 - The
 Sky Fracture and
  Crystal Serpent are strong against single targets.
 - The
 Golden Shower is a good secondary weapon with piercing capabilities.
- For Summoners
- The
 Spider Staff,
  Optic Staff,
  Pirate Staff,
  Blade Staff, and
  Sanguine Staff are the best pre-Plantera minions.
 - The
 Durendal is the best whip available before Plantera, with the
  Cool Whip and
  Firecracker as alternatives.
 - A Flask of Ichor can be used to allow your whips to inflict the ichor debuff.
Accessories
 Wings are extremely useful in hardmode.
- Mobility accessories such as the Shield of Cthulhu or the
 Frog Leg and any of its upgrades are very useful as well.
 - Damage increasing accessories such as the
 Apprentice's Scarf, any Emblem, the
  Mechanical or
  Fire Gauntlet and
  Magic Quiver are always a good choice.
 - Variants of the
 Cobalt Shield and
  Cross Necklace can help when taking damage.
  Magic Cuffs are good for regaining Mana. They can be used as a source of infinite mana by standing on Spikes.
 Volatile Gelatin is effective against grounded enemies that get close to you.
Tier 3
| Type | |
|---|---|
| Environment | |
| AI Type | Betsy AI |
| Damage | 80/104/156 (contact) 70140210 (Betsy's Fireball) 70140210 (Betsy's Breath) [6] |
| Max Life | 50000/75000/95625 |
| Defense | 38 |
| KB Resist | 100% |
| Immune to |
| Debuff | |
|---|---|
| Debuff tooltip | Slowly losing life |
| Chance | 100% (Betsy's Breath) |
| Duration | 7–10 seconds14–20 seconds17.5-25 seconds [7] |
- Item (Quantity)Rate
- One of the following 4 weapons will always be dropped [8]
- 25%
- 25%
- 25%
- 25%
- 25%
- 14.29%
- 10%
 Treasure Bag(Betsy)
- 14.29%
- 25%
 Defender Medal (30-49)100%
- One of the following 4 weapons will always be dropped
- 25%
- 25%
- 25%
- 25%


- Betsy's Fireball

- Betsy's Breath

| Hurt | |
|---|---|
| Killed | |
| Charge | |
| Betsy's Fireball | |
| Betsy's Fireball impact | |
| Betsy's Breath | |
| Flying Circle | |
| Roar | |
| Summon Etherian Wyvern |
- Internal NPC ID: 551
- Internal Buff ID: 24
- Internal Projectile ID: 686, 687
After the Golem has been defeated, the third and final tier of the Old One's Army can be fought.
Like the previous tiers, enemies will get significantly higher stats, and some will also get new designs. There are also two new ones:
- Etherian Lightning Bugs will quickly fly near the Crystal, and attack it with energy projectiles. They will inflict
 Withered Weapon on hit, which will temporarily halve the damage output of all weapons.
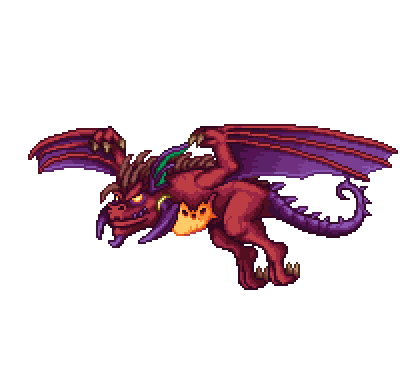
 - Betsy, who will spawn on Wave 7 serving as the final boss of the event. Unlike the other enemies, she will directly focus on killing the player instead of the Crystal. Her attacks consist of spinning in circles before charging multiple times, breathing fire, shooting fireballs and spawning Etherian Wyverns. While her attacks don't deal too much damage to the Crystal, the threat of the other enemies can make the final wave significantly harder than the others. Like with the Dark Mage and Ogre on Tiers 1 and 2, killing her will end the event.
Gearing Up
Armor
- The best armors available are the
 tier 1 armors sold by the Tavernkeep. While they have worse stats than post-Golem armors, most of the damage done during this event is from the sentries themselves. Thus, using armor that boosts sentry damage will results in far higher DPS than damage from player weapons. The

 upgraded versions of their armor are even more powerful, and can be purchased with Defender Medals earned from beating the Tier 2 Old One's Army or from beating rounds 1-6 of the Tier 3 Army.
- The exception to this is Apprentice armor, whose set bonus does not directly benefit the DPS of Flameburst towers. The hat should be replaced with a Forbidden Mask if available.
- The exception to this is Apprentice armor, whose set bonus does not directly benefit the DPS of Flameburst towers. The hat should be replaced with a
 Beetle armor is the next-best choice for a Melee character. Beetle Scale Mail is preferred over the Beetle Shell since damage output is more important than defense for this event.
 Shroomite armor is the next-best for a Ranged user. Its set bonus is particularly useful since the player can beat the event by shooting the enemies while standing in the center.
 Spectre armor is the next-best armor for a Mage. The Hood should only be used when healing is needed, since it will greatly reduce damage dealt.
 Spooky armor provides very high damage boosts to both minions and sentries, and can compete with or exceed the strength of the Tavernkeep's armor.
Weapons
- For all classes
- The
 Clinger Staff remains incredibly useful for destroying all enemies that are susceptible to knockback.
 - The
 Nimbus Rod can contribute some DPS over the entire event.
 - The
 Rainbow Gun shreds entire waves of enemies and can be used as a last resort to defend the Eternia Crystal. Note that it has a lower duration than the Clinger Staff and Nimbus Rod, and must be refreshed after every wave.
 - The
 Proximity Mine Launcher can be used between waves to heavily damage Ogres and other enemies that are resilient enough to get close to the Crystal. It can also be deployed near the Crystal at the end of Wave 6 to significantly chunk Betsy's health.
 - The
 Staff of the Frost Hydra can be used as an extra sentry that doesn't cost Etherian Mana. If using sentry-boosting equipment, several can be summoned.
- For Melee users
- The
 Influx Waver and the
 Seedler are the strongest swords available.
 - The
 The Horseman's Blade and the
  Terra Blade are effective against large groups of enemies.
 - The
 North Pole is a great spear for crowd control as its projectiles cover an very wide area. It is very effective on Wave 7, since it can handle Betsy and the enemies at once.
  The Eye of Cthulhu is the strongest yo-yo available.
- The
 Scourge of the Corruptor and
  Vampire Knives can beat the event, although their overall damage is lower than that of piercing weapons.
 - With the right setup, the Fetid Baghnakhs can deal an extreme amount of damage to all enemies and bosses.
- Beginning players may have trouble seeing Betsy in all the confusion. Homing weapons can make this part of the fight easier. Some homing melee weapons available at this stage include (from weakest to strongest) Possessed Hatchet, Scourge of the Corruptor, Seedler, and Flairon. More experienced players are better off aiming a higher-DPS weapon directly at Betsy.
- For Ranged users
- The
 Tsunami and
  Eventide with Holy Arrows are the strongest bows available. The rainbow stream of the Eventide is especially helpful with crowds, while the Tsunami has incredible single-target damage.
 - The
 Stake Launcher or
  Pulse Bow with
  Venom Arrows are fantastic against crowds, though not as effective against Betsy.
 - (Desktop, Console and Mobile versions) The
 Elf Melter can pierce through many enemies at once and performs decently against bosses. It inflicts the Frostbite debuff, which can activate the damage bonus vs Oiled enemies when using Huntress armor or Red Riding armor.
 - The
 Candy Corn Rifle can pierce through many enemies at once.
 - The
 Sniper Rifle or
  Venus Magnum can be used with the
  Endless Musket Pouch to cleave through crowds of enemies even offscreen.
 - The
 Xenopopper with Crystal Bullets or
  Chlorophyte Bullets is an extremely strong gun for single targets. The
  Chain Gun is a noticeably weaker alternative.
 - The
 Snowman Cannon is very powerful during the entire event, as it is great against enemies and bosses alike. The
  Electrosphere Launcher is an alternative.
- For Magic users
- The
 Charged Blaster Cannon is capable of firing from one portal to the other, killing all non-boss enemies instantly.
 - The
 Staff of Earth is a powerful crowd control option that also passively boosts the critical strike chance of other magic projectiles.
 - The
 Razorblade Typhoon and
  Nightglow are both very effective weapons against enemies while still being useful against the bosses.
 - The
 Razorpine and
  Blizzard Staff both have extremely high DPS for single targets. The
  Laser Machinegun is a weaker alternative.
 - In addition to the magic weapons listed in the first section, the
 Magnet Sphere and Golden Shower are useful secondary weapons.
- For Summoners
- The
 Xeno Staff,
  Terraprisma, and
  Desert Tiger Staff are the best minions available.
 - The
 Dark Harvest makes your minions do additional damage to nearby enemies, letting the player focus on bosses while the dark energy kills smaller enemies.
 - The
 Kaleidoscope provides the highest tag damage against bosses.
Accessories
- Since the sentries deal most of the damage in this event, accessories that increase summon damage are especially important. These include the
 Papyrus Scarab, the
  Necromantic Scroll, accessories dropped by the Ogre such as the
  Monk's Belt, and general damage-increasing accessories such as the
  Celestial Shell or
  Stone and the
  Destroyer Emblem.
 - Class-specific accessories that increase damage are also useful. Among the most effective are the
 Sniper Scope, Magic Quiver, and Mechanical Glove.
 - Wings such as
 Fishron Wings , or the
  Hoverboard.
  Shiny Stone is very useful for healing between waves.
- Variants of the Cobalt Shield may be useful to prevent knockback.
It's recommended to reforge all accessories to Menacing to maximize damage dealt by sentries. Warding is less effective than usual, as the goal of this event is to defend the crystal and not oneself.
Potions
- The
 Obsidian Skin Potion provides immunity to Betsy's On Fire! debuff, which usually lasts 10 seconds and inflicts 40 damage.
References
- ↑ Information taken from the
 Desktop 1.4.0.5 source code, method
 AI_109_DarkMage()inTerraria.NPC.cs. There may be inaccuracies, as the current Desktop version is 1.4.4.9.
- ↑ Information taken from the Desktop 1.4.0.5 source code, method
RegisterDD2EventDrops()inTerraria.GameContent.ItemDropRules.ItemDropDatabase.cs. There may be inaccuracies, as the current Desktop version is 1.4.4.9.
- ↑ Information taken from the Desktop 1.4.0.5 source code, method
GetMeleeCollisionData()inTerraria.NPC.cs. There may be inaccuracies, as the current Desktop version is 1.4.4.9.
- ↑ Information taken from the Desktop 1.4.0.5 source code, method
AI_107_ImprovedWalkers()inTerraria.NPC.cs. There may be inaccuracies, as the current Desktop version is 1.4.4.9.
- ↑ Information taken from the Desktop 1.4.0.5 source code, method
RegisterDD2EventDrops()inTerraria.GameContent.ItemDropRules.ItemDropDatabase.cs. There may be inaccuracies, as the current Desktop version is 1.4.4.9.
- ↑ Information taken from the Desktop 1.4.4.9 source code, method
AI_110_Betsy()inTerraria.NPC.cs. - ↑ Information taken from the Desktop 1.4.0.5 source code, method
StatusPlayer()inTerraria.Projectile.cs. There may be inaccuracies, as the current Desktop version is 1.4.4.9.
- ↑ Information taken from the Desktop 1.4.0.5 source code, method
RegisterBoss_Betsy()inTerraria.GameContent.ItemDropRules.ItemDropDatabase.cs. There may be inaccuracies, as the current Desktop version is 1.4.4.9.