Guide:Walkthrough/Hardmode
Smashing Altars
Starting Hardmode is very hard: you’re underequipped and almost everything is stronger than you. You will have to return underground in search of ores to get some decent gear. But first, you’ll need to make a detour because none of that new ore actually exists yet. You’ll have to smash a few Altars with the Pwnhammer to make it appear. Every time you destroy an Altar, ore will be generated in various places underground, spawning more densely at lower depths.
- The first altar destroyed will spawn Cobalt / Palladium.
- The second altar destroyed will spawn Mythril / Orichalcum.
- The third altar destroyed will spawn Adamantite / Titanium.
The pattern will repeat with additional altars destroyed, spawning more Cobalt or Palladium, then more Mythril or Orichalcum, then more Adamantite or Titanium. There's diminishing returns on this: after you've smashed your first three altars, generating that amount of ore again requires you to smash a further nine (12 total), then 21 (33 total).
(Old-gen console and 3DS versions) Also note, however, that each altar destroyed may spawn a new block of Ebon/Crimstone, or Pearlstone somewhere in the world, causing the respective biomes to spread from another location.
On your way to smash altars, you may find yourself passing through some of these biomes:
 Molten armor
 Jungle armor
 Meteor armor
 Necro armor
 Bee armor(Desktop, Console, Old-gen console and Mobile versions)
 Obsidian armor(Desktop, Console and Mobile versions)
 Crimson armor
 Fast Clock
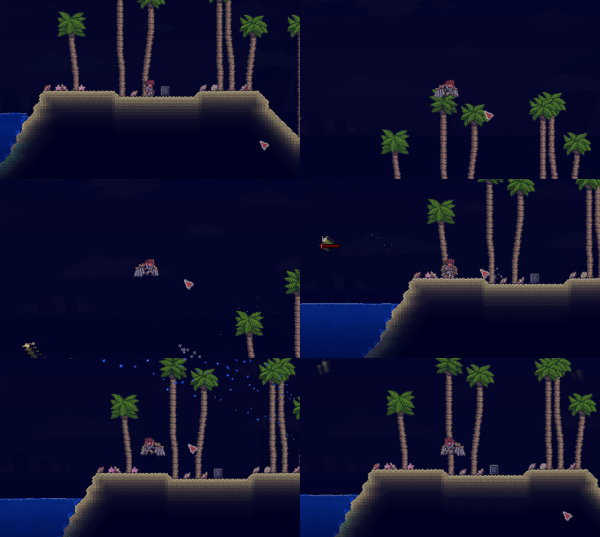
 Wandering Eye Kite(Desktop, Console and Mobile versions)(on Windy Days)
 Trifold Map
 Bananarang
 Moon Charm
 Adhesive Bandage
 Wolf Fang(Old-gen console and 3DS versions)
Be cautious when exploring the surface at Night. New, more powerful monsters come out at night. A player used to traveling at night may find it difficult to progress when they are out after dark.
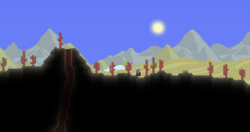
- Desert Biome (Hardmode)
 Molten armor
 Jungle armor
 Meteor armor
 Necro armor
 Bee armor(Desktop, Console, Old-gen console and Mobile versions)
 Obsidian armor(Desktop, Console and Mobile versions)
 Mummy(normal Desert only)
 Dark Mummy(Corrupted Desert only)
 Blood Mummy(Desktop, Console and Mobile versions)(Crimson Desert only)
 Light Mummy(Hallowed Desert only)
 Shadow Mummy(Old-gen console and 3DS versions)(Corrupted Desert only)
 Spectral Mummy(Old-gen console and 3DS versions)(Hallowed Desert only)
Natural deserts typically don't last long in hardmode. When corrupted, crimsoned, or hallowed, they become very similar to their respective biomes. Hardmode deserts are the only places where the Mummy can be found.
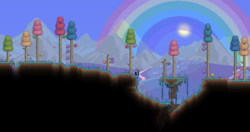
- Hallow Biome
 Molten armor
 Jungle armor
 Meteor armor
 Necro armor
 Bee armor(Desktop, Console, Old-gen console and Mobile versions)
 Obsidian armor(Desktop, Console and Mobile versions)
 Pixie
Pixie Unicorn
 Gastropod(at night)
 Spectral Gastropod(Old-gen console and 3DS versions)(at night)
 Rainbow Slime(during Rain)
 Fast Clock
 Megaphone
 Pixie Dust
 Unicorn Horn
 Unicorn on a Stick
 Blessed Apple(Desktop, Console and Mobile versions)
 Rainbow Brick
 Unicorn Kite(Desktop, Console and Mobile versions)(on Windy Days)
 Chocolate Chip Cookie(Desktop, Console and Mobile versions)
 Hallowed Key(only on (Desktop, Console and Mobile versions))
 Hallowed Key Mold(Old-gen console and 3DS versions)
 Pearlwood
 Dragon Fruit(Desktop, Console and Mobile versions)
 Star Fruit(Desktop, Console and Mobile versions)
 Pearlstone Block
 Pearlsand Block
 Hardened Pearlsand Block(Desktop, Console and Mobile versions)
 Pearlsandstone Block(Desktop, Console and Mobile versions)
 Pink Ice Block
 Princess Fish
 Prismite
 Crystal Serpent(Desktop, Console and Mobile versions)
 Divine Crate(Desktop, Console and Mobile versions)
 The Land of Deceiving Looks
 Lady Of The Lake(Desktop, Console and Mobile versions)
 Hallow Pylon(Desktop, Console and Mobile versions)
The Hallow spreads rapidly through the world, just like the Corruption and Crimson. Be wary of the seemingly whimsical denizens of the Hallow. All of them are hostile and are just as dangerous as their corrupted counterparts. Like with the evil biomes, players new to Hardmode should avoid staying in this biome for longer than necessary.
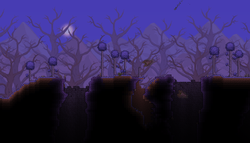
- Corruption Biome (Hardmode)
 Molten armor
 Jungle armor
 Meteor armor
 Necro armor
 Bee armor(Desktop, Console, Old-gen console and Mobile versions)
 Obsidian armor(Desktop, Console and Mobile versions)
 Corruptor
 Corrupt Slime
 Slimeling(from Corrupt Slime)
 Shadow Slime(Old-gen console and 3DS versions)
 Slimer
 World Feeder
 Corruption Key(only on (Desktop, Console and Mobile versions))
 Corruption Key Mold(Old-gen console and 3DS versions)
 Cursed Flame
 World Feeder Kite(Desktop, Console and Mobile versions)(on Windy Days)
 Blindfold
 Petri Dish(Old-gen console and 3DS versions)
 Vitamins
 Meat Grinder ((Desktop, Console and Mobile versions))
 Toxikarp(Desktop, Console and Mobile versions)
 Defiled Crate(Desktop, Console and Mobile versions)
Corruption now spreads through the world at a fast pace. Players that are new to Hardmode should move through this biome as quickly as possible.
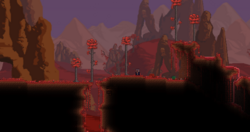
- Crimson Biome (Hardmode)
 Molten armor
 Jungle armor
 Meteor armor
 Necro armor
 Bee armor(Desktop, Console, Old-gen console and Mobile versions)
 Obsidian armor(Desktop, Console and Mobile versions)
 Crimson Key(only on (Desktop, Console and Mobile versions))
 Crimson Key Mold(Old-gen console and 3DS versions)
 Meat Grinder
 Bladetongue(Desktop, Console and Mobile versions)
 Hematic Crate(Desktop, Console and Mobile versions)
Crimson spreads identically to Corruption, and is just as dangerous, or perhaps even worse, since the Herpling, which has no corrupt counterpart, exists. They are very fast, have a short hitbox, high health, defense, and high damage. Their only significant weakness is rough terrain, as they will have difficulty reaching the high speeds they often use to surprise players. Extra caution is advised, especially in flat terrain.
Mining Hardmode Ores
Once enough ore has been spawned, the player should begin mining Cobalt or Palladium with a Molten Pickaxe. The other ores cannot be mined. Proceed with extreme caution: the most dangerous biomes in Hardmode are found underground. If the player created a Hellevator, they should use it to access the lower layers quickly. Hardmode ores are more abundant deeper underground. It is very helpful to go to a Spider Nest and farm up 76 Spider Fangs to get a full set of Spider armor, the Spider Staff, and the Queen Spider Staff. The Spider armor is very helpful because it provides 20 defense, 3 minion slots, and 28% summon damage, which is a good upgrade from Pre-Hardmode armor sets until you get Adamantite/Titanium armor. The Spider Staff and the Queen Spider Staff are great upgrades from Pre-Hardmode minions and sentries, respectively.
 Molten armor
 Jungle armor
 Meteor armor
 Necro armor
 Bee armor(Desktop, Console, Old-gen console and Mobile versions)
 Obsidian armor(Desktop, Console and Mobile versions)
This previously trivial biome has had its difficulty increased significantly. Hardmode ores are not very common in this layer. It is best to pass through to lower layers, the best location being right above the underworld and below the lava layer of the Caverns.
 Molten armor
 Jungle armor
 Meteor armor
 Necro armor
 Bee armor(Desktop, Console, Old-gen console and Mobile versions)
 Obsidian armor(Desktop, Console and Mobile versions)
 Mimic
Mimic Digger
 Armored Skeleton
 Giant Bat
 Angler Fish
 Rock Golem(Desktop, Console and Mobile versions)
 Skeleton Archer
 Rune Wizard
 Trifold Map
 Megaphone
 Armor Polish
 Rock Golem Head(Desktop, Console and Mobile versions)
 Beam Sword
 Magic Quiver
 Marrow
 Dual Hook
 Magic Dagger
 Philosopher's Stone
 Titan Glove
 Star Cloak
 Cross Necklace
This biome is very dangerous, but it is less dangerous than the Underground Corruption, Crimson, and Hallow. It's for this reason that this biome is one of the ideal biomes for mining hardmode ores. However, don't underestimate the new monsters in this biome: the Armored Skeleton's "Broken Armor" debuff is particularly lethal. Consider returning to town and talking to the Nurse if hit by the debuff. They sometimes drop ![]() Armor Polish, which prevents the debuff and will be very helpful later on. The Mimic will also spawn underground here, and if you can, attempt to take some down. You can use the Lifeform Analyzer to tell when these enemies are near. Be wary, however, that even they will inflict high amounts of damage, so ranged and/or high knockback weapons are recommended.
Armor Polish, which prevents the debuff and will be very helpful later on. The Mimic will also spawn underground here, and if you can, attempt to take some down. You can use the Lifeform Analyzer to tell when these enemies are near. Be wary, however, that even they will inflict high amounts of damage, so ranged and/or high knockback weapons are recommended.

 Chaos Elemental
 Illuminant Bat
 Illuminant Slime
 Enchanted Sword
 Hallowed Mimic(Desktop, Console and Mobile versions)
 Rod of Discord
 Soul of Light
 Daedalus Stormbow(Desktop, Console and Mobile versions)
 Flying Knife(Desktop, Console and Mobile versions)
 Crystal Vile Shard(Desktop, Console and Mobile versions)
 Illuminant Hook(Desktop, Console and Mobile versions)
It is recommended to mine elsewhere until Mythril armor or better is obtained. Chaos Elementals and Enchanted Swords can easily reach the player. If you do decide to venture in and run into a Hallowed Mimic in chest form, avoid going near, and especially avoid attacking it. If one is already on your tail, you should attempt to use your Magic Mirror at the nearest convenience.

 Corrupt Mimic(Desktop, Console and Mobile versions)
 Clinger
 Corrupt Slime
 Corruptor
 Cursed Hammer
 Slimer
 World Feeder
 Soul of Night
 Cursed Flame
 Vitamins
 Dart Rifle(Desktop, Console and Mobile versions)
 Worm Hook(Desktop, Console and Mobile versions)
 Chain Guillotines(Desktop, Console and Mobile versions)
 Clinger Staff(Desktop, Console and Mobile versions)
 Putrid Scent(Desktop, Console and Mobile versions)
As with the Underground Hallow, it is recommended that the player avoids this biome until they obtain Mythril armor. The denizens of this biome will make mining extremely difficult for a player without hardmode gear.

 Ichor Sticker
 Floaty Gross
 Blood Jelly
 Crimson Mimic(Desktop, Console and Mobile versions)
 Blood Feeder
 Crimson Axe
 Soul of Night
 Ichor
Ichor Nazar
Nazar Vitamins
 Meat Grinder
 Life Drain(Desktop, Console and Mobile versions)
 Dart Pistol(Desktop, Console and Mobile versions)
 Fetid Baghnakhs(Desktop, Console and Mobile versions)
 Flesh Knuckles(Desktop, Console and Mobile versions)
 Tendon Hook(Desktop, Console and Mobile versions)
Similarly to the Underground Corruption and Hallow, the Crimson should be avoided early on in hardmode. Attempt to stay farther from this biome than others, though, as Floaty Grosses can pass through blocks, even if you aren't in the biome.
The player can find Truffle Worms in this biome, which are used to summon Duke Fishron. Otherwise, the new enemies are comparable to those of other underground biomes, and their attacks, especially those of the Giant Fungi Bulb, can be very dangerous. If you are exposed to the biome directly, you may be hit by the Giant Fungi Bulb's attacks, which are very small but deal a lot of damage. Stay away from this biome unless you need an emergency supply of Glowing Mushrooms or Mushroom Seeds.
It can be very difficult to survive long enough in Hardmode biomes to mine enough ore. If the player finds they are having difficulty mining, they should consider looking for ores in the ceiling of the Underworld. This biome has the same mobs as it did pre-Hardmode, making it considerably safer than almost anywhere else in the world.
Aim to upgrade to a ![]() Cobalt Pickaxe or
Cobalt Pickaxe or ![]() Palladium Pickaxe (or their drill equivalents) as quickly as possible. The Cobalt Drill or Pickaxe and its counterpart can mine Mythril/Orichalcum. The first Mythril/Orichalcum ores mined should be used to craft a
Palladium Pickaxe (or their drill equivalents) as quickly as possible. The Cobalt Drill or Pickaxe and its counterpart can mine Mythril/Orichalcum. The first Mythril/Orichalcum ores mined should be used to craft a ![]()
![]() Hardmode Anvil and then a
Hardmode Anvil and then a ![]() Mythril Pickaxe or
Mythril Pickaxe or ![]() Orichalcum Pickaxe (or their Orichalcum counterparts). The Mythril Drill and Pickaxe (and their Orichalcum counterparts) can mine Adamantite/Titanium. The first 30 Adamantite/Titanium ore mined should be used to create an
Orichalcum Pickaxe (or their Orichalcum counterparts). The Mythril Drill and Pickaxe (and their Orichalcum counterparts) can mine Adamantite/Titanium. The first 30 Adamantite/Titanium ore mined should be used to create an ![]() Adamantite Forge or
Adamantite Forge or ![]() Titanium Forge. Upgrading to an Adamantite Pickaxe or Titanium Pickaxe isn't crucial, as it does not grant access to any new ores.
Titanium Forge. Upgrading to an Adamantite Pickaxe or Titanium Pickaxe isn't crucial, as it does not grant access to any new ores.
Be mindful when opening chests. A seemingly innocuous treasure chest may be a Mimic posing as a chest. Mimics will chase the player when they approach or when attacked. A good approach is to shoot any chests with a ranged weapon before opening them. This will cause any Mimics to break their ruse and attack. Mimics can drop items that are incredibly useful in Hardmode, and also always drop several gold coins.
Use any leftover ore to upgrade armor, then weapons, and lastly tools. Keep mining until enough Adamantite or Titanium is collected to craft a full set of armor and any weapons or tools the player may want.
The Goblin Army (Hardmode)
New Monsters: Goblin Warlock
Monster Drops: ![]() Shadowflame Hex Doll(Desktop, Console and Mobile versions),
Shadowflame Hex Doll(Desktop, Console and Mobile versions), ![]() Shadowflame Knife(Desktop, Console and Mobile versions),
Shadowflame Knife(Desktop, Console and Mobile versions), ![]() Shadowflame Bow(Desktop, Console and Mobile versions)
Shadowflame Bow(Desktop, Console and Mobile versions)
Recommended Equipment: Adamantite/Titanium or better, Demon Scythe, Crystal Storm, Golden Shower, Lightning Boots, Wings
This time, it's much more difficult with the new Goblin Warlock in the mix. She can attack you with her highly damaging spells. However, it is indeed worth the trouble to defeat her, as she can drop powerful weapons, like the Shadowflame Bow, which can prove devastating when used against the mechanical bosses, as these weapons can inflict the Shadowflame debuff, dealing 5 damage per second.
The Pirate Invasion
Monsters: Pirate Deckhand, Pirate Deadeye, Pirate Corsair, Pirate Crossbower, Pirate Captain, Parrot, Flying Dutchman
Monster Drops: ![]() Coin Gun,
Coin Gun, ![]() Lucky Coin,
Lucky Coin, ![]() Discount Card,
Discount Card, ![]() Cutlass,
Cutlass, ![]() Pirate Staff(Desktop, Console, Old-gen console and Mobile versions),
Pirate Staff(Desktop, Console, Old-gen console and Mobile versions), ![]() Gold Ring(Desktop, Console and Mobile versions), Various Golden furniture,
Gold Ring(Desktop, Console and Mobile versions), Various Golden furniture, ![]() Sailor costume,
Sailor costume, ![]() Buccaneer costume(Desktop, Console and Mobile versions),
Buccaneer costume(Desktop, Console and Mobile versions),
Recommended Armor: Hallowed armor
Recommended Weaponry: Death Sickle, Chlorophyte Saber, Chlorophyte Partisan, Optic Staff, Golden Shower, Uzi, Megashark
A Pirate Invasion can occur after a player smashes one demon altar, or alternatively when the player uses a ![]() Pirate Map.
Pirate Map.
The Pirate Invasion can generally be difficult in early Hardmode, so it is best if the player is prepared in case one arrives. When a Pirate Invasion spawns or is summoned using a Pirate Map, a message will appear saying "Pirates are approaching from the (East/West)!"
When the Pirates' initial wave reaches the spawn, their arrival is announced with "The Pirates have arrived!"
For more information, see Pirate Invasion for more info and tips.
The Great Run-up
Whilst you're trying to find enough ore to make better gear, it's highly recommended that you make the following other preparations in the run-up to the mech bosses:
- Make sure you have a home for the Wizard. Like the Goblin Tinkerer and Stylist, he can be found tied up underground. This NPC is mandatory for magic users, as he sells Greater Mana Potions and crafting ingredients used to craft some very powerful spells.
- Make sure you have a full set of buff potions and at least a stack of Greater Healing Potions or Honeyfin. The mech bosses' damaging attacks will eat away at your health very quickly, so acquiring better potions is recommended.
Collecting Souls
Collecting souls is the last task the player should complete before fighting the Mechanical bosses. There are three types of souls dropped by normal monsters: Soul of Light, Soul of Night, and Soul of Flight. Souls of Light can be obtained from any monster found in the Underground Hallow, Souls of Night can be obtained from any monster found in the Underground Corruption or Crimson, and lastly, Souls of Flight can be obtained from Wyverns. The order in which the player obtains these souls does not matter. However, it can be advantageous to gather Souls of Flight first, as Wings are very useful when navigating the Underground Hallow or Underground Corruption.
Soul of Flight
Wyverns can be found at very high altitudes, at around the same level as Floating Islands. Look for Wyverns on Floating Islands, as it is much easier to fight them this way.
New Monsters: Wyvern, Arch Wyvern(Old-gen console and 3DS versions)
Monster Drops: ![]() Soul of Flight
Soul of Flight ![]() Shadow Key (from Arch Wyvern)
Shadow Key (from Arch Wyvern)
Recommended Equipment: Adamantite or Titanium armor, piercing weapons (Demon Scythe is particularly effective), and Gravitation, Ironskin, and Regeneration Potions (Shotgun kills them will around 50 Exploding Bullets)
The only hardmode addition to floating islands is the Wyvern enemy. These Wyverns are of interest because they drop Souls of Flight, which are required to craft wings.
Wyverns are very difficult to kill. They fly through the air using the same AI as worms, but they move much faster, do much more damage, and have a lot more life. They are very difficult to dodge and attack at the same time. Piercing weapons are very effective against the Wyvern, like with all segmented monsters.
Soul of Light
Souls of Light can be found by killing enemies in the Underground Hallow. Underworld Enemies spawned below the Underground Hallow will also drop Souls. Try to gather crystal shards while looking for souls. Try to gather at least 50 souls, although more is better. If the Hallow in your world went through a Spider Nest, you can also farm the spiders, taking advantage of their fast spawn rate.
Soul of Night
Souls of Night can be found by killing enemies in the Underground Corruption and Crimson. Many of the same rules apply within these biomes.
Miscellaneous Items
There are a few other important items not mentioned above:
- Pixies from the surface Hallow will drop Pixie Dust, which is needed to make Greater Healing Potions, or combined with Unicorn Horns to make Holy Arrows.
- Mummies from the Corrupt or Crimson Desert will drop Dark Shards; Mummies from the Hallowed Desert will drop Light Shards. Collect these to craft the Dao of Pow.
- Biome Keys have an extremely rare drop from enemies in the six main biomes (Hallow, Corruption, Crimson, Jungle, Desert, and Snow). These can be used to open the Biome Chests in the Dungeon once that Plantera has been defeated (see below), which contain extremely powerful items.
- Mimics can appear in just about any biome. Look for Mimics using Hunter Potions or a Lifeform Analyzer and kill them until you get a Philosopher's Stone and a Cross Necklace.
- Fifteen Souls of Light or Night can be used to make Light or Night Keys, respectively. A Key of Light or Night placed into an empty chest will create Hallowed or Corrupt/Crimson Mimics, which are larger than normal mimics and more dangerous, but with unique rewards.
- Hallowed, Corrupt and Crimson Mimics can also naturally appear in their respective underground biomes.
Queen Slime
Queen Slime is an entirely optional boss: none of its drops are necessary for game advancement.
She is summoned by using a Gelatin Crystal, found in the underground hallow alongside Crystal Shards, anywhere in any hallowed biome. Defeating her rewards you with similar drops to King Slime: the Crystal Assassin armor set, the only armor set to increase all types of damage, the Hook of Dissonance, which teleports you to the grappled location, and the Gelatinous Pillion, allowing increased airborne movement capabilities. In Expert and Master mode, she also drops the Volatile Gelatin which automatically hurls bouncing slime balls at nearby enemies.
Like King Slime, much of the reason she is easier than the 3 main bosses at this point is because of her limited movement and attacking capabilities; she has no rapid, long range attack, and even in her second form she moves significantly slower than The Twins or Skeletron Prime.
The Three Mechanical Bosses
Once you have a stockpile of the various hardmode resources, it's time to begin preparing to defeat the first three hardmode bosses. Each must be summoned with an item that can be crafted or dropped by enemies. It's also possible for one to spawn on its own at sunset, though the player will probably not be able to defeat it unless they are well prepared.
Recommended Equipment for Mechanical Bosses
Following is a list of equipment recommendations for use against the mechanical bosses. This is not an exhaustive list; other items may prove to be effective. This list assumes that only Queen Slime has been defeated:This content is transcluded from Guide:Class setups.
![]() Bananarang
Bananarang![]() Shadowflame Knife(Desktop, Console and Mobile versions)
Shadowflame Knife(Desktop, Console and Mobile versions)![]() Chain Guillotines(Desktop, Console and Mobile versions)
Chain Guillotines(Desktop, Console and Mobile versions)![]() Fetid Baghnakhs(Desktop, Console and Mobile versions)[a]
Fetid Baghnakhs(Desktop, Console and Mobile versions)[a]
![]() Amarok(Desktop, Console and Mobile versions)
Amarok(Desktop, Console and Mobile versions)![]() Ice Sickle
Ice Sickle
![]() Drippler Crippler(Desktop, Console and Mobile versions)
Drippler Crippler(Desktop, Console and Mobile versions)![]() Fetid Baghnakhs(Desktop, Console and Mobile versions)[a]
Fetid Baghnakhs(Desktop, Console and Mobile versions)[a]
 Bladetongue(Desktop, Console and Mobile versions)
![]() Warrior Emblem
Warrior Emblem![]() Yoyo Bag(Desktop, Console and Mobile versions)
Yoyo Bag(Desktop, Console and Mobile versions)![]() Power Glove
Power Glove![]() Berserker's Glove(Desktop, Console and Mobile versions)[b]
Berserker's Glove(Desktop, Console and Mobile versions)[b]![]() Moon Charm
Moon Charm
![]() Daedalus Stormbow(Desktop, Console and Mobile versions)(Ichor Arrow)
Daedalus Stormbow(Desktop, Console and Mobile versions)(Ichor Arrow)![]()
![]() Dart Rifle/Pistol(Ichor Dart)
Dart Rifle/Pistol(Ichor Dart)![]() Coin Gun(Gold Coin)[c]
Coin Gun(Gold Coin)[c]![]() Uzi
Uzi
![]() Star Cannon[c]
Star Cannon[c]![]()
![]() Dart Rifle/PistolCursed/Crystal Dart
Dart Rifle/PistolCursed/Crystal Dart
![]() Archery Potion
Archery Potion![]() Ammo Reservation Potion
Ammo Reservation Potion![]() Ammo Box(Desktop, Console, Old-gen console and Mobile versions)
Ammo Box(Desktop, Console, Old-gen console and Mobile versions)
![]() Cursed Dart(Desktop, Console and Mobile versions)
Cursed Dart(Desktop, Console and Mobile versions)![]() Crystal Dart(Desktop, Console and Mobile versions)
Crystal Dart(Desktop, Console and Mobile versions)![]() Jester's Arrow
Jester's Arrow![]() Unholy Arrow
Unholy Arrow
![]() Orange Zapinator(Desktop, Console and Mobile versions)
Orange Zapinator(Desktop, Console and Mobile versions)![]() Spirit Flame(Desktop, Console and Mobile versions)
Spirit Flame(Desktop, Console and Mobile versions)
![]() Orange Zapinator(Desktop, Console and Mobile versions)
Orange Zapinator(Desktop, Console and Mobile versions)![]() Life Drain(Desktop, Console and Mobile versions)
Life Drain(Desktop, Console and Mobile versions)
![]() Nimbus Rod
Nimbus Rod![]() Clinger Staff(Desktop, Console and Mobile versions)
Clinger Staff(Desktop, Console and Mobile versions)
![]() Adamantite Headgear
Adamantite Headgear![]() Adamantite Breastplate
Adamantite Breastplate![]() Forbidden Treads(Desktop, Console and Mobile versions)
Forbidden Treads(Desktop, Console and Mobile versions)
![]() Titanium Mask
Titanium Mask![]() Adamantite Breastplate
Adamantite Breastplate![]() Forbidden Treads(Desktop, Console and Mobile versions)
Forbidden Treads(Desktop, Console and Mobile versions)
![]() Celestial Cuffs(Desktop, Console, Old-gen console and Mobile versions)
Celestial Cuffs(Desktop, Console, Old-gen console and Mobile versions)![]() Sorcerer Emblem
Sorcerer Emblem![]() Magnet Flower(Desktop, Console and Mobile versions)
Magnet Flower(Desktop, Console and Mobile versions)![]() Mana Cloak(Desktop, Console and Mobile versions)
Mana Cloak(Desktop, Console and Mobile versions)
![]() Sanguine Staff(Desktop, Console and Mobile versions)[e]
Sanguine Staff(Desktop, Console and Mobile versions)[e]![]() Blade Staff(Desktop, Console and Mobile versions)
Blade Staff(Desktop, Console and Mobile versions)
![]() Firecracker(Desktop, Console and Mobile versions)
Firecracker(Desktop, Console and Mobile versions)![]() Cool Whip(Desktop, Console and Mobile versions)
Cool Whip(Desktop, Console and Mobile versions)
![]() Queen Spider Staff(Desktop, Console, Old-gen console and Mobile versions)
Queen Spider Staff(Desktop, Console, Old-gen console and Mobile versions)
![]() Spider armor(Desktop, Console, Old-gen console and Mobile versions)
Spider armor(Desktop, Console, Old-gen console and Mobile versions)
![]() Titanium Mask
Titanium Mask![]() Forbidden Robes(Desktop, Console and Mobile versions)
Forbidden Robes(Desktop, Console and Mobile versions)![]() Spider Greaves(Desktop, Console, Old-gen console and Mobile versions)
Spider Greaves(Desktop, Console, Old-gen console and Mobile versions)
![]() Summoner Emblem(Desktop, Console and Mobile versions)
Summoner Emblem(Desktop, Console and Mobile versions)![]() Berserker's Glove(Desktop, Console and Mobile versions)
Berserker's Glove(Desktop, Console and Mobile versions)![]() Pygmy Necklace((Desktop, Console and Mobile versions))
Pygmy Necklace((Desktop, Console and Mobile versions))![]() Apprentice's Scarf(Desktop, Console and Mobile versions) or
Apprentice's Scarf(Desktop, Console and Mobile versions) or ![]() Squire's Shield(Desktop, Console and Mobile versions)
Squire's Shield(Desktop, Console and Mobile versions)
![]() Flask of Ichor((Desktop, Console and Mobile versions))
Flask of Ichor((Desktop, Console and Mobile versions))
For the mechanical bosses you have a choice between two whip-summon combinations. The Firecracker pairs well with the Sanguine Staff due to its high base damage getting increased with the Firecracker's debuff that increases summon damage by 2.75×, as well as the Snapthorn in order to attack faster with the Firecracker. The Blade Staff pairs well with whip stacking the Cool Whip, Durendal (after one mechanical boss), Spinal Tap, and Snapthorn to the Blade Staff's low damage highly benefiting from the tag damage that the mentioned whips inflict.
![]() Spider Greaves(Desktop, Console, Old-gen console and Mobile versions)[f]
Spider Greaves(Desktop, Console, Old-gen console and Mobile versions)[f]![]() Forbidden Robes(Desktop, Console and Mobile versions)[g]
Forbidden Robes(Desktop, Console and Mobile versions)[g]
![]()
![]()
![]()
![]() Wings
Wings![]() Shield of Cthulhu(Desktop, Console and Mobile versions)
Shield of Cthulhu(Desktop, Console and Mobile versions)![]() Amphibian Boots(Desktop, Console and Mobile versions)
Amphibian Boots(Desktop, Console and Mobile versions)
![]() Star Veil
Star Veil![]() Worm Scarf(Desktop, Console and Mobile versions)
Worm Scarf(Desktop, Console and Mobile versions)![]() Brain of Confusion(Desktop, Console and Mobile versions)
Brain of Confusion(Desktop, Console and Mobile versions)![]() Flesh Knuckles(Desktop, Console and Mobile versions)[b]
Flesh Knuckles(Desktop, Console and Mobile versions)[b]![]() Berserker's Glove(Desktop, Console and Mobile versions)[b]
Berserker's Glove(Desktop, Console and Mobile versions)[b]
![]() Putrid Scent(Desktop, Console and Mobile versions)
Putrid Scent(Desktop, Console and Mobile versions)
![]()
![]()
![]() Food buffs
Food buffs![]() Regeneration Potion
Regeneration Potion![]() Ironskin Potion
Ironskin Potion![]() Swiftness Potion
Swiftness Potion![]() Rage Potion
Rage Potion![]() Wrath Potion
Wrath Potion![]() Heartreach Potion
Heartreach Potion![]() Lifeforce Potion
Lifeforce Potion![]() Endurance Potion
Endurance Potion![]() Slice of Cake(Desktop, Console and Mobile versions)
Slice of Cake(Desktop, Console and Mobile versions)
Building a Hardmode Arena
Proper terrain preparation is almost completely essential to successfully defeat all three mechanical bosses. Players who intend to solo the hardmode bosses will find the task very challenging without an adequate arena.
For solo players, build a very long bridge out of wood platforms. The bridge should be at least 1000 platforms long, but 2500 is recommended. Build the bridge a large distance from the ground; the ground should not be visible from any part of the bridge. Place blocks at each end of the bridge to prevent running off of the sides.
For team players, the arena can be much shorter. A team arena can be between 250-500 platforms long, but should also have 2-3 separate rows. Space the rows so they are not too close together, but are reachable with rocket boots.
Another Re-Usable Arena can be made out of the pre-hardmode boss arena, the old ones army one, and your skybridge. This allows reusing of the old arenas for Eye of Cthulhu/King Slime, events, and the wyvern arena.
Consider setting up Heart Statues and Star Statues on 1 Second Timers, as well as Sunflowers, Heart Lanterns, Campfires, Bast Statues(Desktop, Console and Mobile versions), Garden Gnomes(Desktop, Console and Mobile versions), and pools of Honey as these can make the battles much easier.
If you don't quite feel up to the task of making a second very long bridge, you could simply use the first one you built for the Wall of Flesh. This will also make the first fight easier due to all of the ambient light. However, after defeating your first mechanical boss, this becomes much harder due to the additional spawns of Lava Bats and Red Devils.
Fighting the Mechanical Bosses
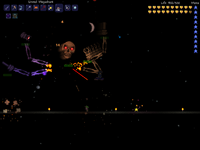
The Destroyer is arguably the easiest of the three bosses and should be fought first. The Destroyer has a chance of spawning naturally at sunset with the message "You feel vibrations deep below..." It can also be summoned by using a Mechanical Worm at night. Fight the Destroyer first if you prefer melee or ranged, as its souls can be used to craft the Light Disc and the Megashark.
Life: 80000
Defense: 0 (Head), 30 (Body), 35 (Tail)
Damage: 60 (Head), 40 (Body), 20 (Tail), 22 (Death Laser)
Minions: Probes
Drops: 20-44 ![]() Hallowed Bar, 20-40
Hallowed Bar, 20-40 ![]() Soul of Might, 5-15
Soul of Might, 5-15 ![]() Greater Healing Potion,
Greater Healing Potion, ![]() Mechanical Wagon Piece(Desktop, Console and Mobile versions) (expert)
Mechanical Wagon Piece(Desktop, Console and Mobile versions) (expert)
Recommended Equipment: See above section "Recommended Equipment for Hardmode Bosses"
The Destroyer is the hardmode version of Eater of Worlds. The Destroyer uses a variation of worm AI, burrowing into the ground and making long sweeping passes at the player. The Destroyer is much longer than the Eater of Worlds and moves much faster. Unlike the Eater of Worlds, the Destroyer does not break into segments. The Destroyer's segments all have a shared life of 80000. All of its segments will be destroyed when this life reaches 0. The Destroyer will release Probes as it takes damage. Probes will drop hearts when killed. If the Destroyer is not defeated before 4:30 AM, it will run away.
Piercing weapons and AoE weapons are particularly effective against this boss. The Destroyer will frequently try to trap you with its body. Use a hook to get out of these situations. The Destroyer's drops come from its head when it is killed. When its health is very low, wait until any of its segments are above the ground before finishing it off.
The destroyer does not despawn if you use a Magic Mirror or Recall Potion to flee and will instead follow you. This can be helpful if the player sets up a house near the spawn point for the Nurse to move in, aiding the player in healing if the player's health is low.
Hallowed equipment (except for the Drax/Pickaxe Axe, which is necessary for progression) doesn't require boss souls; it only requires Hallowed Bars, which you can farm up from the Destroyer.
It is recommended to fight Skeletron Prime next, as ranged characters can make a Flamethrower if he is defeated.
Life: 25000 (Head), 6000 (Cannon), 8000 (Saw), 8000 (Vice), 5000 (Laser)
Defense: 25 (Head), 50 (Head, while spinning), 25 (Cannon), 40 (Saw), 35 (Vice), 20 (Laser)
Damage (Melee): 50 (Head), 100 (Head, while spinning), 30 (Cannon), 52 (Saw), 45 (Vice), 29 (Laser)
Damage (Grenade): 40
Damage (Laser): 25
Drops: 19-35 ![]() Hallowed Bar, 20-40
Hallowed Bar, 20-40 ![]() Soul of Fright, 5-15
Soul of Fright, 5-15 ![]() Greater Healing Potions,
Greater Healing Potions, ![]() Mechanical Battery Piece(Desktop, Console and Mobile versions) (expert)
Mechanical Battery Piece(Desktop, Console and Mobile versions) (expert)
Recommended Equipment: See above section "Recommended Equipment for Hardmode Bosses"
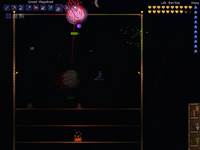
Skeletron Prime is the hardmode version of Skeletron. Skeletron Prime behaves very similarly to its predecessor. It alternates between attacking with its various appendages and using a deadly spinning attack with its head. Skeletron Prime has a lot of health and can take a long time to kill. If Skeletron Prime is not defeated before the sun rises, it will use an attack that instantly kills the player on touch.
The damage from all of its arms can add up quickly. Try to destroy the arms before focusing on the head. The Prime Saw and Prime Vice are very difficult to avoid and should be destroyed first. The Prime Laser is only a medium threat and should be killed after the Vice and Saw, and the Prime Cannon can be ignored. There are two methods to avoiding Skeletron Prime's attacks. The first is to use the maximum speed of Lightning or Frostspark Boots to stay out of reach (Prime Saw will always be able to keep up), combined with Wings to throw off the aim of Skeletron Prime's spinning head attack. The second method is to use Gravitation potions for a similar effect, though it can be harder to dodge some of Skeletron Prime's attacks this way.
The last of the three mechanical bosses is the Twins. This boss is the hardest of the three for most players and should be defeated last. The Twins have a chance of spawning at sunset with the message "This is going to be a terrible night..." They can also be summoned by using a Mechanical Eye at night. The Twins are recommended for magic and summoner players, as the Rainbow Rod, Magical Harp, and Optic Staff will be very useful weapons later on.
Retinazer
Life: 20000
Defense: 10 (First Stage), 25 (Second Stage)
Damage (Melee): 50 (First Stage), 75 (Second Stage)
Damage (Laser): 20 (First Stage), 25 (Second Stage), 20 (Second Stage, Rapid Fire)
Spazmatism
Life: 23000
Defense: 10 (First Stage), 35 (Second stage)
Damage (Melee): 50 (First Stage), 75 (Second Stage)
Damage (Cursed Flame): 25 (First Stage), 30 (Second Stage)
Drops: 20-35 ![]() Hallowed Bar, 20-40
Hallowed Bar, 20-40 ![]() Soul of Sight, 5-15
Soul of Sight, 5-15 ![]() Greater Healing Potion,
Greater Healing Potion, ![]() Mechanical Wheel Piece(Desktop, Console and Mobile versions) (Drops from last boss to be killed)
Mechanical Wheel Piece(Desktop, Console and Mobile versions) (Drops from last boss to be killed)
Recommended Equipment: See above section "Recommended Equipment for Hardmode Bosses"
The Twins are the hardmode version of Eye of Cthulhu. Both Twins will alternate between their signature attack (Laser for Retinazer, Cursed flame for Spazmatism), and charging at the player. The two choose attacks independently of the other. There will be times when one uses their signature while the other charges, when they both use their signature, and when they both charge. When a Twin gets down a certain amount of health (8000 / 12000 for Retinazer, 9200 / 13800 for Spazmatism), it will transform into a more powerful second stage. Both will gain a rapid-fire version of their signature attack and a much more damaging melee attack in their second stages. The first Twin killed will not yield any drops. When the second Twin is killed, the listed drops will appear where it was killed. The eyes can be killed in any order. If the Twins are not defeated before the sun rises, they will run away.
Each twin is much more dangerous in its second stage. Focus on one Twin at a time, and only move on to the second Twin when the first is destroyed. Retinazer's stage one signature is less dangerous, so kill Spazmatism first. The Twins have a charging attack that is extremely difficult to dodge. This charging attack will cripple a player if they can't consistently dodge it. There are two methods to dodging the attacks, like with Skeletron Prime. The first method is to reach max running speed with Lightning or Frostspark Boots and use timed jumps to throw off the trajectory of the charge. Jump just as a Twin is about to start a charge while maintaining run speed. This will cause the charging Twin to charge too fast, and then attempt to correct it as they try to charge again. The second method is to use Gravitation Potions and constantly fall - they won't be able to catch up to you. If a Twin is off screen too long, it will despawn like any other enemy (only on console and mobile though). This can be used to make Spazmatism despawn and simplify the fight greatly. However, you will not gain the loot.
Once any mechanical boss has been defeated, new challenges unlock, and the player gains access to new materials to work with, starting with the souls and bars dropped by the boss. Hallowed Bars can be used to craft Hallowed armor and several kinds of weapons.
The player can also return to the Underground Jungle to search for Life Fruit, a consumable item that can increase the player's maximum health to 500.
The Solar Eclipse is a very rare event and drops powerful weapons for all classes. You may need to do many before obtaining every item. In the ![]() Desktop version,
Desktop version, ![]() Console version, and
Console version, and ![]() Mobile version, the Solar Eclipse can be summoned manually using a Solar Tablet, which can be crafted with eight Solar Tablet Fragments. The fragments drop from Flying Snakes And Lihzahrds, and can be found in Lihzahrd Chests in the Jungle Temple.
Mobile version, the Solar Eclipse can be summoned manually using a Solar Tablet, which can be crafted with eight Solar Tablet Fragments. The fragments drop from Flying Snakes And Lihzahrds, and can be found in Lihzahrd Chests in the Jungle Temple.
Monsters: Frankenstein, Swamp Thing, Reaper, Vampire, Eyezor, The Possessed, Fritz, Creature from the Deep
Monster Drops:  Death Sickle,
 ![]() Moon Stone,
Moon Stone, ![]() Broken Bat Wing,
Broken Bat Wing, ![]() Eye Spring,
Eye Spring, ![]() Broken Hero Sword,
Broken Hero Sword, ![]() Neptune's Shell
Neptune's Shell
Recommended Equipment: Hallowed or Chlorophyte
Solar eclipses occur randomly at dawn and last throughout the day. The enemies here are extremely dangerous and it may require gear from the Hardmode Jungle and Dungeon to efficiently farm them. If all the mechanical bosses are defeated, Reapers will begin to spawn and drop the Death Sickle, which is good for melee characters with its high DPS and piercing ability. After defeating Plantera, Nailheads, Butchers, Deadly Spheres, Mothrons, Dr. Man Flys and Psychos begin to appear, making even the most well-equipped player thus far to reach for his Magic Mirror. On the ![]() Old-gen console version and Nintendo
Old-gen console version and Nintendo version, the event is much safer, with only Frankensteins, Swamp Things, Reapers, Vampires, and Eyezors spawning.
New Monsters: Lava Bat, Red Devil, Tortured Soul
Monster Drops: ![]() Magma Stone,
Magma Stone, ![]() Unholy Trident,
Unholy Trident, ![]() Fire Feather
Fire Feather
Recommended Equipment: Hallowed
Two new enemies now spawn in the Underworld after one Mechanical Boss has been defeated. Lava Bats are simply a stronger version of the Hellbat. Red Devils are the real danger, being able to deal over 100 damage with their trident attack. It's recommended that the player does anything they need to do in the Underworld (such as farming the Wall of Flesh for its special drops) before defeating mechanical bosses; otherwise, doing anything here may become much harder. As soon as Hardmode begins, it is possible to find a Tortured Soul which, when purification powder is used in it rather than killing it, transformed into a Tax Collector, which greatly boosts income.
Return to the Underground Jungle
New Monsters: Moth, Moss Hornet, Angry Trapper, Arapaima, Giant Tortoise
Monster Drops: ![]() Uzi,
Uzi, ![]() Bezoar,
Bezoar, ![]() Turtle Shell,
Turtle Shell, ![]() Butterfly Dust,
Butterfly Dust, ![]() Tattered Bee Wing,
Tattered Bee Wing, ![]() Yelets(Desktop, Console and Mobile versions)
Yelets(Desktop, Console and Mobile versions)
Notable Resources: ![]() Chlorophyte Ore,
Chlorophyte Ore, ![]() Life Fruit
Life Fruit
Recommended Equipment: Hallowed
Now that one or more of the mechanical bosses have been defeated, Chlorophyte ore spawns throughout the underground jungle. Hardmode also makes it so that Life Fruits can occasionally be found growing amongst the foliage. Harvesting these two items should be a top priority. Life Fruits increase the player's health by 5, up to a maximum of 500, and Chlorophyte can be crafted into weapons and armor a step above Hallowed equipment.
Players using melee or ranged weapons can make even better armor by acquiring an additional material. Creating a house in the glowing mushroom biome will spawn the Truffle NPC, who sells the Autohammer. The Autohammer turns Chlorophyte bars into Shroomite bars, which are used to create Shroomite armor, a great armor for ranged attackers. Giant Tortoise drop Turtle Shell, which when combined with Chlorophyte Bars make Turtle armor, a powerful melee armor set. Make note that the Autohammer cannot be purchased until Plantera has been defeated.
Plantera
Also found in the underground jungle is a mysterious pink bulb. Destroying this bulb with a drill or pickaxe summons the boss Plantera.
Life: 30000
Defense: 14
Damage: 50
Drops: ![]() Temple Key,
Temple Key, ![]() Grenade Launcher,
Grenade Launcher, ![]() Pygmy Staff,
Pygmy Staff, ![]() Venus Magnum,
Venus Magnum, ![]() Nettle Burst,
Nettle Burst, ![]() Leaf Blower,
Leaf Blower, ![]() Flower Pow,
Flower Pow, ![]() Wasp Gun,
Wasp Gun, ![]() Seedling,
Seedling,  The Axe,
 ![]() Seedler(Desktop, Console and Mobile versions),
Seedler(Desktop, Console and Mobile versions), ![]() Thorn Hook(Desktop, Console and Mobile versions),
Thorn Hook(Desktop, Console and Mobile versions), ![]() Spore Sac(Desktop, Console and Mobile versions) (expert)
Spore Sac(Desktop, Console and Mobile versions) (expert)
Recommended Equipment: Chlorophyte or Turtle armor; piercing weapons
Plantera can be one of the easiest bosses if you have an arena. Simply bomb out a large cave (although of course, make sure NOT to accidentally destroy Plantera's Bulb) and put a short wall in the middle of the cave. Put platforms below the wall so that you have a place to grapple to, and summon Plantera. Run around the wall you built and you should be fine. (See also: Guide:Plantera strategies)
Upon defeating Plantera, the message "Screams are echoing from the dungeon..." appears, and powerful new enemies are added to the dungeon. The boss also drops the Temple Key, which is used to open the Jungle Temple.
Jungle Temple
Monsters: Lihzahrd, Flying Snake, Golem
Monster Drops: ![]() Lihzahrd Power Cell,
Lihzahrd Power Cell, ![]() Lizard Egg,
Lizard Egg, ![]() Solar Tablet Fragment(Desktop, Console and Mobile versions)
Solar Tablet Fragment(Desktop, Console and Mobile versions)
Recommended Equipment: Chlorophyte, Turtle, or Shroomite
After defeating Plantera, you will pick up a Temple Key that is used to unlock the door to the Jungle (also known as the Lihzahrd Temple). It is small compared to the normal dungeon, but it contains far more traps. In the console version of Terraria, you can use two Teleporters to teleport into the temple.
Golem
At the bottom of the Jungle Temple, there is a boss room with a lihzahrd altar. Using a Lihzahrd Power Cell on it summons the Golem.
Life: 15000 (Head), 8000 (Body), 6000 (Fist)
Defense: 24
Damage: 70
Drops: ![]() Stynger with
Stynger with ![]() Stynger Bolt,
Stynger Bolt, ![]() Possessed Hatchet,
Possessed Hatchet, ![]() Sun Stone,
Sun Stone, ![]() Eye of the Golem,
Eye of the Golem, ![]() Picksaw,
Picksaw, ![]() Heat Ray,
Heat Ray, ![]() Staff of Earth,
Staff of Earth, ![]() Golem Fist,
Golem Fist, ![]() Golem Trophy,
Golem Trophy, ![]() Beetle Husk,
Beetle Husk, ![]() Shiny Stone(Desktop, Console and Mobile versions) (expert)
Shiny Stone(Desktop, Console and Mobile versions) (expert)
Recommended Equipment: Chlorophyte, Turtle, or Shroomite and post-Plantera weapons
Golem in its first stage is made significantly easier if the player focuses on destroying his fists before releasing his head's other attacks. Constant damage to the fists will nullify their attacks, leaving you free to attack at a range while avoiding his head's fireballs and lasers. In his second form, it is best to have built platforms to run underneath his jumping body Bowser-style while taking shots at him and avoiding his head attacks. This means that ranged attacks would be the safest strategy to beating him, providing you don't make too many mistakes and other mobs don't interfere. Note that his body has the ability to move midair, meaning that he can still change direction and land on you after running beneath him at a close distance.
The Golem drops the Picksaw, which enables the player to mine Lihzahrd Brick. The Stynger is a very effective explosive weapon. The Possessed Hatchet and Golem Fist are melee weapons with considerable range. Beetle Husk can make a great new melee armor. Heat Ray and Staff of Earth are efficient in the Hardmode Dungeon, where you should go next. The bonuses of the Sun Stone and Eye of the Golem will help as well.
See also: Guide:Golem strategies
Return to the Dungeon
New Monsters: Rusty Armored Bones, Blue Armored Bones, Bone Lee, Paladin, Tactical Skeleton, Dungeon Spirit, Skeleton Commando, Necromancer, Giant Cursed Skull, Diabolist, Ragged Caster, Skeleton Sniper
Monster Drops: ![]() Shadowbeam Staff,
Shadowbeam Staff,  Keybrand,
 ![]() Ectoplasm,
Ectoplasm, ![]() Sniper Rifle,
Sniper Rifle, ![]() Rifle Scope,
Rifle Scope, ![]() Tactical Shotgun,
Tactical Shotgun, ![]() Paladin's Shield,
Paladin's Shield, ![]() Paladin's Hammer,
Paladin's Hammer, ![]() Wisp in a Bottle,
Wisp in a Bottle, ![]() Magnet Sphere,
Magnet Sphere, ![]() Tabi,
Tabi, ![]() Black Belt,
Black Belt, ![]() Spectre Staff,
Spectre Staff, ![]() Inferno Fork
Inferno Fork
Recommended Equipment: Chlorophyte, Shroomite, Turtle, Beetle
After defeating Plantera, the dungeon's difficulty increases dramatically. There are stronger enemies and new drops from each. Also, note that the dungeon has 5 biome-related chests. To unlock each one, you may need to defeat many of the respective biome's enemies to get a key, which is used to unlock the respective chest. Dungeon Spirits, which may spawn after the player kills enemies in the dungeon, drop Ectoplasm, which is used to craft Spectre armor, a great armor for mages.
The Pumpkin Moon
Monsters: Scarecrow, Splinterling, Hellhound, Poltergeist, Mourning Wood, Headless Horseman, Pumpking
Monster Drops: ![]() Scarecrow costume,
Scarecrow costume, ![]() Spooky Wood,
Spooky Wood, ![]() Cursed Sapling,
Cursed Sapling, ![]() Spooky Twig,
Spooky Twig, ![]() Spooky Hook,
Spooky Hook, ![]() Necromantic Scroll,
Necromantic Scroll, ![]() Stake Launcher,
Stake Launcher, ![]() Mourning Wood Trophy,
Mourning Wood Trophy, ![]() Jack 'O Lantern Mask,
Jack 'O Lantern Mask,  The Horseman's Blade,
 ![]() Pumpking Trophy,
Pumpking Trophy, ![]() Candy Corn Rifle,
Candy Corn Rifle, ![]() Raven Staff,
Raven Staff, ![]() Jack 'O Lantern Launcher,
Jack 'O Lantern Launcher, ![]() Bat Scepter,
Bat Scepter, ![]() Black Fairy Dust,
Black Fairy Dust, ![]() Spider Egg
Spider Egg
Recommended Equipment: Chlorophyte, Turtle, Spectre, or Shroomite
The Pumpkin Moon is summoned at night using the ![]() Pumpkin Moon Medallion. Unlike the Blood Moon and Solar Eclipse, enemies appear in up to 15 consecutive waves, similar to an invasion. During this event, the moon turns orange with a jack 'o lantern face.
Pumpkin Moon Medallion. Unlike the Blood Moon and Solar Eclipse, enemies appear in up to 15 consecutive waves, similar to an invasion. During this event, the moon turns orange with a jack 'o lantern face.
See also: Guide:Pumpkin Moon strategies
The Frost Moon
Monsters: Present Mimic, Flocko, GingerBread, Zombie Elf, Elf Archer, Nutcracker, Yeti, Elf Copter, Everscream, Krampus, Ice Queen, Santa-NK1
Monster Drops:  Christmas Tree Sword,
 ![]() Festive Wings,
Festive Wings, ![]() Razorpine,
Razorpine, ![]() Christmas Hook,
Christmas Hook, ![]() Everscream Trophy,
Everscream Trophy,  Blizzard Staff,
  North Pole,
 ![]() Ice Queen Trophy,
Ice Queen Trophy, ![]() Snowman Cannon,
Snowman Cannon, ![]() Baby Grinch's Mischief Whistle,
Baby Grinch's Mischief Whistle, ![]() Reindeer Bells,
Reindeer Bells, ![]() Elf Melter,
Elf Melter, ![]() Chain Gun,
Chain Gun, ![]() Santa-NK1 Trophy
Santa-NK1 Trophy
Recommended Equipment: Chlorophyte, Turtle, Spectre, or Shroomite
The Frost Moon is summoned at night using the ![]() Naughty Present. It is one of the most difficult events in the game, as it is meant for endgame players. Like the Pumpkin Moon, enemies appear in 15 standard waves as well as 5 extra bonus waves. During this event, the moon changes color to look like the face of a snowman.
Naughty Present. It is one of the most difficult events in the game, as it is meant for endgame players. Like the Pumpkin Moon, enemies appear in 15 standard waves as well as 5 extra bonus waves. During this event, the moon changes color to look like the face of a snowman.
See also: Guide:Frost Moon strategies
Martian Madness
Monsters: Brain Scrambler, Gray Grunt, Ray Gunner, Martian Officer, Martian Engineer, Gigazapper, Tesla Turret, Martian Walker, Scutlix, Martian Saucer
Monster Drops: ![]() Martian Conduit Plating(Desktop, Console and Mobile versions),
Martian Conduit Plating(Desktop, Console and Mobile versions), ![]() Martian Costume(Desktop, Console and Mobile versions),
Martian Costume(Desktop, Console and Mobile versions), ![]() Laser Machinegun(Desktop, Console and Mobile versions),
Laser Machinegun(Desktop, Console and Mobile versions), ![]() Xenopopper(Desktop, Console and Mobile versions),
Xenopopper(Desktop, Console and Mobile versions), ![]() Cosmic Car Key(Desktop, Console and Mobile versions),
Cosmic Car Key(Desktop, Console and Mobile versions), ![]() Laser Drill(Desktop, Console and Mobile versions),
Laser Drill(Desktop, Console and Mobile versions), ![]() Electrosphere Launcher(Desktop, Console and Mobile versions),
Electrosphere Launcher(Desktop, Console and Mobile versions), ![]() Charged Blaster Cannon(Desktop, Console and Mobile versions),
Charged Blaster Cannon(Desktop, Console and Mobile versions),  Influx Waver(Desktop, Console and Mobile versions),
 ![]() Anti-Gravity Hook(Desktop, Console and Mobile versions),
Anti-Gravity Hook(Desktop, Console and Mobile versions), ![]() Martian Saucer Trophy(Desktop, Console and Mobile versions)
Martian Saucer Trophy(Desktop, Console and Mobile versions)
Recommended Equipment:Shroomite armor, Turtle armor, Beetle armor, Spectre armor
Martian Madness is an invasion-type event that can happen after defeating Golem. Occasionally, in the outer two-thirds of your map, a Martian Probe will randomly appear. If it scans you and escapes, the event will start. This event cannot be triggered manually.
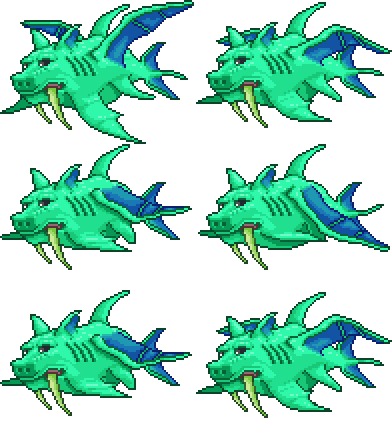
Duke Fishron
| Type | |
|---|---|
| Environment | |
| AI Type | Duke Fishron AI |
| Damage | 100/140/210 (contact) 200280420 (contact when enraged) [1] 80100150 (Sharknado) [2] 100150225 (Detonating Bubble) [3] |
| Max Life | 60000 (Desktop, Console and Mobile versions)7800099450 / 50000 (Old-gen console and 3DS versions) |
| Defense | 50 100 (when enraged) [1] |
| KB Resist | 100% |
| Immune to |
| Debuff | |
|---|---|
| Debuff tooltip | Cannot regenerate life |
| Chance | 33% |
| Duration | 6–20 seconds7.5–25 seconds |
| Debuff | |
|---|---|
| Debuff tooltip | Increased damage, Decreased life regen, Causes status effects |
| Chance | 33% |
| Duration | 3–10 seconds |
| Coins | 25 GC (Desktop, Console and Mobile versions) 1 GC (Old-gen console and 3DS versions)62 GC50 SC |
|---|
- Sharknado

- Sharknado Bolt

| Hurt | |
|---|---|
| Killed | |
| Summoned | |
| Detonating Bubble | |
| Sharknado |
- Internal NPC ID: 370
- Internal Buff ID: 30, 148
- Internal Projectile ID: 384, 385
| Type | |
|---|---|
| Environment | |
| AI Type | Duke Fishron AI |
| Damage | 120201302 (contact, second phase) 184 (contact, third phase)[1] 277 (contact, third phase)[1] 200280420 (contact when enraged) 160200300 (Cthulunado) [2] |
| Max Life | 30000/6000039000/7800049725/99450 |
| Defense | 40 (second phase) 0 (third phase)[1] 100 (when enraged) |
| KB Resist | 100% |
| Immune to |
| Debuff | |
|---|---|
| Debuff tooltip | Cannot regenerate life |
| Chance | 33% |
| Duration | 6–20 seconds7.5–25 seconds |
| Debuff | |
|---|---|
| Debuff tooltip | Increased damage, Decreased life regen, Causes status effects |
| Chance | 33% |
| Duration | 3–10 seconds |
| Coins | 25 GC (Desktop, Console and Mobile versions) 1 GC (Old-gen console and 3DS versions)62 GC50 SC |
|---|
- Item (Quantity)Rate
- One of the following 5 items will be dropped
- 20%
- 20%
- 20%
- 20%
- 20%
- 6.67%
 Greater Healing Potion (5–15)100% (Desktop, Console, Old-gen console and Mobile versions)
 Greater Healing Potion (5–15)100%
 Lesser Healing Potion (5–15)
- 14.29%
- 10%
 Treasure Bag(Desktop, Console and Mobile versions)(Duke Fishron)
 Shrimpy Truffle(Desktop, Console and Mobile versions)100%
- 14.29%
- One of the following 5 items will be dropped
- 20%
- 20%
- 20%
- 20%
- 20%
- 100%
 Pork of the Sea(Desktop, Console and Mobile versions)
 Duke Fishron Relic(Desktop, Console and Mobile versions)
- Cthulunado

- Sharknado Bolt

| Hurt | |
|---|---|
| Killed | |
| Attack | |
| Detonating Bubble |
- Internal NPC ID: 370
- Internal Buff ID: 30, 148
- Internal Projectile ID: 386, 385
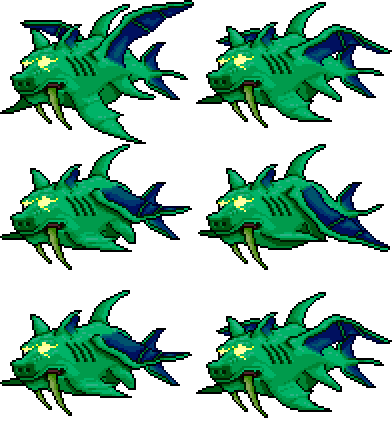
Duke Fishron is one of the hardest bosses in the game. Just summoning the Duke is a significant challenge in itself, as you will need to capture the rare Truffle Worm. The spawn rates in naturally occurring Underground Glowing Mushroom biomes are low, and if you intend on getting the Fishron Wings (1/15 (6.67%)/1/10 (10%)), as well as all his drops, you’ll need to defeat him on average 15/10 times. Your best bet is to build a Truffle Worm farm by mining out an area that is at least 168 by 99 tiles, then building a horizontal line of mud in the middle of the area, then covering it with Mushroom Grass by using Mushroom Grass Seeds.
Shown below is the recommended gear for defeating Duke Fishron:
Armor
This content is transcluded from Guide:Duke Fishron strategies § Armor.
- For melee users, the best offensive set consists of the
 Chlorophyte Mask,
  Monk's Shirt(Desktop, Console and Mobile versions) or
  Shinobi Infiltrator's Torso(Desktop, Console and Mobile versions), and
  Valhalla Knight's Greaves(Desktop, Console and Mobile versions). Alternatively,
  Spooky Breastplate can be worn if you prefer a hybrid set. If defense is preferred,
  Beetle armor can be used with the
  Beetle Shell.
 - For ranged users, the best offensive set consists of the
 Shroomite Mask/
  Shroomite Headgear,
  Shroomite Breastplate, and
  Red Riding Leggings(Desktop, Console and Mobile versions). The
  Hallowed Helmet and the
  Adamantite Mask are viable, more accessible alternatives that boost all weapon types and provide highest damage for rocket type weapons.
- The
 Red Riding Dress(Desktop, Console and Mobile versions) has slightly worse ranged bonuses, but it makes up for it with its large boost to summon damage.
 - The full Shroomite set has better damage output when stealthed, but maintaining stealth is not feasible in singleplayer mode.
- The
- For magic users, the best offensive set consists of either
 Spectre armor or a hybrid set consisting of
  Hallowed Headgear,
  Spooky Breastplate, and
  Dark Artist's Leggings(Desktop, Console and Mobile versions).
  Spectre Hood can be used to heal when your health is running low.
 - For summoners, the best set consists of
 Spooky armor.
  Tiki armor is a viable option that boosts whip range, which is especially important when using low range whips like
  Firecracker(Desktop, Console and Mobile versions). For a bit more survivability,
  Hallowed armor can be used.
Weapons
This content is transcluded from Guide:Duke Fishron strategies § Weapons.For Melee users:
- (Desktop, Console and Mobile versions)The
 Terra Blade scales with melee speed as well as damage and critical chance, and its large projectile makes hitting Duke Fishron easy.
 - The
 Influx Waver(Desktop, Console and Mobile versions) is a very powerful choice if you have defeated Martian Madness already.
 - The (Desktop, Console and Mobile versions)
 Christmas Tree Sword works very well against Duke Fishron, as the boss chases the player, flying directly into the trail of ornaments.
 - The
 Seedler(Desktop, Console and Mobile versions) is an excellent option due to its auto-targeting nature.
 - The
 Possessed Hatchet has lacking DPS, but a very reliable homing projectile.
  The Eye of Cthulhu(Desktop, Console and Mobile versions) is the best Yo-yo that can be used at this point.
 Vampire Knives are very useful for stealing life combined with decent damage.
- The
 Scourge of the Corruptor is somewhat low in damage, but it makes up for this by homing in on Fishron during the fight.
 - The
 Sergeant United Shield(Desktop, Console and Mobile versions) is useful during the third phase of the fight, for those who are bold enough to try parrying the Duke's attacks.
For Ranged users:
- The
 Xenopopper(Desktop, Console and Mobile versions) is an extremely powerful choice when used with Crystal Bullets, but will often be unable to target Duke Fishron when he is offscreen.
 - The
 Chain Gun,
  Tactical Shotgun, and
  Sniper Rifle are also highly effective when using Crystal Bullets. Chlorophyte Bullets are a more accurate but significantly weaker alternative.
 - The
 Piranha Gun is good for Duke Fishron's third phase as it can latch on to teleporting enemies.
 - The
 Aerial Bane(Desktop, Console and Mobile versions) is very useful with its extremely high DPS and splitting arrows, dealing damage to the Sharknados as well.
  Ichor Arrows,
  Bullets, or
  Darts(Desktop, Console and Mobile versions) will reduce his defense significantly, since he is vulnerable to Ichor.
- The
 Snowman Cannon is powerful against him, if you have defeated the Frost Moon.
  Electrosphere Launcher(Desktop, Console and Mobile versions) is noticeably stronger, but lacks homing abilities.
 - (Desktop, Console and Mobile versions) The
 Elf Melter has consistent, high damage and a wide hitbox, and the boss tends to stay within its range as it chases you. The
  Flamethrower is a weaker alternative.
 - The
 Chlorophyte Shotbow with Ichor or Holy Arrows can perform excellently against him.
 - The
 Stynger is very effective.
For Magic users:
- The
 Razorpine is very strong due to its excellent DPS, although it requires you to get closer than with other weapons.
 - The
 Nightglow(Desktop, Console and Mobile versions) is also very strong because of its homing ability and high DPS.
 - The
 Golden Shower spell is helpful as it reduces his defense and easily pops all the Detonating Bubbles.
  Betsy's Wrath(Desktop, Console and Mobile versions) is a higher DPS alternative to the Golden Shower that also lowers his defense more, at the cost of having to get a bit closer.
- The
 Spectre Staff is effective due to its homing nature allowing one to focus on dodging, especially during the third and final phase in Expert/Master Mode.
 - The
 Inferno Fork clears out bubbles easily and deals moderate amounts of damage.
 - The
 Blizzard Staff is very good for attacking while he is stationary.
 - The
 Laser Machinegun(Desktop, Console and Mobile versions) can be used if the player has already defeated Martian Madness.
 - The
 Magnet Sphere can deal a lot of damage and only needs to be cast once in a while.
 - The
 Heat Ray is also a viable option.
For Summoners:
- The
 Terraprisma(Desktop, Console and Mobile versions) is the best minion available. Pair it with the
  Kaleidoscope(Desktop, Console and Mobile versions) for the maximum damage output possible.
 - The
 Xeno Staff(Desktop, Console and Mobile versions) is a consistent and powerful minion. It should be used with a combination of
  Dark Harvest(Desktop, Console and Mobile versions) and
  Morning Star(Desktop, Console and Mobile versions) (or
  Kaleidoscope(Desktop, Console and Mobile versions) if available) for stacking tag damage.
 - The
 Blade Staff(Desktop, Console and Mobile versions) is also reliable and tends to completely nullify Fishron's bubbles, but depends heavily on tag damage from whips. It should be used with
  Dark Harvest(Desktop, Console and Mobile versions) and
  Morning Star(Desktop, Console and Mobile versions) (or
  Kaleidoscope(Desktop, Console and Mobile versions) if available), and alternating between the two to stack tag damage is highly recommended.
 - The
 Desert Tiger Staff(Desktop, Console and Mobile versions) is a powerful alternative. It should be used with
  Firecracker(Desktop, Console and Mobile versions), though you should be mindful of its slightly shorter range.
Accessories
This content is transcluded from Guide:Duke Fishron strategies § Accessories.
- Quick aerial movement is a must-have for the fight. The most natural option is to use
 Wings, though without boosts, most wings do not have enough vertical speed to consistently dodge the Duke.
  Frog Leg can make them significantly faster, making it easier to get over the Cthulhunados and dodging his attacks while flying.
- Alternatively, one can obtain the
 Jetpack. The high vertical speed makes it an ideal choice for dodging Duke Fishron without the need of the Frog Leg, though having the Frog Leg can make it even more effective at dodging Cthulhunados. (Desktop, Console and Mobile versions) Desktop users can also use the
  Empress Wings(Desktop, Console and Mobile versions).
 - The
 Amphibian Boots(Desktop, Console and Mobile versions) allow for increased ascent speed with wings and fast running, even on normal tiles. On
  Old-gen console and
 ,
 Lightning Boots or
  Frostspark Boots can still give the increased movement speed.
- Alternatively, one can obtain the
- The
 Master Ninja Gear and
  Shield of Cthulhu(Desktop, Console and Mobile versions) provide a dash, which is invaluable for mobility.
 - Accessories that increase damage are a must have for ending the battle sooner. The best choices include the
 Celestial Shell(Desktop, Console and Mobile versions) or
  Stone,
  Destroyer Emblem,
  Mechanical Glove, and
  Sniper Scope.
  Cross Necklace or
  Star Veil can prevent heavy damage from getting trapped inside a Sharknado or a big group of homing bubbles.
- Due to the boss' high damage, the
 Magic Cuffs or
  Celestial Cuffs(Desktop, Console, Old-gen console and Mobile versions) can almost completely restore the player's Mana from one hit.
 - If you are using
 The Eye of Cthulhu(Desktop, Console and Mobile versions) or another yoyo, use a
  Yoyo Bag(Desktop, Console and Mobile versions).
  Charm of Myths will both allow for increased regen and reduced time for the
  Potion Sickness debuff. The Philosopher's Stone effect can be used without the need of investing an accessory slot by keeping it on a vanity slot until needing to heal.
- An
 Ankh Shield will protect from the
  Bleeding debuff and those caused by
  Feral Bite(Desktop, Console and Mobile versions), and will also provide knockback resistance.
 - The
 Cosmic Car Key(Desktop, Console and Mobile versions) mount is a good replacement for Wings. While its movement is generally slower and less versatile due to being unaffected by other mobility accessories, it can save accessory slots for other defense or damage improvements.
- The Expert Mode-exclusive
 Witch's Broom(Desktop, Console and Mobile versions) is better, as it is faster and is able to travel in water. However, it requires the player to have done the Pumpkin Moon.
- The Expert Mode-exclusive
- The
 Superheated Blood(Desktop, Console and Mobile versions) mount can be used in this fight due to its high mobility through water without having to use asphalt blocks.
  Gelatinous Pillion(Desktop, Console and Mobile versions) and
  Slimy Saddle(Desktop, Console, Old-gen console and Mobile versions) can help you to move fast vertically, which is extremely useful during the 3rd phase.
Potions and Buffs
This content is transcluded from Guide:Duke Fishron strategies § Potions and Buffs.
 Inferno Potion is highly recommended as it will destroy the Detonating Bubbles Fishron spawns before they reach the player.
 Regeneration Potion and
  Ironskin Potion,
  Endurance and
  Lifeforce will improve survivability.
- Any food item that can provide the
 Well Fed buff or better is very welcome.
  Swiftness Potion can help you evade Duke Fishron's attacks.
 Wrath Potion and/or
  Rage Potions for a boost in damage output.
 Magic Power Potion and
  Mana Regeneration potions are a must for Magic users.
 Water Walking Potions can be used as a substitute for a platform in the Ocean.
 Gravitation Potions can free up an accessory slot. It is recommended to use
  Featherfall Potions with them.
- Melee characters should use the
 Tipsy debuff and the
  Flask of Ichor if available.
 - If you are facing him at night, a
 Shine Potion,
  Night Owl Potion, and
  Hunter Potion will improve visibility.
  Summoning Potion increases the damage output for the summoner class.
If you sit still or linger in the same area for too long, he will kill you quite quickly, whereas if you keep moving and keep your distance, you shouldn’t take much damage. It is important to keep in mind that if you move too far away from him that he will despawn, wasting a precious Truffle Worm.
This content is transcluded from Guide:Duke Fishron strategies § The Fight.Duke Fishron has two phases normally, and a third phase in Expert Mode(Desktop, Console and Mobile versions) and Master Mode(Desktop, Console and Mobile versions).
First Phase
Duke Fishron will attack in three different ways during the first phase. The first thing Fishron will do is begin his charging flurry. He will charge towards the player exactly five times, with a short pause between each charge.
After each charge, he will execute one of the two Projectile attacks:
- The first attack fires around 20
 Detonating Bubbles;
 - The second attack will create two small Bubbles on either side of where he is located that will each generate a Sharknado. The Sharknados are not only tall and do damage, but they also fire
 Sharkrons towards the player.
Second Phase
When Duke Fishron falls below 50% health, he will stay stationary for a second, then his eyes will glow as he enters his second stage. His damage and speed increase significantly. However, his defense drops to 40.
His charge flurry only has 3 charges, but they are a bit faster than before. He still has two kinds of projectile attacks, but their patterns change:
- The Detonating Bubble attack now causes him to move around in a circle, dropping the bubbles in a circle around his original location. This spreads out the bubbles, making it more difficult to pop them all. It also makes it difficult to hit Duke Fishron consistently, so this can be a good time to refill your mana with a Mana Regeneration Potion or re-apply Ichor.
- His Sharknado attack upgrades to summon a Cthulhunado. He will fire a special bubble that homes in towards the nearest player. The bubble deals no damage on contact, but it will spawn a Cthulhunado, an upgraded version of the Sharknado that is much taller, deals more damage, fires more Sharkrons, and lasts much longer.
Duke Fishron's charging attack is his primary attack and can be difficult to dodge when without proper mobility accessories.
The key to dodging it is to try to move perpendicularly to where he is aimed, right before he makes his charge. For example, if you are horizontal with him when he is about to charge, you need to quickly move up or down. (The fastest way to drop down is to briefly mount a Slimy Saddle or Gelatinous Pillion). If he is right above or below you, then you need to quickly move left or right. Do not fly all the way into the space layer, or the reduced gravity will render you helpless.
One important element of the Sharknado attack is that they will spawn in the location where Duke Fishron was when he fired the attack, and they will despawn almost exactly when he is ready to drop another pair of Sharknados.
As long as the player keeps in mind what attack Duke Fishron will do next, the player can put him in a position that makes it hard for the player to hit the Sharknados themselves. For example, during the charging flurry before the Sharknado attack, the player can move towards the edge of the screen, horizontally. That way, the player can run the other way knowing that they will not encounter Sharkrons from that direction. This also means that attacks towards Duke Fishron will also be towards the direction of incoming Sharkrons.
Also, note that Duke Fishron's first attack will always be bubbles.
Sharknados are quite tall; getting over them will require fast ![]() Wings or an infinite flight mount like the
Wings or an infinite flight mount like the ![]() Cosmic Car Key(Desktop, Console and Mobile versions).
Cosmic Car Key(Desktop, Console and Mobile versions).
The upgraded Sharknado attack is a bit more difficult to deal with. It's taller, and it does more damage than the original, plus it fires more Sharkrons.
However, there is one thing that makes it a bit easier to deal with: the Cthulhunado will spawn in the location where you were when the bubble hit you. This gives you a bit more control over where the tornado spawns, so you have more of a chance (if you are fast) to make sure it doesn't spawn in an inconvenient place. You likely do not have the speed to outrun the attack, but you can help get it out of the way.
The downside of course is that, once the bubble hits you, you need to quickly move, lest it spawn on top of you. Do not allow the bubble to hit you while you are moving upwards straight or on the ground, or you are likely to take damage (and possibly get stunlocked) from it immediately.
Another important factor to note is that you should attempt to avoid a Cthulhunado by any means necessary. They deal about 100 damage, which will turn the fight in Duke Fishron's favor. Always use Wings to fly over them. Alternatively, use the Rod of Discord to teleport to the other side.
Expert Mode
Duke Fishron’s Phase 2 lunges are delayed by a second, requiring that you time your dodges a bit later than usual to avoid them.
When Duke Fishron drops below 9000 health, he will transform again and the background will notably darken, while making himself invisible except for his glowing eyes.
He will only be able to use his charge attacks in this stage, but he will gain the ability to teleport behind the player before attacking. The charges will come in a set pattern: After teleporting, he will successively charge once, then twice, and finally three times before the pattern resets.
While his contact damage is reduced, the high speed of his charges can cause you to get hit many times in a quick succession. Pay attention to his attack pattern, and make sure to not stand still during the fight. Dashing around can help avoid attacks more easily; be sure to move perpendicular to the direction that Duke Fishron will dash in. You should also try to get away from any Cthulhunados left from the second stage.
Because Duke Fishron is untargetable while teleporting, minions and many slower homing weapons will almost stop working entirely. As there won't be many opportunities to deal damage, you should try to deal as much burst damage as possible during his charges. Slow, highly-damaging weapons like the Sniper Rifle and Tactical Shotgun work well during this phase.
A possible strategy for this form is placing a teleporter with a pressure plate on top at surface level, and an actuated teleporter on a platform 200 blocks above, which you can use to fall endlessly, and giving Fishron a hard time hitting you.
Note that, after the battle is over, care should still be taken. If he has launched a Cthulhunado, it may still fire Sharkrons. He may also have died in the Cthulhunado, so don't charge into it to collect his drops until it dissipates.
For more strategies to defeat the Duke, see Guide:Duke Fishron strategies.
The Lunatic Cultist
Life: 32000
Damage: 50
Defense: 42
Minions: Phantasm Dragon, Ancient Vision
Drops: ![]() Ancient Manipulator(Desktop, Console and Mobile versions),
Ancient Manipulator(Desktop, Console and Mobile versions), ![]() Ancient Cultist Mask,
Ancient Cultist Mask, ![]() Ancient Cultist Trophy(Desktop, Console and Mobile versions),
Ancient Cultist Trophy(Desktop, Console and Mobile versions), ![]() Greater Healing Potions
Greater Healing Potions
The Lunatic Cultist is a boss summoned by killing the four Cultists that spawn at the Dungeon after defeating Golem. Once the Lunatic Cultist is defeated, the Lunar Events will start.
Before reaching a certain health level, it will use 3 attacks:
- Firing 3 homing
 fireballs projectiles that explode on impact.
 - Summoning an ice fractal that fires
 ice shards in six directions four times over as it flies in one direction before fading away.
 - Summoning a
 orb that fires bolts of lightning at the character.
After reaching around half health, it will use a fourth attack:
- Firing 2 spreads of 5 destructible
 Ancient Light.
In Expert Mode, it may also spawn numerous ![]() Ancient Dooms that fire four purple projectiles in a cross pattern.
Ancient Dooms that fire four purple projectiles in a cross pattern.
After cycling through its attacks a few times, it will fade away, and reappear in a ritual-like circle, with duplicates of itself called Ancient Cultists. The player must hit the real cultist to stop the ritual. Attacking a fake or letting the ritual finish will cause a Phantasm Dragon to spawn, and cause the respective Ancient Cultist to fight alongside the real cultist, if the former happens. This fake cultist can be destroyed by attacking the real cultist when it performs its ritual again.
Attacking a fake while the Phantasm Dragon is still alive will result an Ancient Vision being spawned, NOT another Phantasm Dragon.
See also: Lunatic Cultist
See also: Guide:Lunatic Cultist strategies
The Celestial Pillars
Once the Lunatic Cultist is defeated, four pillars will spawn in the world. These can easily be found with the map. Be sure to pick up the Ancient Manipulator the Cultist drops, as it is needed to craft end-game gear.
Chances are that you will be near a pillar when they spawn. The pillars represent the four classes: Solar for melee, Vortex for ranged, Nebula for magic, and Stardust for summoning. There is no set order necessary to kill them, but it is preferable to take on the one corresponding to your class first, then the Stardust Pillar to get the powerful Stardust Dragon Staff.
Life: 20000
Defense: 20
Damage: 0 (melee), 90 (solar flare)
Minions: Selenian, Drakanian, Corite, Sroller, Drakomire, Crawltipede
Drops: ![]() Solar Fragment(Desktop, Console and Mobile versions) (12-60) 18-90
Solar Fragment(Desktop, Console and Mobile versions) (12-60) 18-90
Recommended Melee Equipment: Turtle or Beetle armor, and Vampire Knives, North Pole, Paladin's Hammer, Scourge of the Corruptor, Influx Waver
Recommended Ranged Equipment: Shroomite armor and Stynger, Megashark, Chain Gun, Electrosphere Launcher, Tsunami, Sniper Scope
Recommended Magic Equipment: Spectre armor (Hood)/(Mask), Razorblade Typhoon, Laser Machinegun, Blizzard Staff, Bat Scepter, Golden Shower, Celestial Cuffs, Sorcerer Emblem or Celestial Stone, Razorpine, Bubble Gun, Magic Power Potion, Mana Regeneration Potion, Crystal Ball
Recommended Accessories (all classes): Frostspark Boots, Star Veil
Recommended Buff Potions (all classes): Ironskin, Regeneration, Swiftness, Thorns, Well Fed, Wrath, Rage, Lifeforce, Endurance, Summoning.
The Solar Pillar is a tough one to crack, and, like all the Pillars, you will be under constant attack from its minions.
To make the Solar Pillar (or any pillar) vulnerable, you must kill 100 (50 after the Moon Lord is defeated) minions to deactivate its shield, allowing it to be harmed directly.
Try to stay out of the air around the Solar Pillar if possible, because the Crawltipedes will swarm and kill you quickly otherwise. If need be, aim at their weak spot, the tail, to kill them. This will give you a small window to take flight before another spawns.
Be sure to also be wary of the Corites that spawn as well, because their charge attack can be deadly, or even fatal when they swarm you.
The Selenians are extremely deadly when they are spinning, as they can reflect damage, which is able to deal heavy damage to the caster/shooter. Avoid high damage ranged/magic weapons like Nebula Blaze and Sniper Rifle. It is recommended to use low-damage, high fire weapons like the Razorpine, melee weapons, and summons.
Because many of the enemies from this pillar cannot pass through solid blocks, it's recommended that you attempt to find an area where most mobs will have trouble reaching you, but where you can reach them. If possible, try to obtain a weapon that can pass through walls, such as the Nettle Burst or Flying Dragon.Life: 20000
Defense: 20
Damage: 0
Minions: Vortexian, Storm Diver, Alien Hornet, Alien Queen
Drops: ![]() Vortex Fragment(Desktop, Console and Mobile versions) (12-60) 18-90
Vortex Fragment(Desktop, Console and Mobile versions) (12-60) 18-90
Recommended Melee Equipment: Turtle or Beetle armor, and Vampire Knives
Recommended Ranged Equipment: Shroomite armor and Stynger, Megashark
Recommended Magic Equipment: Spectre armor (Hood)/(Mask), Bat Scepter, Golden Shower, Celestial Cuffs, Sorcerer Emblem or Celestial Stone, Razorpine/Bubble Gun, Magic Power Potion, Mana Regeneration Potion, Crystal Ball
Recommended Accessories (all classes): Wings, Frostspark Boots, Master Ninja Gear (Black Belt), Star Veil
Recommended Buff Potions (all classes): Ironskin, Regeneration, Swiftness, Thorns, Well Fed, Wrath, Rage, Lifeforce, Endurance, Summoning.
Like every Pillar, to make the Vortex Pillar susceptible to damage, you must defeat 100 (50 after the Moon Lord is defeated) minions to deactivate its shield.
Try to take out the Storm Divers and Alien Queens first, as the Storm divers have a very strong shotgun attack that can deal large amounts of damage, while the Alien Queens can inflict the distorted debuff, which leaves the player extremely susceptible to other enemies.
Gravity is distorted around areas of the Vortex Pillar as well, so beware of the area around it. Because this is a ranged pillar, you will find that many of the enemies are going to fire volleys of projectiles at you. Due to this, it is recommended you have a Black Belt or a Master Ninja Gear, so you can have a slight chance to dodge these attacks.
Life: 20000
Defense: 20
Damage: 0
Minions: Nebula Floater, Brain Suckler, Predictor, Evolution Beast
Drops: ![]() Nebula Fragment(Desktop, Console and Mobile versions) (12-60) 18-90
Nebula Fragment(Desktop, Console and Mobile versions) (12-60) 18-90
Recommended Melee Equipment: Turtle or Beetle armor, and Vampire Knives
Recommended Ranged Equipment: Shroomite armor and Stynger, Megashark
Recommended Magic Equipment: Spectre armor (Hood)/(Mask), Bat Scepter, Golden Shower, Celestial Cuffs, Sorcerer Emblem or Celestial Stone, Razorpine/Bubble Gun, Magic Power Potion, Mana Regeneration Potion, Crystal Ball
Recommended Accessories (all classes): Wings, Master Ninja Gear (Black Belt), Frozen Turtle Shell
Recommended Buff Potions (all classes): Ironskin, Regeneration, Swiftness, Thorns, Well Fed, Wrath, Rage, Lifeforce, Endurance, Summoning.
Like every Pillar, to make the Nebula Pillar susceptible to damage, you must defeat 100 (50 after the Moon Lord is defeated) minions to deactivate its shield.
Focus on the Brain Sucklers that fly at you to prevent them from latching onto your head. If they do, aim your weapon above you to knock them off, or simply swing any regular sword/ melee weapon. The Nebula Floaters are tricky, as they will randomly teleport around. Take them out quickly, and dodge their beam attacks.
With this pillar, it is best to avoid the ground. Predictors and Evolution Beasts can make quick work of any player ground-bound, so sticking to the air is best. This is because Brain Sucklers have no projectile attack, and are relatively easy to kill. If the player is skilled, the pillar can be defeated relatively easily.
It is highly recommended to use flight accessories like wings for temporary flight, or the Cosmic Car Key, Shrimpy Truffle, and Scaly Truffle for permanent flight.
Life: 20000
Defense: 20
Damage: 0
Minions: Star Cell, Flow Invader, Twinkle Popper, Stargazer, Milkyway Weaver
Drops: Stardust Fragment (12-60) 18-90
Recommended Melee Equipment: Turtle or Beetle armor, and Vampire Knives
Recommended Ranged Equipment: Shroomite armor and Stynger, Megashark
Recommended Magic Equipment: Spectre armor (Hood)/(Mask), Bat Scepter, Golden Shower, Celestial Cuffs, Sorcerer Emblem or Celestial Stone, Razorpine/Bubble Gun, Magic Power Potion, Mana Regeneration Potion, Crystal Ball
Recommended Accessories (all classes): Wings
Recommended Buff Potions (all classes): Ironskin, Regeneration, Swiftness, Thorns, Well Fed, Wrath, Rage, Lifeforce, Endurance, Summoning.
Like every Pillar, to make the Stardust Pillar susceptible to damage, you must defeat 100 (50 after the Moon Lord is defeated) minions to deactivate its shield.
Take out the Star Cells quickly so they don't overwhelm you, but be sure to also kill the little ones they split into as well. If left to long, these will grow into full-sized Star Cells again. The Milkyway Weavers are a big threat, as unlike normal worm AI, they can follow you into the air. Attack their head to kill them easily. The Stargazers should not be taken lightly either, as they have a beam attack that could easily drain a player's health.
If you are experienced, you may want to herd together a group of Star Cells and only kill the large ones, leaving the small ones alive, then wait for them to regrow. Using this tactic, you can max out the spawn limit such that nothing else can spawn, and farm out the Star Cells until the Pillar is vulnerable.
Once the final Pillar is defeated, the status message "Impending doom approaches..." will appear. About a minute later, the Moon Lord will spawn. It is recommended to have potions for the fight, as he will easily kill you if you are not prepared.
The Moon Lord
The Moon Lord, bearing a striking resemblance to Cthulhu but confirmed not to be by the developers (although at health thresholds it spawns True Eyes of Cthulhu), is summoned directly after defeating the final Celestial Pillar and serves as Terraria's final boss as of version 1.3.
Head: 50
Hands: 40
Core: 70
 True Eye of Cthulhu(Desktop, Console and Mobile versions)
 Moon Leech Clot(Desktop, Console and Mobile versions)
 Moon Lord Mask(Desktop, Console and Mobile versions)
 Luminite(70-90)(Desktop, Console and Mobile versions)
 Portal Gun(Desktop, Console and Mobile versions)
 Meowmere(Desktop, Console and Mobile versions)
 Terrarian(Desktop, Console and Mobile versions)
 Star Wrath(Desktop, Console and Mobile versions)
 S.D.M.G.(Desktop, Console and Mobile versions)
 Celebration Mk2(Desktop, Console and Mobile versions)
 Last Prism(Desktop, Console and Mobile versions)
 Lunar Flare(Desktop, Console and Mobile versions)
 Rainbow Crystal Staff(Desktop, Console and Mobile versions)
 Lunar Portal Staff(Desktop, Console and Mobile versions)
 Meowmere Minecart(Desktop, Console and Mobile versions)
 Moon Lord Trophy(Desktop, Console and Mobile versions)
 Super Healing Potions(5-15)(Desktop, Console and Mobile versions)
 Exquisitely Stuffed(Desktop, Console and Mobile versions)
 Lifeforce
 Ironskin
 Rage
Rage Wrath
Wrath Endurance
 Regeneration
 Archery (for bow users)
 Magic Power (for magic players)
 Mana Regeneration (for magic players)
 Summoning (for summoner players)
 Sharpened(Desktop, Console and Mobile versions) /
  Sharpening Station(Desktop, Console and Mobile versions) (for melee players)
 Ammo Reservation /
  Ammo Box(Desktop, Console, Old-gen console and Mobile versions) (for ranged players)
 Clairvoyance /
  Crystal Ball (for magic players)
 Bewitched(Desktop, Console and Mobile versions) /
  Bewitching Table(Desktop, Console and Mobile versions) (all players)
 Swiftness (doesn't affect Mounts)
There's a reason the developers chose him to be the game's "final boss". Similar to Duke Fishron, the boss sweeps side to side, taking up the entire screen and making arenas less effective than with other bosses. Recommended arenas include a minecart track or an asphalt skybridge, running along the length of the world for maximum damage output. Its defeat means subsequent runs will be easier with its drops but still provides quite a challenge even with the best gear. Luminite is used to craft end-game gear and mounts, including the Drill Containment Unit, which requires 40 Luminite Bars, or ~two Moon Lord defeats. To craft all items with Luminite, 1308 ores are required, meaning Moon Lord must be defeated 15-19 times in Normal Mode. However, to craft all the equipment related to only one type of lunar fragment, 204 ores are required, meaning Moon Lord must only be defeated 3 times in Normal Mode.
The Post-Game
After defeating the moon invasions and acquiring all their drops, the player is free to do anything. You could try designing an ultimate castle or PvP with other top-tier players, or even overcome incredibly difficult challenges (e.g. Frost Moon wave 15+ with Ranger, no arena.) The only end is the player's imagination!
Some things you might try:
- Purify the Corruption or Crimson biomes.
- Reach top tier in Fishing and acquire the Hotline Fishing Hook/Golden Fishing Rod.
- Beat multiple Bosses at once.
- Complete all the achievements.
- Defeat the Dungeon Guardian.
- Get 100% in the Bestiary.
- Play on an online server.
- Explore player-made custom maps and content.
- Make your own theme park using minecarts.
- Learn how to golf.
- Experiment with the extremely elaborate combinations possible with wiring and teleporters, such as making your own in-game computer!
- Try to complete the game as different Classes.
- Do a hardcore playthrough.
- Do speedruns.
- Play, design, and/or create new PvP modes for all to enjoy!
- Acquire every single weapon and tool.
- Obtain every single armor and vanity set.
- Gather up every single accessory and dye.
- Collect every single Trophy/Relic and Banner.
- Play through the game on Expert Mode or Master Mode.
- Seek out the rarest items in the game, such as the Nymph Banner or Pinky Banner.
- Find bugs and glitches so developers can fix them.
- Create a mod or texture pack, or maybe an adventure/puzzle map.
- Become a wiki contributor!
- Get every item in the duplication window (Journey Mode).
References
- ↑ 1.0 1.1 1.2 1.3 1.4 Information taken from the
 Desktop 1.4.4.9 source code, method
 AI_069_DukeFishron()inTerraria.NPC.cs. - ↑ 2.0 2.1 Information taken from the
 Desktop 1.4.0.5 source code, method
 Kill()inTerraria.Projectile.cs. There may be inaccuracies, as the current Desktop version is 1.4.4.9.
- ↑ See Detonating Bubble.
Footnotes
- ↑ 1.0 1.1 1.2 1.3 Most effective on a tank build
- ↑ 2.0 2.1 2.2 If the player is playing Multiplayer and is a tank, the Flesh Knuckles and/or its upgrades should be used for increased aggro
- ↑ 3.0 3.1 Due to this weapon's high ammo cost, it should be used with Adamantite armor for its ammo conversation.
- ↑ Highest single-target DPS
- ↑ 5.0 5.1 Should be used with Firecracker
- ↑ Use this instead of Mythril Greaves. The Orichalcum Leggings are a weaker alternative.
- ↑ Mages should use this instead of Adamantite Breastplate
- ↑ This is especially strong if used with Mounts


