ボス (Bosses/ja)
Bosses are aggressive, resilient enemies/ja that offer a substantial challenge to players. Defeating a boss is usually instrumental in advancing the game in some way or another, for example, granting the player a new material for a pickaxe of a higher tier. Each has its own particular way of being summoned. For example, most bosses have associated summoning items/ja that can be used to spawn them manually under certain conditions, while there are others that will appear after the player interacts in a certain way with the environment. Event/ja bosses will only appear during their respective events and leave when the event ends. Mini-bosses also exist and appear only during special events, expressing the same amount of difficulty as many normal bosses. Their health has a huge range: On Classic Mode it ranges from 1,000 to 145,000.
Most bosses and mini-bosses can pass through blocks/ja of all types, with the exception of King Slime/ja, クイーンスライム(Desktop, Console and Mobile versions), Lepus(3DS version), Turkor the Ungrateful's(3DS version) body, and the Flying Dutchman(Desktop, Console and Mobile versions).
For all non-event bosses, with the exception of the Lunatic Cultist(Desktop, Console and Mobile versions), status message/jas will appear when that boss is about to spawn or has already spawned. Upon spawning, its particular theme music/ja plays. During events, bosses and mini-bosses can appear multiple times and have no distinct spawn message. In the case of wave events like the Pumpkin/ja and Frost Moon/jas and the Old One's Army(Desktop, Console and Mobile versions), status messages that appear at the start of each wave can indicate whether or not a certain boss or mini-boss will appear. Defeating a non-event boss concludes with a congratulatory message and several reward items.
On the ![]() Desktop version,
Desktop version, ![]() Console version, and
Console version, and ![]() Mobile version, bosses will appear on the minimap/ja, each with an individual map icon. On the
Mobile version, bosses will appear on the minimap/ja, each with an individual map icon. On the ![]() Desktop version,
Desktop version, ![]() Console version, and
Console version, and ![]() Mobile version, a boss health bar/ja will appear on the screen (it will only show the health of the most recently-attacked boss, if there are multiple).
Mobile version, a boss health bar/ja will appear on the screen (it will only show the health of the most recently-attacked boss, if there are multiple).
- However, bosses will still appear as the standard purple blob that signifies enemies on the
 Old-gen console version.
Pre-Hardmode bosses
These are the first bosses the player can encounter. Usually, defeating one of these bosses will give the player items and materials necessary to progress in the game, eventually leading to Hardmode/ja. Although there are 8 pre-Hardmode/ja bosses, only 7 can be spawned in the same world, as the Eater of Worlds/ja is exclusive to worlds containing Corruption/ja, and the Brain of Cthulhu/ja is exclusive to worlds containing Crimson/ja (assuming the player does not place an alternate evil in the same world as the other one, e.g. via seeds from another world or (Desktop, Console and Mobile versions) seeds purchased from the Dryad/ja in Hardmode, and does not use a secret seed(Desktop, Console and Mobile versions)).

- Summoned with a
 Slime Crown
Music: Boss 1
![]() For elaborate strategies on defeating King Slime, including weapon and arena recommendations, see Guide:King Slime strategies.
For elaborate strategies on defeating King Slime, including weapon and arena recommendations, see Guide:King Slime strategies.
King Slime/ja is a giant blue slime/ja with 2,000 / 2,800 / 3,570 health. It is summoned with a Slime Crown/ja, or after killing 150 (75 if he has already been killed) slimes during a スライムの雨(Desktop, Console and Mobile versions), or can also rarely appear in the outer thirds of the map completely by itself. As with all enemies that can spawn naturally, the King Slime has a better chance of spawning while standing near a placed Water Candle/ja or while under the effects of a Battle Potion/ja.
On the ![]() Desktop,
Desktop, ![]() Console, and
Console, and ![]() Mobile versions, King Slime can teleport to the player if he gets trapped or if the player gets out of his reach for too long.
Mobile versions, King Slime can teleport to the player if he gets trapped or if the player gets out of his reach for too long.
King Slime does not provide access to game-advancing items upon defeat, but outside Expert Mode/ja will drop one Gold Coin/ja, one or two piece(s) of Ninja clothes/ja, and one of several slime-related items.
In Expert Mode/ja (and Master Mode/ja), King Slime can summon Spiked Slime/jas, which act similarly to the Spiked Jungle Slime/ja and Spiked Ice Slime/ja.
- Summoned with a
 Suspicious Looking Eye
Music: Boss 1
![]() For elaborate strategies on defeating Eye of Cthulhu, including weapon and arena recommendations, see Guide:Eye of Cthulhu strategies.
For elaborate strategies on defeating Eye of Cthulhu, including weapon and arena recommendations, see Guide:Eye of Cthulhu strategies.
The Eye of Cthulhu/ja is a huge eyeball with 2,800 / 3,640 / 4,641 health. It has a 1/3 (33.33%) chance of spawning at the beginning of each night/ja once the player has 200 HP or more, 3 or more NPCs/ja living in houses, and over 10 defense/ja. It will continue to do so until defeated for the first time. It can also be summoned using a Suspicious Looking Eye/ja at night. If not defeated by the player by the end of the night, it will travel upwards and despawn. This is generally the first boss a player must face. It travels through blocks/ja, and spawns Servants of Cthulhu/ja.
In Expert Mode/ja (and Master Mode/ja), the Eye of Cthulhu will do a fast chain dash in its second phase, using the attack more often the lower health it has. The chain dash attack will also scale in aggressiveness the same way. This can lead to it dashing almost continually at high velocity at very low health.
- Summoned with
 Worm Food or by breaking 3 Shadow Orb/jas
Music: Boss 1
![]() For elaborate strategies on defeating Eater of Worlds, including weapon and arena recommendations, see Guide:Eater of Worlds strategies.
For elaborate strategies on defeating Eater of Worlds, including weapon and arena recommendations, see Guide:Eater of Worlds strategies.
The Eater of Worlds/ja is a colossal worm with 10,050 / 15,120 / 19,224 health in total on the ![]() Desktop version,
Desktop version, ![]() Console version, and
Console version, and ![]() Mobile version, and 7,500 / 10,500 health on the
Mobile version, and 7,500 / 10,500 health on the ![]() Old-gen console version and Nintendo
Old-gen console version and Nintendo ![]() version. It awakens after every third Shadow Orb/ja is broken or after Worm Food/ja is used. Shadow Orbs are found in the Corruption/ja chasms/ja, surrounded by Ebonstone/ja, which requires a pickaxe/ja with 65% pickaxe power/ja or higher to mine, although explosives/ja or Purification Powder/ja can be used to bypass this. Once within range, Shadow Orbs can be destroyed with a hammer/ja or explosives. The Eater of Worlds can only be summoned in worlds containing Corruption, and can be summoned at any time of the day. If it manages to escape the Corruption, it will flee and disappear.
version. It awakens after every third Shadow Orb/ja is broken or after Worm Food/ja is used. Shadow Orbs are found in the Corruption/ja chasms/ja, surrounded by Ebonstone/ja, which requires a pickaxe/ja with 65% pickaxe power/ja or higher to mine, although explosives/ja or Purification Powder/ja can be used to bypass this. Once within range, Shadow Orbs can be destroyed with a hammer/ja or explosives. The Eater of Worlds can only be summoned in worlds containing Corruption, and can be summoned at any time of the day. If it manages to escape the Corruption, it will flee and disappear.
Eater of Worlds is a large worm-type/ja enemy that travels through tiles, and is made up of multiple sections that can each attack separately when cut off. To defeat it, every section must be brought down to less than two body parts to be killed (the smallest possible section is a head and a tail with no body pieces). Due to how helpful Corruption gear is, this will probably be the second boss faced in worlds that have Corruption, rather than those who have Crimson/ja.
The Eater of Worlds is the only source of Shadow Scale/jas in the game, and it drops large amounts of Demonite Ore/ja. They can be combined to make Shadow armor/ja, but it can also be sold for almost 10 GC per stack of 99, making this technically the best pre-Hardmode boss for farming in the game.
In Expert Mode/ja, the boss is able to shoot dark-green projectiles at the player called Vile Spit/ja, similar to those fired from Corruptor/jas, another Corruption-exclusive enemy.
- Summoned with a
 Bloody Spine or by breaking 3 Crimson Heart/jas
Music: Boss 3
![]() For elaborate strategies on defeating Brain of Cthulhu, including weapon and arena recommendations, see Guide:Brain of Cthulhu strategies.
For elaborate strategies on defeating Brain of Cthulhu, including weapon and arena recommendations, see Guide:Brain of Cthulhu strategies.
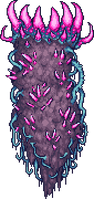
The Brain of Cthulhu/ja is a large, flying brain with a mere 1,250 / 2,125 / 2,709 health, giving it the lowest amount of health out of any boss. It spawns once for every third Crimson Heart/ja that is broken or immediately after a Bloody Spine/ja is used. Crimson Hearts are found in the Crimson/ja's chasms, surrounded by Crimstone/ja, which can be bypassed with the same methods Ebonstone/ja can. However, some of the pockets containing these will generate open. Once within range, Crimson Hearts can be destroyed with a Hammer/ja or any tile-breaking explosive. It can only be summoned in the Crimson, but at any time of day.
The Brain of Cthulhu has two forms. In the first form, the brain cannot be harmed, and Creeper/jas will float around it. After all of these are killed, the Brain of Cthulhu will go into its second form, where it will teleport more frantically and move a lot faster, so a ranged weapon may be needed. The Brain of Cthulhu's second attack form is ramming, like the second form of Eye of Cthulhu/ja. Unlike most other bosses, the Brain of Cthulhu is not immune to knockback/ja.
The Brain of Cthulhu is the only source of Tissue Sample/jas in the game (other than the creepers spawned while fighting it), and drops a large amount of Crimtane Ore/ja, which are the Crimson equivalents to the corruption items Shadow Scale/ja and Demonite Ore/ja respectively.
In Expert Mode/ja, the Brain of Cthulhu will have more health, and in its second phase, it will start creating illusions of itself to charge at the player. The lower the Brain of Cthulhu's HP gets, the illusions become much less obvious to the point where they will look exactly like the real Brain of Cthulhu. However, the minimap/ja icon will still show the real Brain of Cthulhu, allowing players to bypass this.
- Summoned with an
 Abeemination or by breaking its
  Larva
Larva
Music: Boss 5
![]() For elaborate strategies on defeating Queen Bee, including weapon and arena recommendations, see Guide:Queen Bee strategies.
For elaborate strategies on defeating Queen Bee, including weapon and arena recommendations, see Guide:Queen Bee strategies.
Queen Bee/ja is an enormous bee with 3,400 / 4,760 / 6,069 health. She is summoned by destroying her larva/ja, encased within the walls of Bee Hive/jas located in the Underground Jungle/ja. She can also be summoned by the use of an Abeemination/ja anywhere in the Jungle/ja biome/ja. She is the only source of Bee Wax/ja in the game. Queen Bee is immune to knockback/ja.
Queen Bee alternates between charging at the player, hovering above them whilst spawning Bee/jas, and moving left and right whilst shooting stingers. In Expert Mode/ja, the rate at which she charges the player gets faster the more damage she takes.
Defeating Queen Bee will allow the Witch Doctor/ja to spawn; other than this, she does not advance the game in a major sense, though defeating her does provide some decent loot that can further help the player prepare for the boss battle against the Wall of Flesh/ja. One such weapon is the Beenade/ja, which is extremely effective when fighting the Wall of Flesh.

- Summoned by killing the Clothier/ja with a
 Clothier Voodoo Doll equipped or by activating the Old Man's curse
Music: Boss 1
![]() For elaborate strategies on defeating Skeletron, including weapon and arena recommendations, see Guide:Skeletron strategies.
For elaborate strategies on defeating Skeletron, including weapon and arena recommendations, see Guide:Skeletron strategies.
Skeletron/ja is a large skeletal head with 4,400 / 8,800 / 11,220 health and two hands. It is summoned by speaking to the Old Man/ja NPC/ja at the entrance of the Dungeon/ja and activating his curse at night/ja. Skeletron will alternate between attacking the player with its hands and performing a spinning attack. Its hands can be attacked and defeated to make the battle easier, although this is not required. If it has not been defeated before the night is over, Skeletron will attack and usually kill the player in one hit. It will then despawn.
Defeating Skeletron/ja will stop the Dungeon Guardian/jas from spawning, allowing free access to the Dungeon. It can be summoned again by killing the Clothier/ja with the Clothier Voodoo Doll/ja equipped at night.
In Expert Mode/ja, Skeletron's head is more resistant to damage until its hands are destroyed. Once they are destroyed, it will start shooting homing skulls at the player. Expert mode Skeletron is much faster. Its hands inflict the Slow/ja debuff/ja, and its head inflicts Bleeding/ja. If the player gets caught by its head-spin attack, Skeletron can "stun-lock" them, a lethal situation that can only be escaped by high mobility, e.g. with a hook/ja.

- Summoned with a
 Deer Thing(Desktop, Console and Mobile versions)
Music: Deerclops
![]() For elaborate strategies on defeating Deerclops, including weapon and arena recommendations, see Guide:Deerclops strategies.
For elaborate strategies on defeating Deerclops, including weapon and arena recommendations, see Guide:Deerclops strategies.
The Deerclops/ja is a large, upright, one eyed deer with 7,000 / 11,900 / 15,172 health. It is summoned by using a Deer Thing/ja at any time while in the Snow biome/ja, or can spawn naturally at midnight during a Blizzard/ja if at least one player in the world has either 9 defense or 200 health. If the Deerclops has previously been defeated in the world, there is only a 1/4 (25%) chance of this occurring.
The Deerclops has four attacks:
- If it is close to the player, the Deerclops will smash the ground, summoning a wave of ice spikes that quickly travels torwards them. Every third consecutive wave does not go as far, but spreads in both directions.
- If it is not close enough to its target to use its ice spikes attack, the Deerclops will 'scoop' and then throw numerous chunks of debris into the air that fall back down. These ice chunks can pass through blocks.
- The Deerclops will occasionally stand in place and roar, inflicting the Slow/ja Debuff/ja on all players for 12 seconds / 24 seconds / 30 seconds.
If the player is above the Deerclops for too long, it will summon five shadow hands around the player.
The Deerclops can pass through solid blocks, but will quickly rise to the top of said blocks unless the player is below it.
If the player is more than 30 tiles away from it, the Deerclops will turn a dark shade purple and become immune to damage.
If the Deerclops is significantly offscreen, it will wander back and forth without directly seeking the player.
In Expert Mode/ja, shadow hands will be periodically summoned that either move forwards slowly, move forwards quickly and curve, or spin in place. Shadow hands are summoned more frequently as the Deerclops' life gets lower.
- Summoned by throwing a
 Guide Voodoo Doll into lava
Music: Boss 2
![]() For elaborate strategies on defeating Wall of Flesh, including weapon and arena recommendations, see Guide:Wall of Flesh strategies.
For elaborate strategies on defeating Wall of Flesh, including weapon and arena recommendations, see Guide:Wall of Flesh strategies.
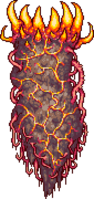
The Wall of Flesh/ja is a towering wall that spans the entire screen height. It has 8,000 / 11,200 / 14,280 health. It is summoned by throwing a Guide Voodoo Doll/ja into a pool of lava/ja while the Guide/ja is alive. It is the final boss of pre-Hardmode, because defeating it will irreversibly enable Hardmode/ja in the world. It can drop several powerful items, one of them being the guaranteed drop Pwnhammer/ja which can be used to break Demon Altar/jas or Crimson Altar/jas in order to spawn various game-advancing Hardmode ores/ja.
Upon summoning the Wall of Flesh, the player will be afflicted with the Horrified/ja debuff/ja, which prevents fleeing from the battle – any attempt to do so will result in severe damage via The Tongue/ja or instant death if the player tries to teleport away, and the debuff will not be removed until either the player or the Wall of Flesh is killed. The Wall of Flesh will then sweep across the map, moving faster as its HP gets lower. It must be killed before it reaches the end of the map, otherwise it will despawn and any living players in the Underworld will instantly die. Additionally, the Wall of Flesh's eyes fire lasers, with the rate of fire increasing as it takes damage. Its mouth burps Leech/jaes that will chase the player, and it has small mouths attached to it called The Hungry, which will also move toward and damage the player.
In Expert Mode/ja, the Wall of Flesh will greatly increase its movement speed as its health decreases, eventually surpassing even players riding the Bunny Mount/ja or horse mounts(Desktop, Console and Mobile versions) in movement speed. The Hungry will rapidly respawn, thus seemingly blocking the wall from attacks, and can deal significant damage themselves. The faster the Wall of Flesh moves and the quicker The Hungry respawn, the more the player will have to focus on dealing damage and moving across a decent terrain.
Hardmode bosses
Hardmode/ja bosses are significantly stronger than previous bosses.

- Summoned with a
 Gelatin Crystal
Music: クイーンスライム
![]() For elaborate strategies on defeating Queen Slime, including weapon and arena recommendations, see Guide:Queen Slime strategies.
For elaborate strategies on defeating Queen Slime, including weapon and arena recommendations, see Guide:Queen Slime strategies.
Queen Slime/ja is a giant slime with 18,000 / 28,800 / 36,720 health. She is available to battle at the start of Hardmode, and is summoned from Gelatin Crystal/jas in the Underground Hallow/ja. She is an optional boss fight and is a small gap to challenge before facing the mechanical bosses/ja, warranting equipment upgrades and other items. There is a very strong resemblance to the pre-Hardmode/ja King Slime/ja, and is one of two Hallowed bosses featured in the game. As she takes damage she spawns Crystal Slime/jas, Bouncy Slime/jas, and Heavenly Slime/jas to aid her. While her first form is straightforward with attack patterns similar to that of King Slime's, the second phase poses much more of a threat as the boss begins to fly in the air, shooting projectiles from above.
- Summoned with a
 Mechanical Eye
Music: Boss 2
![]()
![]() For elaborate strategies on defeating The Twins, including weapon and arena recommendations, see Guide:The Twins strategies.
For elaborate strategies on defeating The Twins, including weapon and arena recommendations, see Guide:The Twins strategies.
The Twins/ja are a pair of cybernetic Eyes of Cthulhu/ja. They exist as two individual entities, known as Retinazer and Spazmatism, with the former having 20,000 / 30,000 / 38,250 health and the latter having 23,000 / 34,500 / 43,987 health. The Twins are summoned using a Mechanical Eye/ja at night. It is worth noting that they will gain defense/ja in their second forms, unlike the Eye of Cthulhu.
The two eyes have different fighting styles. Retinazer focuses on shooting the player with Death Lasers like the Destroyer/ja's Probe/jas. Once it reaches 40% HP, it will transform into its second form, replacing its pupil with a laser cannon. During this form, it will shoot lasers extremely fast, sometimes having the same fire rate as a Megashark/ja.
The other eye, Spazmatism, focuses on slamming into the player and firing cursed flames. Once it reaches 40% HP, it will transform into its second form, resembling a mechanical version of the Eye of Cthulhu's second form. It will deal a lot more damage, and the flames it shoots are more consistent like the Flamethrower/ja instead of the Cursed Flames/ja, but the flames will still inflict Cursed Inferno/ja debuff on the player. The last Twin destroyed will drop all of the loot.
In Expert Mode/ja, Retinazer will shoot lasers faster, and Spazmatism charges faster in its second form.
- Summoned with a
 Mechanical Worm
Music: Boss 3
![]() For elaborate strategies on defeating The Destroyer, including weapon and arena recommendations, see Guide:The Destroyer strategies.
For elaborate strategies on defeating The Destroyer, including weapon and arena recommendations, see Guide:The Destroyer strategies.
The Destroyer/ja is a colossal mechanized Eater of Worlds/ja with 80,000 / 120,000 / 153,000 health. It is considered the easiest Hardmode boss by many players, despite having the second-highest health. Although it is similar to its pre-Hardmode counterpart, the Eater of Worlds, it has some key differences: it will not divide into smaller segments, will shoot lasers from its body if space is available, and will deploy Probe/jas to attack once a segment is destroyed.
The Destroyer is summoned by crafting and using a Mechanical Worm/ja anywhere, but can only be spawned at night. The Destroyer will shoot Death Lasers, increasing in attack speed as it loses health. Weapons that deal damage to multiple segments like Flails/ja, Daedalus Stormbow/ja, and the Demon Scythe/ja are recommended, because they will hit multiple sections of The Destroyer at once.
In Expert Mode/ja, The Destroyer's head can deal damage as high as 280 / 420, crippling the player if they are hit head-on.
- Summoned with a
 Mechanical Skull
Music: Boss 1
![]() For elaborate strategies on defeating Skeletron Prime, including weapon and arena recommendations, see Guide:Skeletron Prime strategies.
For elaborate strategies on defeating Skeletron Prime, including weapon and arena recommendations, see Guide:Skeletron Prime strategies.
Skeletron Prime/ja is a weaponized mechanical variation of Skeletron/ja, with the head alone having 28,000 / 42,000 / 53,550 health. Instead of two hands, it has four limbs – a vice, laser gun, saw, and cannon. With the head and all limbs combined, Skeletron Prime has 59,000 / 88,500 / 112,836 HP. However, like Skeletron, only the head has to be defeated. Skeletron Prime can be summoned as many times per world as needed, by crafting and using a Mechanical Skull/ja, but it can only be summoned at night. It is more mobile than its predecessor, and it regularly flies off-screen, making targeting more difficult. It is also worth noting that when its head spins, its defense/ja doubles from 24 to 48, unlike Skeletron, whose defense is dropped to 0 when spinning.
Skeletron Prime will drop Hallowed Bar/jas and Souls of Fright/ja upon being defeated, which are both used to craft many kinds of armor and tools. Like Skeletron, if Prime is not killed before the night ends, it will spin and target the player, generally killing the player in one hit, and will despawn afterwards.
In Expert Mode/ja, Skeletron Prime moves significantly faster during its spinning attack, similarly to Skeletron/ja.

- Summoned by destroying a
 Plantera's Bulb
Music: Plantera
![]() For elaborate strategies on defeating Plantera, including weapon and arena recommendations, see Guide:Plantera strategies.
For elaborate strategies on defeating Plantera, including weapon and arena recommendations, see Guide:Plantera strategies.
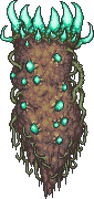
Plantera/ja is an enormous flower with 30,000 / 42,000 / 53,549 health. She is awoken by destroying a Plantera's Bulb/ja, which is found in the Underground Jungle/ja after defeating all three mechanical bosses/ja. If the player exits the Underground Jungle, Plantera becomes "enraged", gaining a significant boost to her stats.
Plantera has two phases. In her first phase, she clings to solid blocks/ja using vine-like hooks and fires Seeds (and eventually Poison Seeds). In her second form, Plantera has increased speed and moves more aggressively torwards the player. She will also release numerous "Plantera's Tentacle" minions that are attached to her main body.
In Expert Mode(Desktop, Console and Mobile versions), the seeds can go through walls and have slight homing, and extra Plantera's Tentacles are attached to each hook (3 on each) in her second phase, adding 9 tentacles in total.
Once Plantera is defeated, the Dungeon/ja will automatically spawn stronger Hardmode enemies/ja, such as the Paladin/ja, and more varieties of loot can be dropped. Additionally, the spread of Crimson, Corruption and Hallow are slowed to half.
- Summoned by using a
 Lihzahrd Power Cell at a
  Lihzahrd Altar
Music: Golem
![]() For elaborate strategies on defeating Golem, including weapon and arena recommendations, see Guide:Golem strategies.
For elaborate strategies on defeating Golem, including weapon and arena recommendations, see Guide:Golem strategies.
Golem/ja is a large boss with a combined total of 60,000 / 90,000 / 114,749 health. It is summoned by using a Lihzahrd Power Cell/ja at the Lihzahrd Altar/ja in the Jungle Temple/ja. In order to access the Jungle Temple, Plantera must be defeated to obtain the Temple Key/ja.
Golem has two phases. During the first phase, its two fists and its head can be attacked. Like Skeletron/ja, destroying the fists is not needed, but can be helpful. Once the head's health is depleted, it begins flying above the body while shooting fireballs and eye beams, leaving the body open to attack. The body will jump around and punch madly in this phase. Defeating the body will defeat Golem.
- Summoned by fishing in the Ocean/ja biome with the
 Truffle Worm as bait
Music: Duke Fishron
![]() For elaborate strategies on defeating Duke Fishron, including weapon and arena recommendations, see Guide:Duke Fishron strategies.
For elaborate strategies on defeating Duke Fishron, including weapon and arena recommendations, see Guide:Duke Fishron strategies.
Duke Fishron/ja is a mutant shark-pig-dragon hybrid with 60,000 / 78,000 / 99,450 health. He is summoned when a Truffle Worm/ja is used as bait/ja for fishing in the Ocean/ja.
In his first stage, Duke Fishron will attempt to ram the player five times before either firing explosive bubbles or summoning Sharknados. In his second stage, Duke Fishron gains glowing eyes and a boost to attack and defense. Although his ramming attacks remain the same, instead of shooting bubbles directly at the player, he flies quickly around in circles, sending bubbles everywhere. Instead of summoning Sharknados in this stage, Duke Fishron summons larger Cthulhunados. These remain in place a longer time than Sharknados.
In Expert Mode/ja, when Duke Fishron drops below 15% (11700 / 14917) health, he enters his third phase. In this phase, the screen turns dark, Duke Fishron becomes invisible, and only his glowing eyes are visible. He teleports and tries to ram the player with high speed a few times, before he teleports again.
![]() For elaborate strategies on defeating Empress of Light, including weapon and arena recommendations, see Guide:Empress of Light strategies.
For elaborate strategies on defeating Empress of Light, including weapon and arena recommendations, see Guide:Empress of Light strategies.
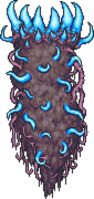
The Empress of Light/ja is a Hallow/ja-themed boss with 70,000 / 98,000 / 124,950 health. She can be summoned from killing a Prismatic Lacewing/ja, and is one of two Hallowed bosses present in the game. This boss is meant to be a small gap in between Plantera/ja and Golem/ja, but can be fought later or skipped altogether, as it is an optional fight. However, if the player fights her the moment she is available, they will face a major difficulty spike and numerous attack patterns. This boss can also be fought in the day, which will make her "enraged", greatly increasing her attack damage to an instant-kill, but will drop the Terraprisma/ja once 100% of damage is dealt during the day.
- Summoned by killing all the

 Cultists at the Dungeon/ja entrance
Music: Golem
![]() For elaborate strategies on defeating Lunatic Cultist, including weapon and arena recommendations, see Guide:Lunatic Cultist strategies.
For elaborate strategies on defeating Lunatic Cultist, including weapon and arena recommendations, see Guide:Lunatic Cultist strategies.
The Lunatic Cultist/ja is a comparably small boss with 32,000 / 48,000 / 61,200 health. It is summoned by killing the four cultists/ja, which reside at the entrance of the Dungeon/ja after Golem/ja is defeated. When the Lunatic Cultist is defeated, the Lunar Events/ja will begin.
The Lunatic Cultist's attacks become more powerful as it loses health. The Lunatic Cultist flies around randomly, cycling between shooting fireballs, creating a ball which shoots lightning at the player, shooting a giant snowflake which shoots ice shards around it, shooting shadowflames, and shooting five destructible projectiles twice in a row. The Lunatic Cultist will also create fake copies of itself, which will summon a Phantasm Dragon/ja when damaged. If a Phantasm Dragon is still alive and the player damages these copies, it will summon an Ancient Vision/ja instead. Waiting too long to attack the real Lunatic Cultist will also cause the Phantasm Dragon/ja or Ancient Vision/ja to be summoned.
In Expert Mode/ja, the Lunatic Cultist will spawn Ancient Doom/jas along with its other attacks.
- Summoned with a
 Celestial Sigil or by defeating the Celestial Pillars/ja
Music: Moon Lord
![]() For elaborate strategies on defeating Moon Lord, including weapon and arena recommendations, see Guide:Moon Lord strategies.
For elaborate strategies on defeating Moon Lord, including weapon and arena recommendations, see Guide:Moon Lord strategies.
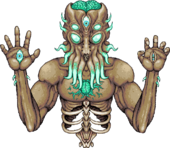
The Moon Lord/ja is the final boss of Terraria, and drops a majority of the endgame items, such as the Meowmere/ja. He also drops Luminite/ja, an ore/ja used to craft many endgame armor/ja sets and tools/ja. He is summoned by defeating all four of the Celestial Pillars/ja from the Lunar Events/ja, or by using a Celestial Sigil/ja. He has a combined health of 145,000 / 217,500 / 277,311, the most health of any boss in the game.
Moon Lord has two hands and a head which must be killed by attacking the eyes on them, and when killed will release invincible True Eyes of Cthulhu/ja. When the three eyes are destroyed, the Moon Lord's core opens up on his chest, which must then be destroyed to defeat the boss.
Moon Lord's hands shoot two projectiles at once which home onto the player, and summon phantom versions of the True Eye of Cthulhu and throwing them at the player. Moon Lord's top eye will occasionally fire a Phantasmal Deathray that will sweep across the entire screen. Being very deadly to players, it can be avoided by hiding under solid blocks/ja (it will pass through blocks on the ![]() Desktop version,
Desktop version, ![]() Console version, and
Console version, and ![]() Mobile version), or by trying to escape its wrath on a flying mount/ja. When the True Eyes of Cthulhu are released, the places where they used to be will inflict minor contact damage. The True Eyes of Cthulhu will fire less damaging versions of many of the same attacks as they did when they were still enclosed within the Moon Lord.
Mobile version), or by trying to escape its wrath on a flying mount/ja. When the True Eyes of Cthulhu are released, the places where they used to be will inflict minor contact damage. The True Eyes of Cthulhu will fire less damaging versions of many of the same attacks as they did when they were still enclosed within the Moon Lord.
In Expert Mode/ja, Moon Lord's Phantasmal Deathray attack deals a lot more damage, enough to kill most players in one hit.
Event bosses
Event/ja bosses are classified as mini-bosses/ja, except for the Celestial Pillars/ja.

- Event initiated with an
 Eternia Crystal
![]() For elaborate strategies on defeating Dark Mage, including weapon and arena recommendations, see Dark Mage § Tips/ja and Guide:Old One's Army strategies/ja.
For elaborate strategies on defeating Dark Mage, including weapon and arena recommendations, see Dark Mage § Tips/ja and Guide:Old One's Army strategies/ja.
The Dark Mage/ja is a mini-boss that appears during the final wave of the Old One's Army/ja Tier 1 event/ja. It has three attacks, from hurling dark energy at the player, to summoning a rune which heals nearby enemies in its vicinity or summoning multiple Old One's Skeleton/jas around it.

- Event initiated with an Eternia Crystal
![]() For elaborate strategies on defeating Ogre, including weapon and arena recommendations, see Ogre § Tips/ja and Guide:Old One's Army strategies/ja.
For elaborate strategies on defeating Ogre, including weapon and arena recommendations, see Ogre § Tips/ja and Guide:Old One's Army strategies/ja.
The Ogre/ja is a mini-boss that appears during the final wave of the Old One's Army/ja Tier 2 event/ja. The mini-boss has three attacks, consisting of flinging snot at its targets inflicting Oozed, leaping in the air creating a damaging shockwave when landing, and swinging its large club at enemies in front of it.
- Event initiated with an Eternia Crystal
![]() For elaborate strategies on defeating Betsy, including weapon and arena recommendations, see Betsy § Tips/ja and Guide:Old One's Army strategies/ja.
For elaborate strategies on defeating Betsy, including weapon and arena recommendations, see Betsy § Tips/ja and Guide:Old One's Army strategies/ja.
Betsy/ja is a boss that appears during the final wave of the Old One's Army/ja Tier 3 event/ja. The wyvern attacks in similar manner to Duke Fishron/ja, dashing at the player and spiting streams of flames. She also has different attacks as well, launching fireballs at its targets and summoning two Etherian Wyvern/jas alongside it.
- Event initiated with a
 Pirate Map
![]() For elaborate strategies on defeating Flying Dutchman, including weapon and arena recommendations, see Flying Dutchman § Tips/ja.
For elaborate strategies on defeating Flying Dutchman, including weapon and arena recommendations, see Flying Dutchman § Tips/ja.
The Flying Dutchman/ja is the mini-boss of the Pirate Invasion/ja. It will initially spawn after 65% of the invasion is completed. It spawns various Pirate enemies to attack the player, and has four cannons which fire cannonballs at that must be destroyed before it can die, similar to the Martian Saucer. The Flying Dutchman does not disappear after the invasion is over, but it will explode if it has not been engaged before said ending occurs. Several Flying Dutchmen can appear at once.
- Event initiated with a
 Pumpkin Moon
Medallion
![]() For elaborate strategies on defeating Mourning Wood, including weapon and arena recommendations, see Mourning Wood § Tips/ja and Guide:Pumpkin Moon strategies/ja.
For elaborate strategies on defeating Mourning Wood, including weapon and arena recommendations, see Mourning Wood § Tips/ja and Guide:Pumpkin Moon strategies/ja.
Mourning Wood/ja is a mini-boss that spawns during the Pumpkin Moon/ja. It shoots flaming projectiles at the player which pass through blocks. It also spits a jet of flaming spikes out of its head which stay on the ground for a while, dealing fire damage on contact.
- Event initiated with a Pumpkin Moon
Medallion
![]() For elaborate strategies on defeating Pumpking, including weapon and arena recommendations, see Pumpking § Tips/ja and Guide:Pumpkin Moon strategies/ja.
For elaborate strategies on defeating Pumpking, including weapon and arena recommendations, see Pumpking § Tips/ja and Guide:Pumpkin Moon strategies/ja.
Pumpking/ja is the second and final mini-boss in the Pumpkin Moon/ja event/ja. Multiple Pumpkings can be out at the same time, up to six at the final fifteenth wave (or even more in multiplayer/ja). The mini-boss possesses two arms with scythes which swing and fire projectiles at the player, similarly to Skeletron. It cycles through modes of attack from swinging at the player to firing jets of flaming spikes, indicated by the face carved in the pumpkin it uses as a head.

- Event initiated with a
 Naughty Present
![]() For elaborate strategies on defeating Everscream, including weapon and arena recommendations, see Everscream § Tips/ja and Guide:Frost Moon strategies/ja.
For elaborate strategies on defeating Everscream, including weapon and arena recommendations, see Everscream § Tips/ja and Guide:Frost Moon strategies/ja.
Everscream/ja is a mini-boss that can be found during the Frost Moon/ja event/ja. Its attacks alter between firing pine needle projectiles, and dropping bouncing ornaments on the ground that burst into shards.

- Event initiated with a Naughty Present
![]() For elaborate strategies on defeating Santa-NK1, including weapon and arena recommendations, see Santa-NK1 § Tips/ja and Guide:Frost Moon strategies/ja.
For elaborate strategies on defeating Santa-NK1, including weapon and arena recommendations, see Santa-NK1 § Tips/ja and Guide:Frost Moon strategies/ja.
Santa-NK1/ja is a mini-boss that appears during the Frost Moon/ja event/ja. It attacks by rapidly firing bullets from its chain gun at the player, launching presents that rain and parachute from the sky and shooting rockets at the player which pass through blocks. Its face disappears to reveal a robotic one during its second phase.
- Event initiated with a Naughty Present
![]() For elaborate strategies on defeating Ice Queen, including weapon and arena recommendations, see Ice Queen § Tips/ja and Guide:Frost Moon strategies/ja.
For elaborate strategies on defeating Ice Queen, including weapon and arena recommendations, see Ice Queen § Tips/ja and Guide:Frost Moon strategies/ja.
Ice Queen/ja is the third and final mini-boss that appears during the Frost Moon/ja event/ja. Multiple Ice Queens can spawn during the event. Her attacks involve spinning rapidly firing ice bolts in several directions, and shooting multiple ice waves at the player.

- Event initiated by letting a
 Martian Probe escape after a player is detected
![]() For elaborate strategies on defeating Martian Saucer, including weapon and arena recommendations, see Martian Saucer § Tips/ja.
For elaborate strategies on defeating Martian Saucer, including weapon and arena recommendations, see Martian Saucer § Tips/ja.
The Martian Saucer/ja is a large flying mini-boss that spawns during the Martian Madness/ja event. It has two phases, the first phase requiring its turrets to be destroyed before its core can be damaged. During its first phase, the saucer cycles through three attacks, wherein it either fires a barrage of lasers at the player, fires homing rockets or attempts to disintegrate the player with a large laser from its bottom. In Expert Mode (all difficulties on no version), once the turrets have been downed, the mini-boss begins to quickly chase the player, rapidly sweeping and firing its death ray upon them.
- Event initiated by defeating
 Lunatic Cultist
For elaborate strategies on defeating Solar Pillar, including weapon and arena recommendations, see Guide:Lunar Events strategies/ja.
The Solar Pillar/ja is one of the four bosses that spawn during the Lunar Events/ja that start once the Lunatic Cultist/ja has been defeated.
After all 4 Celestial Pillars/ja are defeated, the Moon Lord/ja will spawn.
The Solar Pillar itself doesn't do much to attack the player, mainly summoning enemies/ja instead, but it does cause solar fragments to rain non-stop from the sky. It is surrounded by a large, impenetrable force field until 100/150 of its minions have been slain. The enemies it spawns are melee-based. It is highly recommended to stay on the ground, as the Crawltipedes it spawns only target airborne players. After 100/150 minions are killed, the force field around it will dissipate, allowing players to attack it.
The Solar Pillar spawns the following enemies:
- Selenian/ja
- Drakanian/ja
- Corite/ja
- Sroller/ja
- Crawltipede/ja
- Drakomire/ja
- Event initiated by defeating Lunatic Cultist
For elaborate strategies on defeating Nebula Pillar, including weapon and arena recommendations, see Guide:Lunar Events strategies/ja.
The Nebula Pillar/ja is one of the four bosses that spawn during the Lunar Events/ja that start once the Lunatic Cultist/ja has been defeated.
After all 4 Celestial Pillars/ja are defeated, the Moon Lord/ja will spawn.
While the Nebula Pillar itself doesn't do anything to attack the player, it spawns magic-based enemies/ja. It is surrounded by a large impenetrable force field until at least 100/150 of its minions are slain. After the 100/150 minions are killed, the force field dissipates, allowing the player to attack it directly.
The Nebula Pillar spawns the following enemies:
- Nebula Floater/ja
- Brain Suckler/ja
- Predictor/ja
- Evolution Beast/ja
- Event initiated by defeating Lunatic Cultist
For elaborate strategies on defeating Vortex Pillar, including weapon and arena recommendations, see Guide:Lunar Events strategies/ja.
The Vortex Pillar/ja is one of the four bosses that spawn during the Lunar Events/ja that start once the Lunatic Cultist/ja has been defeated.
After all 4 Celestial Pillars/ja are defeated, the Moon Lord/ja will spawn.
The Vortex Pillar itself doesn't do much to attack the player, only occasionally spawning a Giant Magnet sphere sort of attack, similar to the Lunatic Cultist's one. It spawns ranged-based enemies/ja. After 100/150 of its minions have been slain, the force field around it will dissipate, leaving it open to the player's attacks.
The Vortex Pillar spawns the following enemies:
- Vortexian/ja
- Alien Queen/ja
- Alien Hornet/ja
- Alien Larva/ja
- Storm Diver/ja
- Event initiated by defeating Lunatic Cultist
For elaborate strategies on defeating Stardust Pillar, including weapon and arena recommendations, see Guide:Lunar Events strategies/ja.
The Stardust Pillar/ja is one of the four bosses that spawn during the Lunar Events/ja that start once the Lunatic Cultist/ja has been defeated.
After all 4 Celestial Pillars/ja are defeated, the Moon Lord/ja will spawn.
The Stardust Pillar itself doesn't attack the player much, but it is the only pillar with a damaging enemy-spawning animation. It spawns summon-based enemies/ja. As with the other pillars, it is surrounded by an impenetrable force field that is only broken when 100/150 or more of its minions are slain. Once the force field is broken, the player can attack the pillar at will.
The Stardust Pillar spawns the following enemies:
- Star Cell/ja
- Flow Invader/ja
- Twinkle Popper/ja
- Twinkle/ja
- Stargazer/ja
- Milkyway Weaver/ja
Old-gen console and 3DS-exclusive bosses
- Summoned with a
 Suspicious Looking Skull
Music: Boss 5
![]() For elaborate strategies on defeating Ocram, including weapon and arena recommendations, see Guide:Ocram strategies.
For elaborate strategies on defeating Ocram, including weapon and arena recommendations, see Guide:Ocram strategies.
Ocram/ja is a boss that exists on the ![]() Old-gen console version and Nintendo
Old-gen console version and Nintendo ![]() version of Terraria. It is generally considered the hardest boss of those versions. It is summoned by using a Suspicious Looking Skull/ja. The boss attacks by lunging at the player, firing barrages of lasers and summoning Servants of Ocram/ja. After it has taken enough damage, it switches to its second phase, thus increasing its attack rate and damage. Furthermore, its attacks are now initiated closer to the player.
version of Terraria. It is generally considered the hardest boss of those versions. It is summoned by using a Suspicious Looking Skull/ja. The boss attacks by lunging at the player, firing barrages of lasers and summoning Servants of Ocram/ja. After it has taken enough damage, it switches to its second phase, thus increasing its attack rate and damage. Furthermore, its attacks are now initiated closer to the player.
3DS-exclusive bosses

- Summoned with a
 Suspicious Looking Egg
Music: Boss 1
For elaborate strategies on defeating Lepus, including weapon and arena recommendations, see Guide:Lepus strategies.
Lepus/ja is a large, rabbit-like, Easter-themed boss exclusive to the Nintendo ![]() version of Terraria. It is summoned with the Suspicious Looking Egg/ja, which is dropped by Corrupt Bunnies/ja and Diseaster Bunnies/ja during the Easter/ja season. Lepus itself will also drop a Suspicious Looking Egg on its death. Lepus lays two types of Easter Eggs: small ones that hatch Diseaster Bunnies, and bigger ones that hatch another weaker Lepus. These eggs can be damaged and destroyed by the player before hatching. A maximum of 5 Lepus can be spawned from the large eggs laid by the original Lepus, and after there are five, no more large eggs will be laid. Only the last remaining Lepus will drop items. Its drops include the Suspicious Looking Egg, Egg Cannon/ja, and Boots of Ostara/ja.
version of Terraria. It is summoned with the Suspicious Looking Egg/ja, which is dropped by Corrupt Bunnies/ja and Diseaster Bunnies/ja during the Easter/ja season. Lepus itself will also drop a Suspicious Looking Egg on its death. Lepus lays two types of Easter Eggs: small ones that hatch Diseaster Bunnies, and bigger ones that hatch another weaker Lepus. These eggs can be damaged and destroyed by the player before hatching. A maximum of 5 Lepus can be spawned from the large eggs laid by the original Lepus, and after there are five, no more large eggs will be laid. Only the last remaining Lepus will drop items. Its drops include the Suspicious Looking Egg, Egg Cannon/ja, and Boots of Ostara/ja.

- Summoned with a
 Cursed stuffing while a Pet Turkey is active
Music: Boss 1
For elaborate strategies on defeating Turkor the Ungrateful, including weapon and arena recommendations, see Guide:Turkor the Ungrateful strategies.
Turkor the Ungrateful/ja is a Thanksgiving/ja-themed boss exclusive to the Nintendo ![]() version of Terraria. It is summoned with a Cursed stuffing/ja while a Pet Turkey/ja is active. Its drops include the Horn o' plenty/ja, and a few Feather/jas.
version of Terraria. It is summoned with a Cursed stuffing/ja while a Pet Turkey/ja is active. Its drops include the Horn o' plenty/ja, and a few Feather/jas.
Notes
- Boss classification is determined as follows:
- Bosses:
boss = truein Terraria/ja's source code; - Mini-bosses: the other trophy-dropping characters.
- Bosses:
- The status messages/ja that appear when the bosses are about to spawn are as follows:
- Eye of Cthulhu/ja: "You feel an evil presence watching you..."
- Eater of Worlds/ja and Brain of Cthulhu/ja: "A horrible chill goes down your spine..." after the first and "Screams echo around you..." after the second Shadow Orb/ja/Crimson Heart/ja is broken. The third only produces a standard summon message.
- The Destroyer/ja: "You feel vibrations from deep below..."
- The Twins/ja: "This is going to be a terrible night..."
- Skeletron Prime/ja: "The air is getting colder around you..."
- Moon Lord/ja: "Impending doom approaches..."
- As of 1.2.3/ja, worlds generated in earlier versions, in which a player defeated all mechanical bosses before upgrading, will not have those bosses register as defeated; for instance, Plantera's Bulb/jas will not spawn, and the Steampunker/ja will not arrive.
- There are currently 34 different/unique bosses ((Desktop, Console and Mobile versions) 31, !!Error: Invalid EICONS input! 29, (Old-gen console version) 19, (3DS version) 21) in the game.
- Some enemies/ja are particularly difficult to defeat, yet are not classified as bosses. These include:
- Dreadnautilus(Desktop, Console and Mobile versions)
- Dungeon Guardian/ja
- Goblin Summoner(Desktop, Console and Mobile versions)
- Ice Golem/ja
- Mothron(Desktop, Console and Mobile versions)
- Sand Elemental(Desktop, Console and Mobile versions)
- Paladin/ja
Achievements


History
- Desktop 1.4.3:
- Added Deerclops/ja.
- Desktop 1.4.0.1:
- Added Queen Slime/ja and Empress of Light/ja.
- Martian Saucer/ja is no longer considered a boss internally.
- Desktop 1.3.4: Added Dark Mage/ja, Ogre/ja and Betsy/ja.
- Desktop 1.3.0.5: Added Celestial Sigil/ja, used to summon Moon Lord/ja.
- Desktop 1.3.0.1:
- Added Lunatic Cultist/ja and Moon Lord/ja.
- New mini-bosses for the Pirate Invasion/ja, the Martian Madness/ja and the Lunar Events/ja.
- All regular bosses are more difficult and drop new items in Expert Mode/ja.
- Desktop 1.2.4: Added Duke Fishron/ja.
- Desktop 1.2.3.1:
- Mechanical bosses/ja no longer spawn randomly if another boss is alive (multiple bosses can still be summoned manually).
- Hardmode/ja bosses will no longer spawn if no player is above ground.
- Desktop 1.2.3:
- Various boss changes and/or bug fixes.
- Mechanical bosses/ja are now slightly more difficult.
- Boss summoning items/ja are no longer wasted by using them after that boss has spawned.
- Fixed a bug where numerous NPC/jas could spawn if you beat a hardmode boss in a non-Hardmode world.
- Desktop 1.2.1.2: Some Plantera/ja and Destroyer/ja changes.
- Desktop 1.2.1.1: Mechanical bosses/ja will no longer spawn during Pumpkin Moon/jas.
- Desktop 1.2.1: Reduced the chance for a mechanical boss/ja summoning item to drop during Hardmode/ja.
- Desktop 1.2.0.3:
- Hardmode/ja Crimson/ja, Corruption/ja, and Hallow/ja spread is now slowed after killing Plantera/ja instead of any mechanical boss/ja.
- Slightly increased chance for a Solar Eclipse/ja to happen after defeating a mechanical boss/ja.
- Desktop 1.2:
- Added 4 bosses: Brain of Cthulhu/ja, Queen Bee/ja, Plantera/ja, and Golem/ja.
- Each boss has a rare chance to drop/ja a placeable boss trophy/ja.
- Hardmode/ja bosses have a chance to spawn on their own to help players progress through the game.
- Current hardmode bosses now do slightly less damage and have had their health decreased.
- Desktop 1.1: Added 4 bosses: Wall of Flesh/ja, The Twins/ja, The Destroyer/ja, and Skeletron Prime/ja (the three mechanical bosses/ja are Hardmode/ja upgrades of the original ones).
- Desktop 1.0.4: Added King Slime/ja.
- Desktop-Release: Introduced Eye of Cthulhu/ja, Eater of Worlds/ja and Skeletron/ja.
- Mobile 1.3.0.7: Removed Lepus/ja and Turkor the Ungrateful/ja.
- Mobile 1.1.6255: Added Turkor the Ungrateful.
- Mobile 1.1.91: Introduced Lepus.
 キングスライム (
- Spiked Slime(Desktop, Console and Mobile versions)
 Eye of Cthulhu (
- Servant of Cthulhu
 Eater of Worlds (
- Vile Spit
 Brain of Cthulhu (
- Creeper
 Queen Bee (
- Bees
 Skeletron (
- Dungeon Guardian
 Deerclops(Desktop, Console and Mobile versions)
 Wall of Flesh (
- Leech
 クイーンスライム(Desktop, Console and Mobile versions) (
- Bouncy Slime(Desktop, Console and Mobile versions)
- Crystal Slime(Desktop, Console and Mobile versions)
- Heavenly Slime(Desktop, Console and Mobile versions)
 The Twins
 The Destroyer (
- Probe
 Skeletron Prime
 Plantera (
- Spore
 Golem
Golem 光の女帝(Desktop, Console and Mobile versions)
 Duke Fishron (
- Sharkron
- Detonating Bubble
 Lunatic Cultist(Desktop, Console and Mobile versions) (
- Ancient Vision(Desktop, Console and Mobile versions)
- Phantasm Dragon(Desktop, Console and Mobile versions)
- Ancient Light(Desktop, Console and Mobile versions)
 Moon Lord(Desktop, Console and Mobile versions) (
- True Eye of Cthulhu(Desktop, Console and Mobile versions)
- Moon Leech Clot(Desktop, Console and Mobile versions)
- Ocram(Old-gen console and 3DS versions) (
- Servant of Ocram(Old-gen console and 3DS versions)
- Mechdusa(Desktop, Console and Mobile versions)
 Flying Dutchman(Desktop, Console and Mobile versions)
- Dark Mage(Desktop, Console and Mobile versions) (
- Old One's Skeleton(Desktop, Console and Mobile versions)
- Ogre(Desktop, Console and Mobile versions)
- Betsy(Desktop, Console and Mobile versions)
 Martian Saucer(Desktop, Console and Mobile versions)
 Mourning Wood
 Pumpking
 Everscream
 Santa-NK1
 Ice Queen
- Celestial Pillars(Desktop, Console and Mobile versions)
- Lepus(3DS version) (
- Diseaster Bunny(3DS version)
- Turkor the Ungrateful(3DS version)
- Pages setting LuaCache keys
- Pages with non-numeric formatnum arguments
- Eversions template with no valid parameters
- Pages with template errors
- Pages with errors from Eicons
- Eicons template with invalid platforms
- Achievement-related elements/ja
- Entities patched in Desktop 1.4.3/ja
- Entities patched in Desktop 1.3.4/ja
- Entities patched in Desktop 1.3.0.5/ja
- Entities patched in Desktop 1.3.0.1/ja
- Entities patched in Desktop 1.2.4/ja
- Entities patched in Desktop 1.2.3.1/ja
- Entities patched in Desktop 1.2.3/ja
- Entities patched in Desktop 1.2.1.2/ja
- Entities patched in Desktop 1.2.1.1/ja
- Entities patched in Desktop 1.2.1/ja
- Entities patched in Desktop 1.2.0.3/ja
- Entities patched in Desktop 1.2/ja
- Entities patched in Desktop 1.1/ja
- Entities patched in Desktop 1.0.4/ja
- Entities introduced in Desktop-Release/ja
- Entities patched in Mobile 1.3.0.7/ja
- Entities patched in Mobile 1.1.6255/ja
- Entities introduced in Mobile 1.1.91/ja
- Boss NPCs
- Japanese translation